
Most people lace their hiking boots with the “criss cross” method. It’s quick, easy to tighten, and works well enough for all foot types. But there are actually a lot of different ways to lace hiking boots – and some of them have a lot of benefits for solving foot issues like heel blisters, pinched toes and arch pain.
Here I’ll go over the 15 main ways to lace hiking boots (yes, there are more ways than this but these 15 cover pretty much all foot issues you may face) and their benefits. I’ve also made you some nice images so you can see how do lace them. 🙂
Also read:
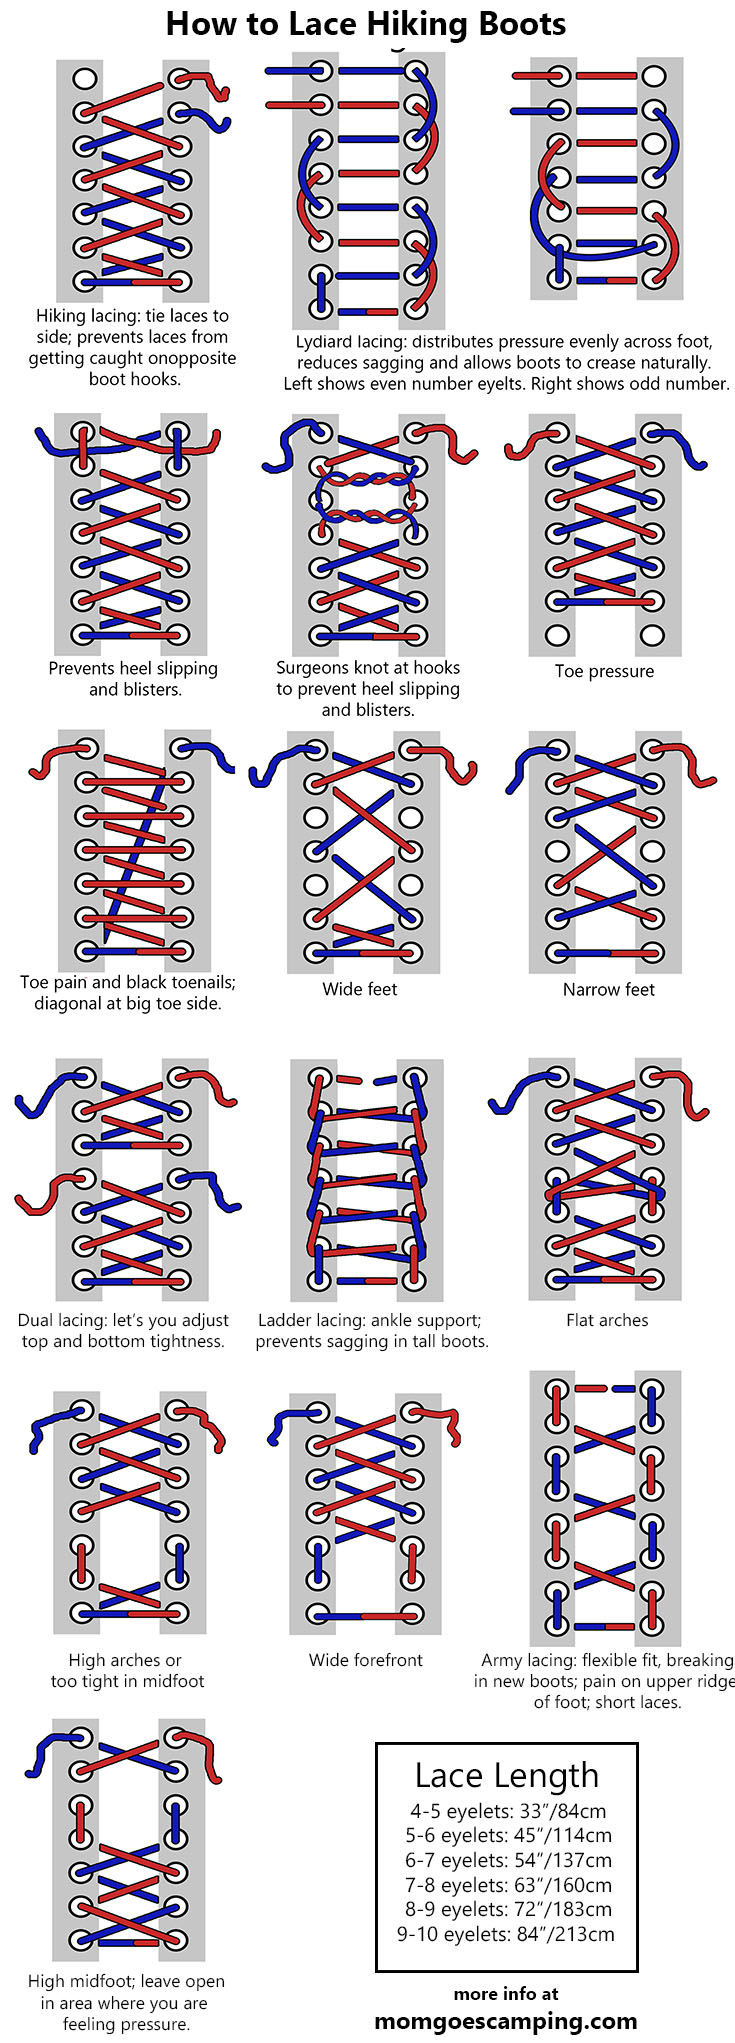
Boot Lacing Infographic
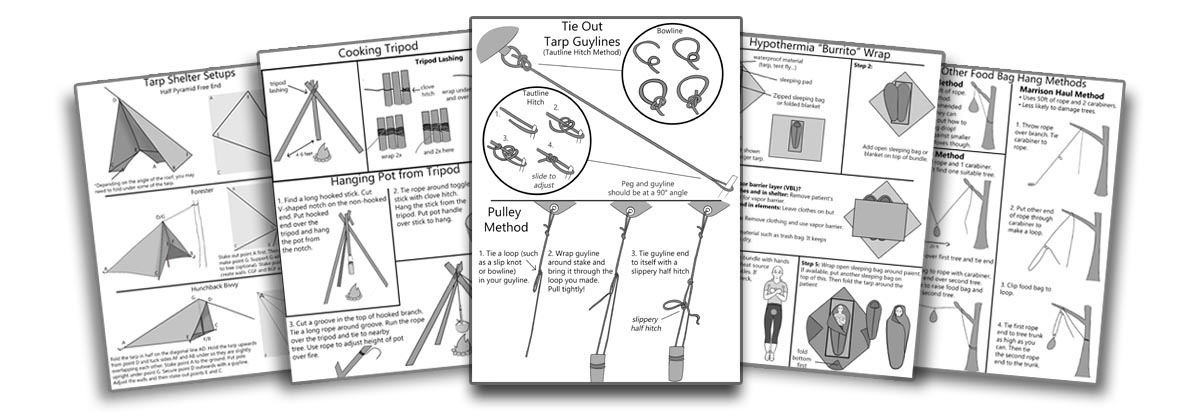
Want this information in PRINTABLE format?
Then you need my Camping Cheat Sheets.
The manual has 42 pages crammed with illustrated guides about everything from campfire cooking to wilderness first aid.
Because you found it through my website, I’ll even give you 50% off 😀
Get Your Copy for 50% Off Here
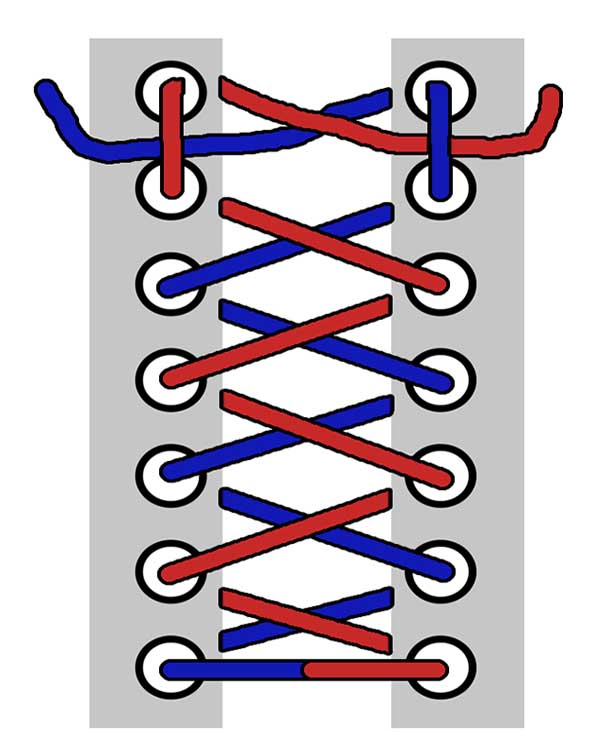
1. Hiking Lacing
Benefit: Prevents tripping
A few years ago, the laces from one of my hiking boots got caught on the hooks on the other boot. This basically tied my feet together and I went crashing down to the ground – shattering my knees in the process (NOT fun!). This method of lacing hiking boots prevents that hazard: the laces are tied off to the exterior side so they won’t get caught on the other boot.
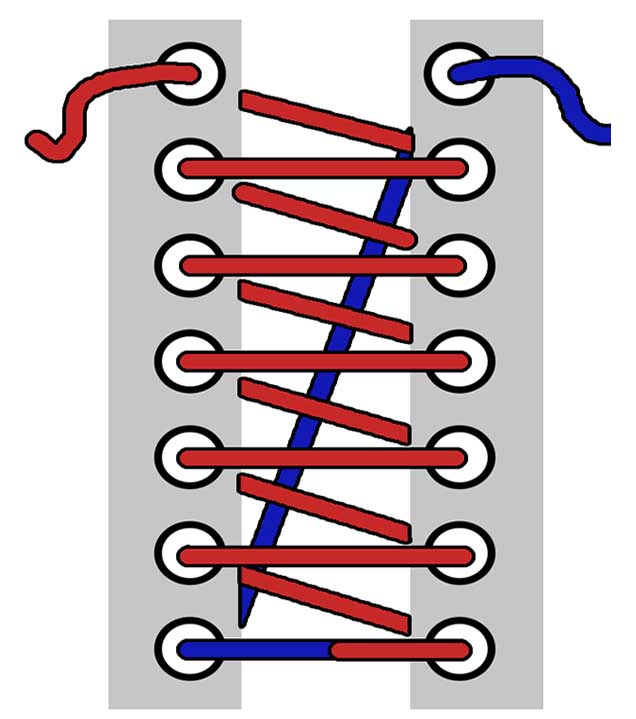
2. Lydiard Lacing
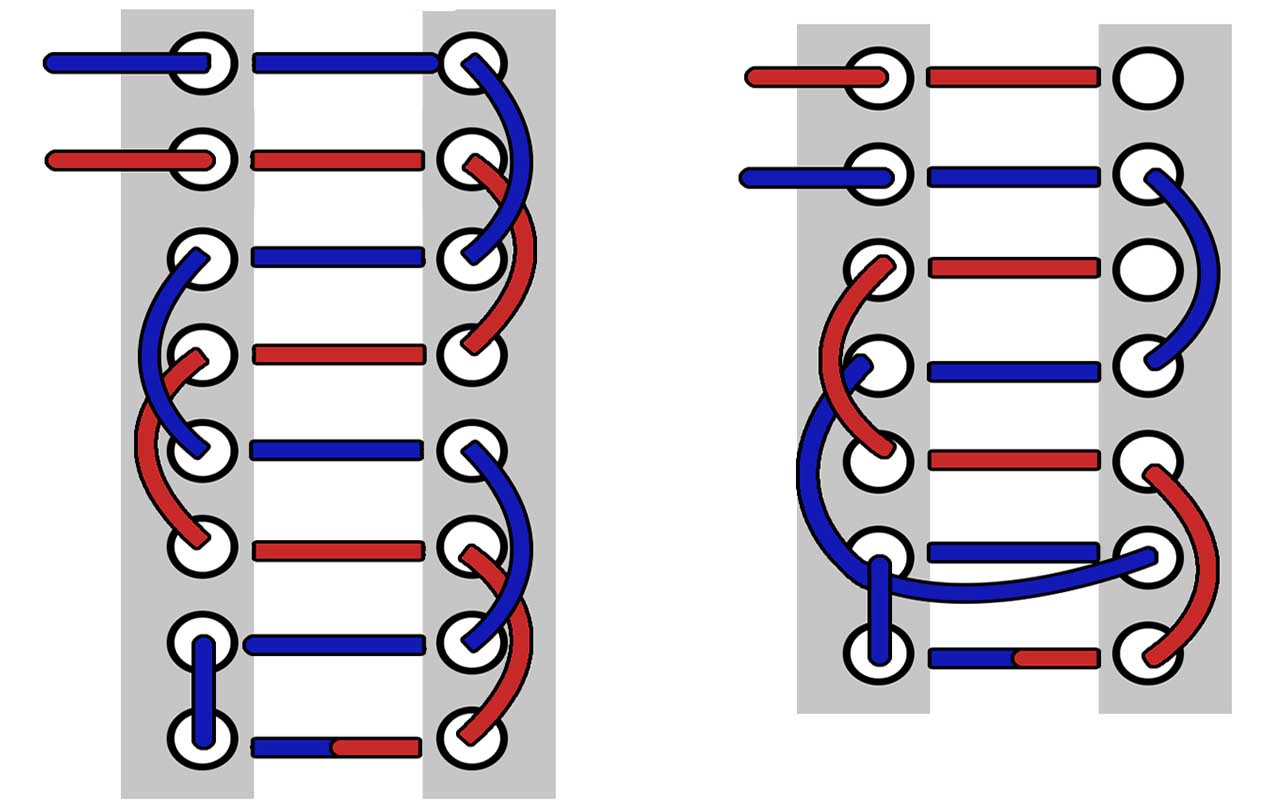
Benefits:
- Distributes pressure evenly across foot
- Reduces sagging in boots
- Allows boots to crease naturally (good for breaking in new boots)
- Prevents tripping
Usually Lydiard lacing can only be done with boots that have an even number of eyelets (Left image). But the image to the right shows a hack so you can do this lacing with odd-number eyelet boots.
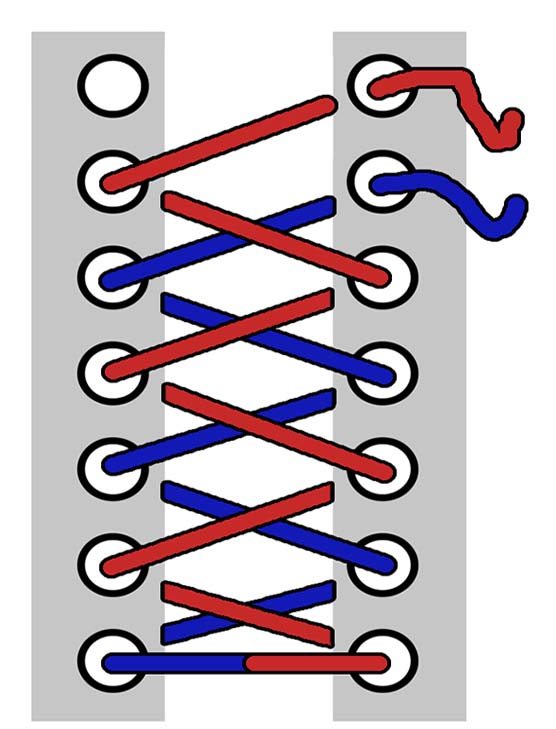
3. Heel Slipping Lacing
Benefit: Prevents heel blisters
This is a really simple moderation to criss-cross lacing. It adds a bit of extra strength around the heel area so your heel is less likely to slip in the boot and get blisters.
4. Surgeon’s Knot Lacing
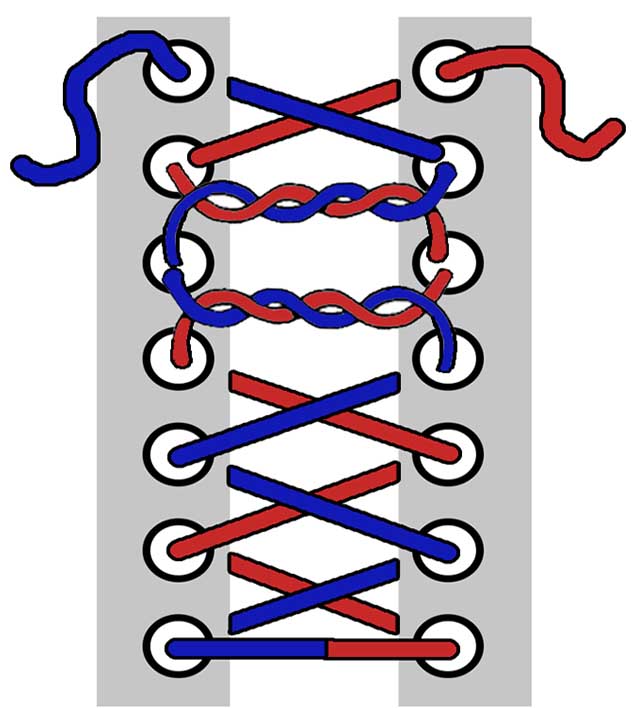
Benefits:
- Prevents heel blisters
- Prevents laces from loosening
Here’s another book lacing method to prevent heel blisters. The difference is that you use a surgeon’s knot at the top of the midfoot and lower boot hooks. It’s also a good method if your laces often loosen towards the bottom.
5. Skip Bottom Eyelets Lacing
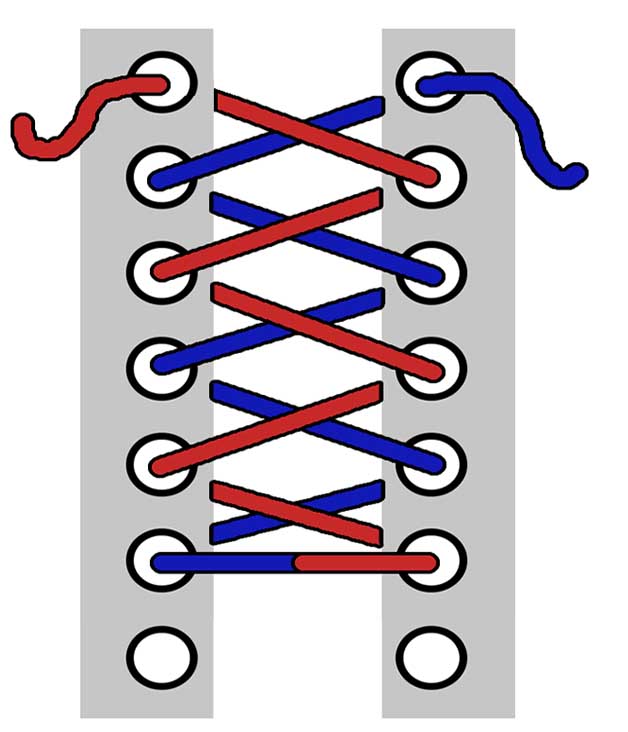
Benefit: Relieve toe pain and pressure
Did your toes swell up? Or your boots feel too tight in the toes? The solution is simple: just skip the bottom eyelets when lacing your boots. You can combine this lacing method with other methods too.
6. Diagonal Lace
Benefit: Big toe pain and black toenails
If you feel pain in your big toe or even have black toenails, then use this lacing method. The diagonal lace (blue) starts on the big toe side. This lifts the big toe area, thus relieving some of the pressure on it.
7. Wide Feet Lacing
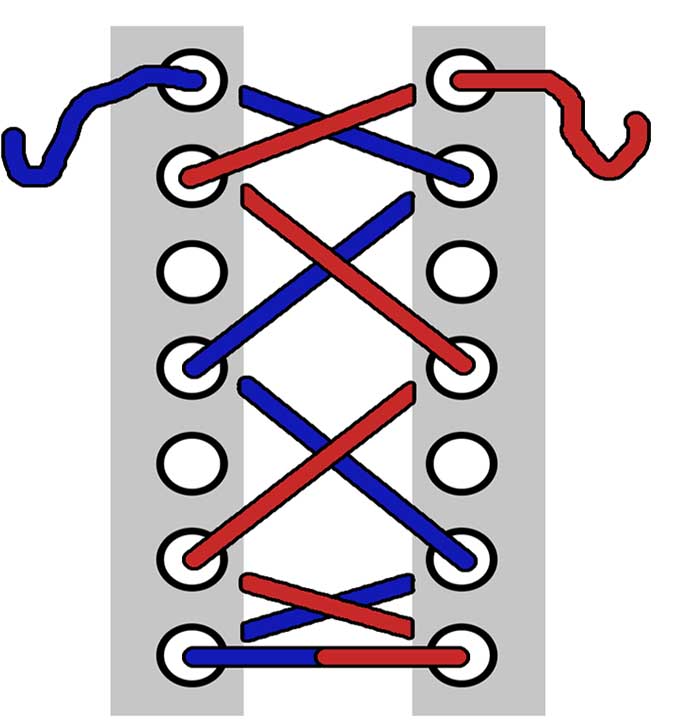
Benefits:
- Widens boots
- Short laces
This can also be useful if you are hiking in winter and wearing thicker socks than normal. Skipping alternating eyelets when lacing opens up the boot throughout.
8. Narrow Feet Lacing
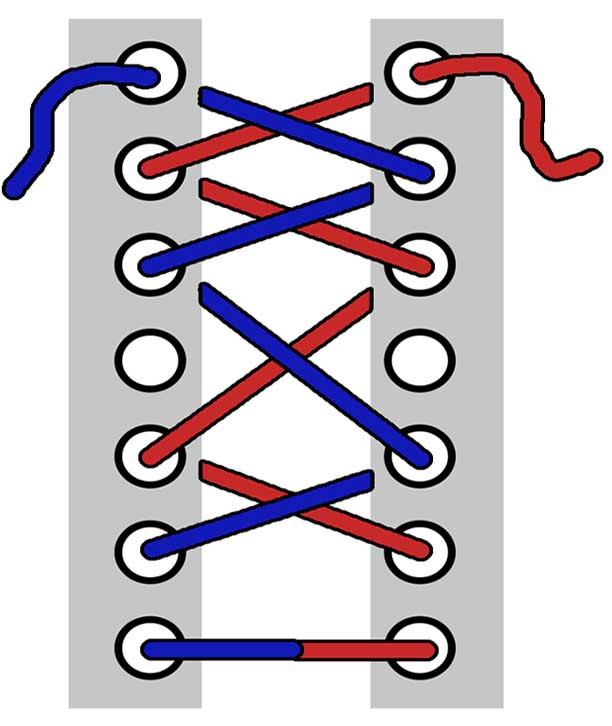
Benefits:
- Tightens boots around midfoot
- Short laces
This lacing method only skips eyelets in the midfoot area, so the crossed laces above pull them tighter together and give a snugger fit.
9. Dual Lacing

Benefit: Adjust top and bottom tightness separately
Warning: If you use this method, make sure the lower laces are short or you tuck the ends underneath. Otherwise it can be a tripping hazard!
10. Ladder Lacing
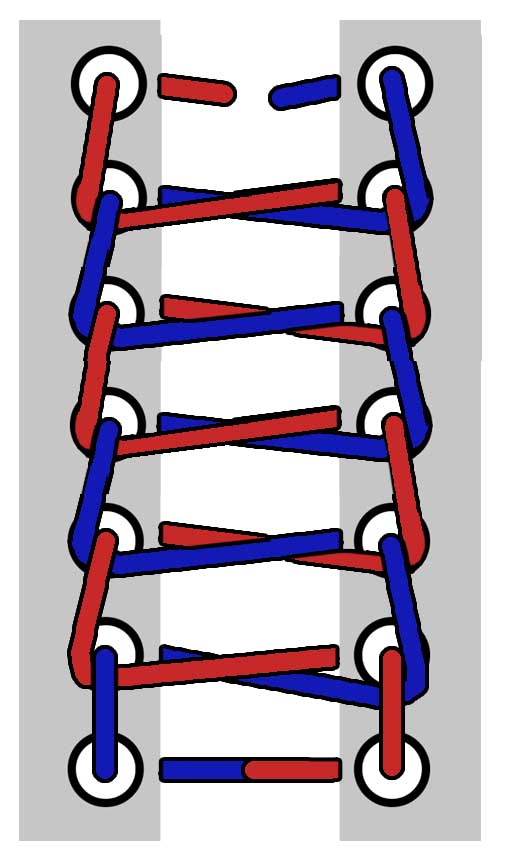
Benefits:
- Ankle support
- Prevents tall boots from sagging
- Keeps laces tight
This lacing method is usually only used for tall boots. Just be warned that it is hard to adjust the tightness of the laces.
11. Flat Arches
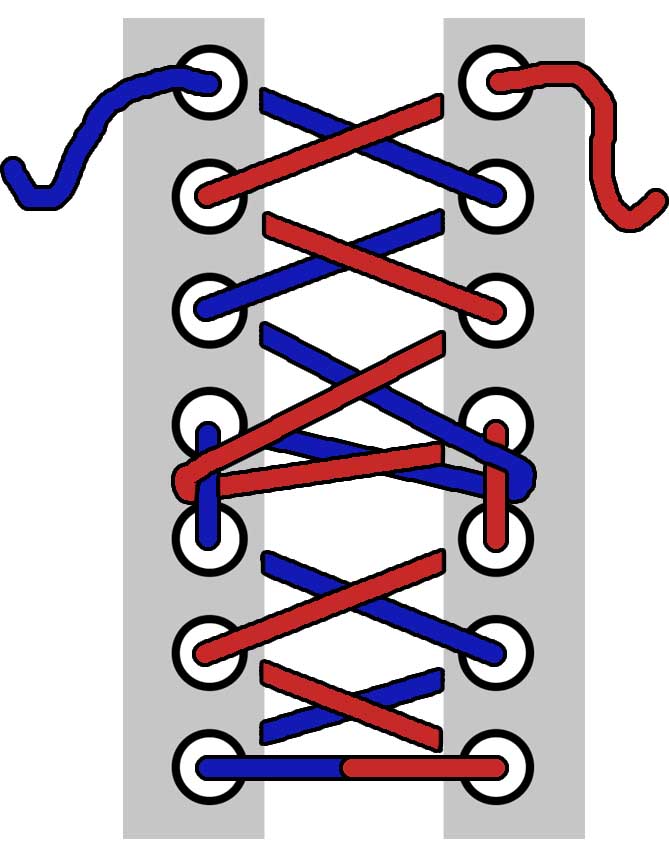
Benefit: Provides more stability and support
This lacing method pulls the midfoot area up and also tightens it further, thus providing the rigidity that flat arches need.
12. High Arches or Too Tight in Midfoot Area
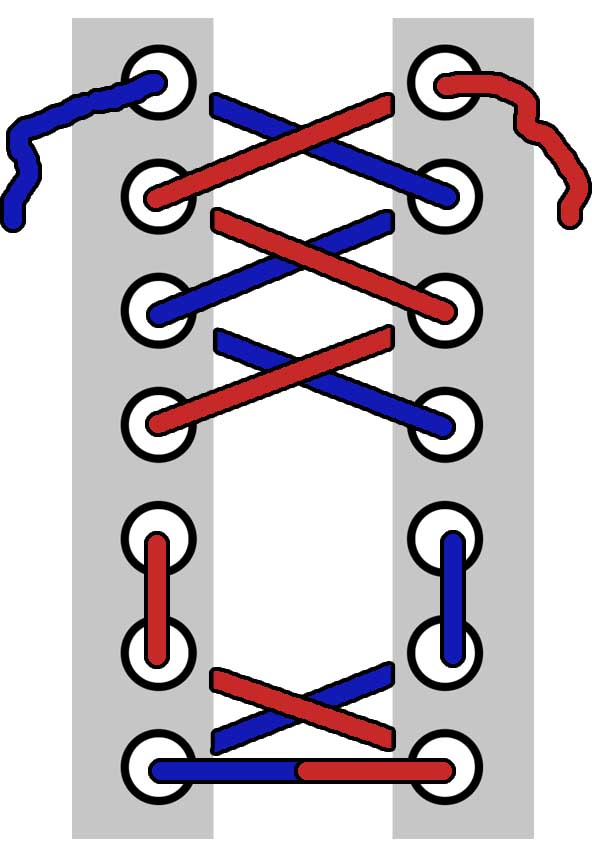
Benefits:
- Reduces pressure on ball and heel of the foot
- Allows more flexibility
In contrast of flat arches, high arches require more flexibility. By opening up the lower midfoot area, the foot has more room to move around, thus reducing pressure and pain.
13. Wide Forefront/Toe Box
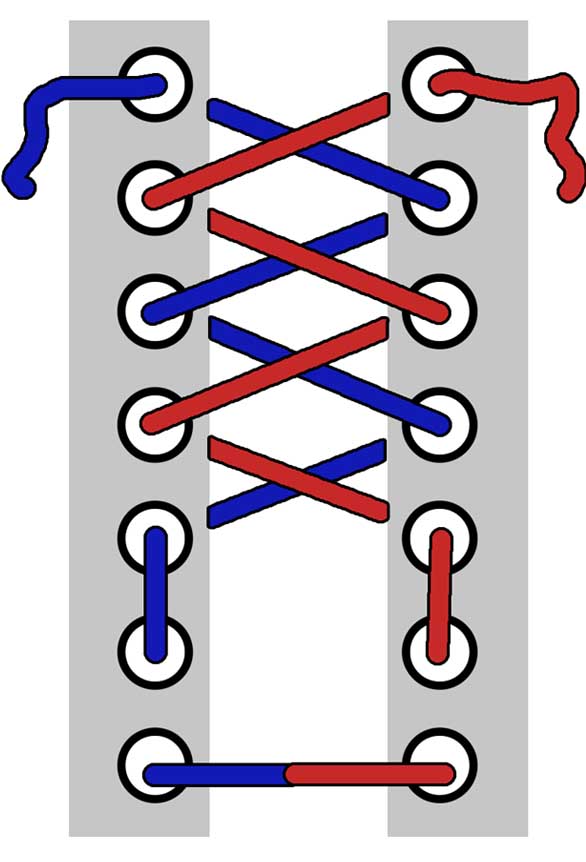
Benefit: Eases pressure on sides of foot
Some people have wide forefronts but regular heel areas. This lacing allows the toe box of the boot to open up more to make space.
14. Army Lacing
Benefits:
- Flexible fit
- Breaking in new boots
- Prevents pain on upper ridge of foot
- Short laces
This lacing method is especially good for tall boots or if you are breaking in new boots. It alternates criss-cross lacing with open areas, so you get more room throughout and flexibility.
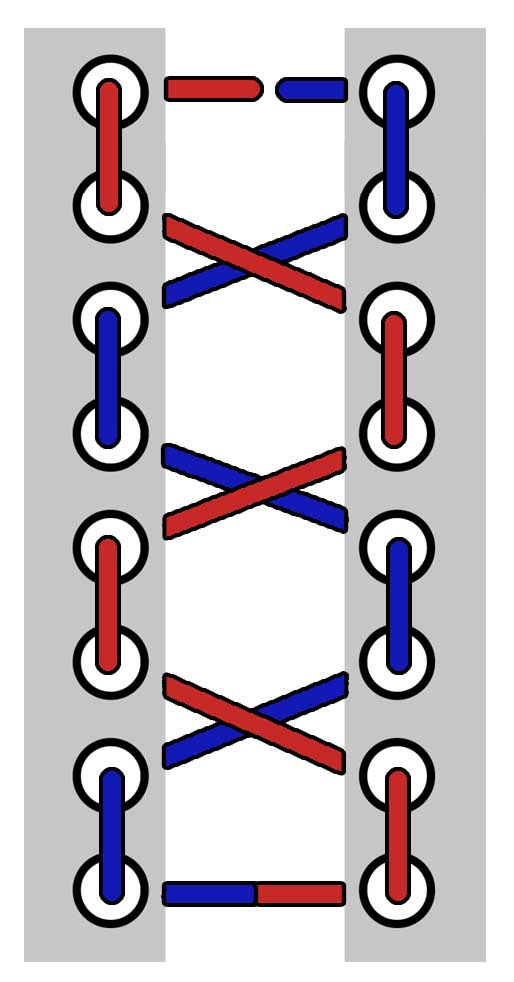
15. High Midfoot
Benefits: Reduces pressure in midfoot
This lacing method can be adjusted depending on how many eyelets your boots have and your foot shape: leave the laces open in the area where you are feeling pressure.


Post your comments