
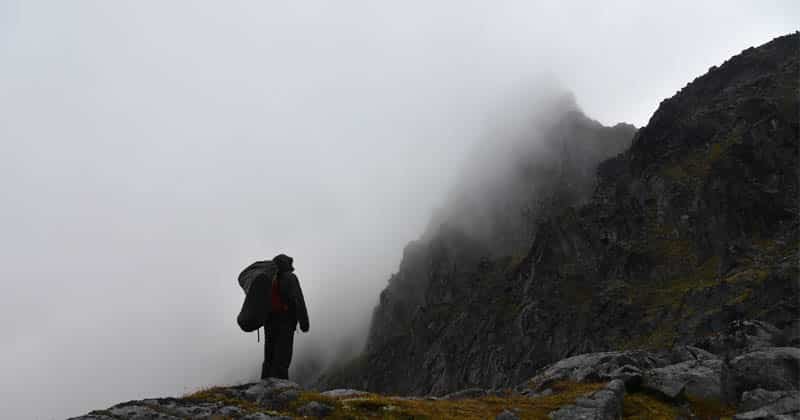
Honestly, spring is my least favorite season for backpacking. The trails are still under the winter spell, but without that beautiful blanket of snow you get during winter hikes. There is tons of mud. Rain is almost inevitable. And flooded streams can make for difficult crossings.
That said, backpacking in spring can also be a wonderful experience.
- It beats staying at home (especially if you’ve been battling cabin fever all winter!).
- There are no annoying bugs.
- You get to watch those first spring plants shoot through the ground.
- Panoramas are excellent without leaves to block the view.
- And you will avoid the crowds that can come during summer and fall backpacking trips.
To make sure you actually enjoy your spring backpacking trip, here are some tips for things you should bring and plan for. Hope it helps!!!
Go Somewhere Warm!
Rather than dealing with rainy weather and mud on a spring backpacking trip, why not go somewhere warm instead? If you have the time and budget to travel further away, you can consider springtime backpacking places like:
- The San Gabriel Mountains (California)
- Big Sur (California)
- Gila National Forest (New Mexico)
- Lovers Leap Loop (North Carolina)
- Liberty Cap (Colorado)
- Herman Creek Pinnacles (Oregon)
Obviously there are a lot more places which are great for springtime backpacking. If you head out of the USA, you’ll also find great places to hike in warm countries like Greece, Portugal, and Spain. (sorry, I don’t know much about hiking in other parts of the world like Southeast Asia or South America!).
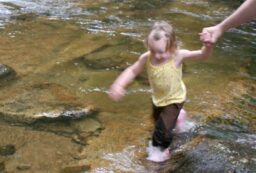
For example, I had a fantastic time camping and hiking with my daughter on the beaches of Greece in early April.
Mandatory Gear for Spring Hiking/Backpacking
As I said, it is almost inevitable that it will rain during your spring backpacking trip. And it won’t be one of those summer downpours that drenches you but then the clouds part to brilliant sunshine which dries all your gear.
Spring showers can go on for days. The rain is heavy and cold. And all that rain makes things muddy. Don’t be surprised if you slip down a trail and end up with a giant muddy spot on your butt (speaking from experience here!).
On top of this, many trails can be completely flooded with half-frozen water. You will end up with wet feet. That probably means blisters too.
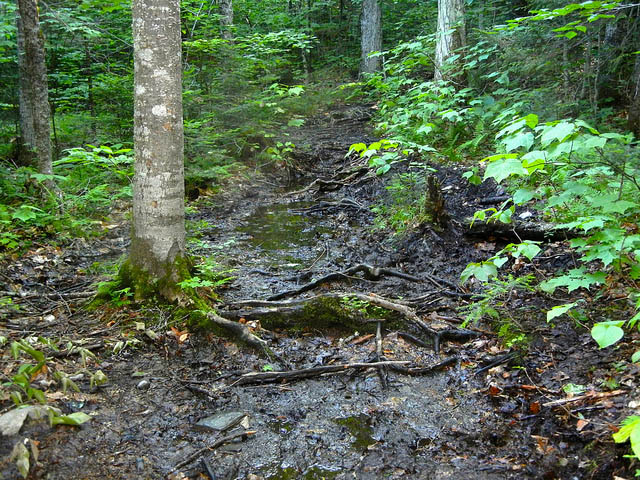
Rain and melting snow mean a lot of mud in springtime
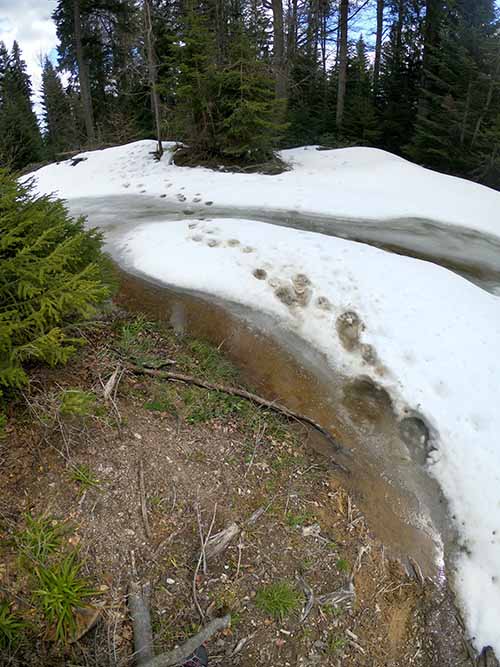
Melting snow on the trail meant I could see all the bear tracks :p
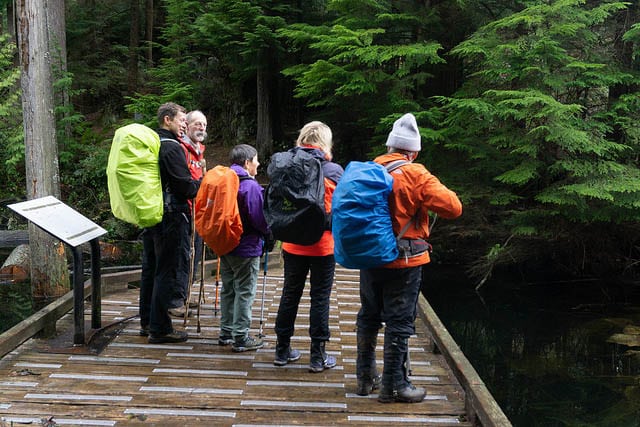
1. Waterproofing for your backpack
Waterproof backpacks are bulky and cumbersome. A better solution for spring backpacking is to use a waterproof backpack cover PLUS a trashbag liner. You’ll also want to keep important gear (like GPS systems and headlamps) in a dry sack or plastic bags.
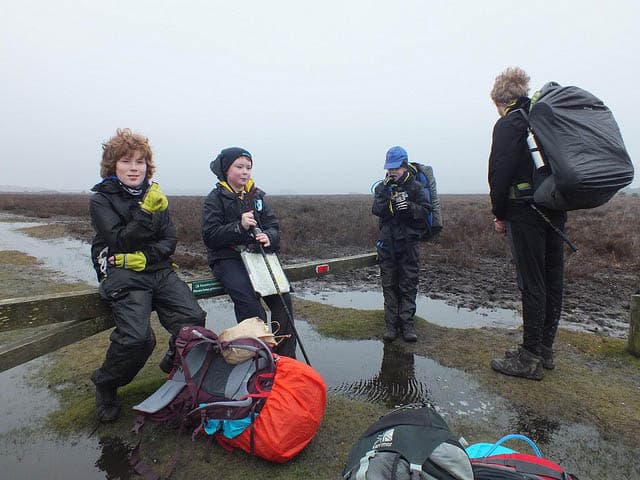
These scouts are keeping their packs dry with rain covers during a spring backpacking trip
2. Trekking Poles
I’m a recent trekking pole convert. They really do wonders to transfer weight from your knees to your upper body (meaning you get a full-body workout on your hike). Here are even more reasons to use trekking poles.
For spring hiking/backpacking, you’ll want trekking poles for stability going through muddy trails, forging creeks, and preventing a “slip and slide” adventure on downhill slopes.
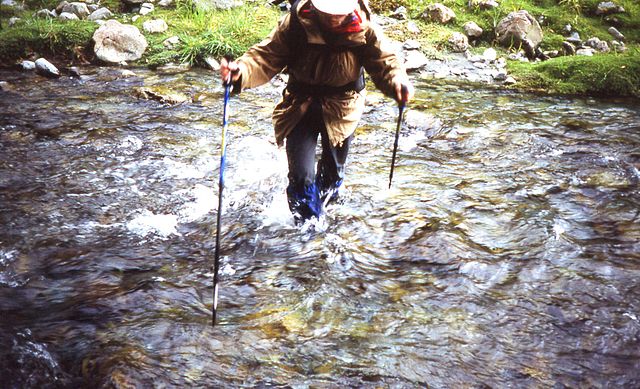
Trekking poles making fording flooded streams much easier.
3. Tarp Shelter
This isn’t exactly “mandatory”, but having a tarp is well worth the carry weight on longer spring backpacking trips. You’ll be able to set up the tarp so you have a place to sit outside of the rain. You can also run a clothesline under the tarp to hang your wet clothes, allowing them to dry.
Also read: 27 Ways to Set Up a Tarp
4. Extra trash bags
Things will get wet and muddy. You need to have a way to keep these separate from your dry gear. So plan on bringing a lot of extra plastic trash bags.
Clothing Strategies for Spring Backpacking
Wet clothing = evaporation = COLD. Hiking while freezing your butt off (even for the most ardent of us) is not fun. With the right strategy, you can actually stay pretty dry while hiking/backpacking in the rain. Here are some strategies:
1. Go with Synthetics or Wool
Any pro backpacker will tell you that cotton is off-limits (though I sometimes wear cotton on summer hikes, gasp!). In springtime though, cotton can be downright dangerous. It absorbs water like a sponge and will never dry. That can mean hypothermia when you get wet.
Go with synthetics which will dry quickly. Wool is also a good material choice for base layers since it is so insulating and naturally resists some water.
Also Read: Is Merino Wool Worth It?
2. Layers, layers, layers!
Wearing layers allows you to quickly adjust your clothing for comfort and weather conditions. You’ll need:
- Base layer: Skin-hugging for maximum movement, made from wool or synthetics.
- Mid layer (insulating layer): Fleece jacket and hiking pants.
- Outer layer: waterproof jacket and waterproof pants with lots of vents
Read: The 3-Layer System Explained
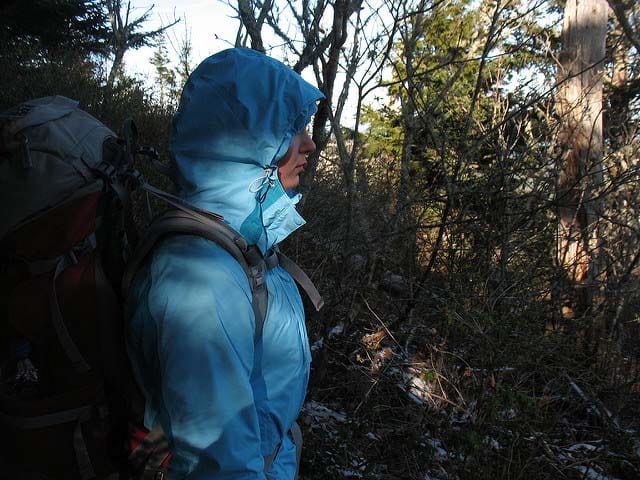
3. Wear a Hardshell Jacket with Vents
Softshell jackets are not at all suitable for spring hiking or backpacking. While they can withstand a bit of rain, they will get drenched in a spring shower.
Likewise, standard rain jackets aren’t suitable for spring hiking/backpacking. They will keep the water out, but won’t keep you warm enough.
What you need is a hardshell jacket. A good hardshell jacket is made up of 3 layers:
- Innermost Layer: This layer protects the other layers from body oils. It also is slippery to prevent friction against your mid and base layers.
- Mid Layer: This layer contains a membrane which is water-resistant and breathable. It helps wick moisture away from your body so you don’t get drenched from sweat.
- Outer Layer: This outer layer is completely waterproof. The thickness varies. A hardshell jacket designed for winter will have a thickness of about 90 denier. A thinner, lighter hardshell jacket may have a 20 denier.
The issue with hardshell jackets is that they aren’t breathable (even the “breathable” ones will still make you sweat). To keep yourself from sweating like crazy, look for one which has lots of zippable vents.
4. Waterproof Pants Will Keep Your Warm & Dry
Most pants are just “water resistant” – which is a completely different thing than waterproof. Water-resistant pants will shed some water, and are quick to dry. But they will NOT keep you dry in a springtime rain!
By contrast, most waterproof pants resemble parachute pants from the 90s. They actually keep water out. And, since they don’t absorb water, dry almost immediately. The reason we don’t wear waterproof pants for hiking in summer is because they aren’t breathable, so will make you sweat like crazy in hot weather.
Cheap waterproof pants will just snap over your normal pants and don’t have any insulating properties. The better waterproof pants can be worn by themselves.
On a short hiking trip in the rain, you can get by with water-resistant hiking pants. Or, some prefer to wear hiking stockings. On longer trips, a pair of breathable waterproof pants will make all the difference and are well worth the investment.
Ladies, read this post on the best waterproof pants for women.
5. Waterproof Gaiters + Really Good Socks
Gaitors helps keep mud and snow out of your boots. The good socks are for keeping your feet comfortable when they get wet, despite the gaitors.
Also Read: How to Keep Your Feet Dry Hiking
6. Consider Trail Runners Instead of Waterproof Boots
There is no such thing as a truly waterproof boot (especially in spring conditions). Your socks will end up damp – which isn’t much better than being completely drenched. So, if you are on a longer trip, consider wearing trail runners instead.
Compared to boots, trail runners are much more breathable, will dry faster (assuming you get some dry weather), and are less likely to give you blisters. You’ll be glad for trail runners instead of stiff boots when you need to forge a creek!
7. Bring an Extra Pair of Clothing.
Forget going ultralight! It is worth it to carry an extra few pairs of clothing so you will have something dry to change into. When camping with my daughter in springtime, I even made a point to bring extra pajamas in case her primary pair got wet.
8. Sock System
In dry weather, wear just a pair of wool socks. Or, to prevent blisters, use the two-sock system. When it starts raining, wear a pair of Gore-Tex socks over your thinner base layer socks.
You’ll also want to bring a few extra pairs of socks. You’ll love having a pair of dry, warm socks to put on at the end of a long day of backpacking.
9. Tuck in your shirt and pants
Any part of your clothes which hangs out will absorb water. Prevent this by tucking in. You can even tuck your pants into your socks to prevent them from absorbing water as they brush against plants.
10. Bring a Waterproof Brimmed Hat
As someone who wears glasses, I always bring a brimmed hat when backpacking. Otherwise even a light shower can blind me by getting my lenses wet.
Even if you don’t wear glasses, a brimmed hat is a good choice. It will keep water from splattering your eyes. You’ll actually be able to look upwards (and enjoy the view) instead of looking down to protect your eyes from the downpour.
11. Gloves and mittens
As Philip Werner points out, “you’d be surprised how much warmer you’ll get wearing rain mittens and glove liners.” So consider bringing a hardshell mitten or a glove which contains lightweight liners.
What to Do If Your Clothes Get Wet
There is only so much clothing you can bring backpacking. A major mistake that people make is changing their clothes when it gets wet. The clothes don’t have time to dry, and they end up with nothing dry to wear.
In some situations, it is better to stay in your wet clothing. Assuming that you are wearing synthetics or wool, your body heat will eventually dry the clothing. You should only change your wet clothes if you are very cold.
According to Roanoke Outside, here’s what to do if your clothes get wet:
- If it stopped raining, put on dry clothes. Lay out your wet clothes to dry as soon as you can.
- If it is still raining, keep your base layer on. Swap out your wet insulating layers for dry ones.
- If it is still raining and you are too cold to stay in wet clothes, change all of the wet clothing. If you don’t have any dry clothes for the next day (or it is raining the next day too), then put on your damp clothes. Your body heat will eventually dry the clothes. You’ll be better off wearing damp clothes today and having dry clothes to change into once you are at camp.
Setting Up Camp in Springtime
In addition to the normal rules of setting up camp, springtime brings some other issues – especially flooding. Here’s what to keep in mind.
Safety Issues:
- Don’t camp in or near dry riverbeds. They flood quickly when it starts raining.
- Camping under trees can provide extra protection, but watch out for “widow maker trees.”
- Avoid camping in lower areas. These flood quickly.
- Watch out for mudslide areas.
Pitching the tent:
- Use the footprint. It is definitely worth the extra carry weight and time to prevent the bottom of your tent from getting drenched.
- Pitch quickly! Practice this at home before you go. Or have your backpacking buddies hold the rain fly over the tent as you pitch so it doesn’t get drenched.
- Stake down your tent guylines. Even if the weather seems nice when you set up camp, it can get windy and rainy quickly. Make sure those guylines are staked down properly so your tent doesn’t blow away!
- Keep doors away from the wind. Otherwise the wind will blow rain in.
Consider a hammock instead
Finding a dry spot to set up camp in springtime can be difficult. Some backpackers prefer to use a hammock in spring instead. You’ll need a waterproof tarp to hang above it, plus a warm quilt. The great thing about this system is that it doesn’t force you to become a pro of pitching the tent in 90 seconds flat so you minimize wetness.
Sleep Setup
It gets COLD at night in springtime. Remember that sleeping bags always list their lower rating, and not their comfort rating. To actually stay warm and comfortable, you’ll need a sleeping bag with a comfort rating of 15-20F.
And don’t forget about the importance of a good sleeping pad. The ground will suck heat out of your body, especially when that ground is already half-frozen. Aim for an R-value of around 3 or 4. Here are some affordable sleeping pads with high R-value.
Tips:
- Unless you are a pro at rainy weather camping, avoid down sleeping bags. They get ruined when wet and don’t insulate when wet.
- Bring an extra short-length sleeping pad. You can use this for sitting on. At night, you can put it under your torso (under your normal sleeping pad) for extra core warmth.
Safety Issues in Springtime
Be prepared to exit.
Don’t be so stubborn about completing your hike that you end up doing something stupid. Fording flooded creeks is more dangerous than it might seem. So, if you aren’t sure, it is better to head back than take the risk.
Likewise, the rainy weather means a higher risk of mudslides and erosion. Go back if you are unsure about the trail conditions!
Canyons and Flash Flooding
Being in a canyon when it starts raining is practically a death sentence. The rains will surge down into the canyon, causing a flash flood — something which kills many hikers every year. Check weather forecasts and don’t go in a canyon if there is a chance of rain.
BEARS!
I’m not keen about meeting a bear on the trail during anytime of the year. However, a springtime encounter would be particularly scary. As the Missouri Department of Conservation warns, bear awareness is extra important in springtime.
Bears are coming out of hibernation in early spring. They are hungry, and thus extra grumpy/aggressive. Mama bears are often with their cubs, which makes them aggressive and potentially dangerous.
Make sure you bring your bear spray with you. Carry it on your hip so it is accessible. There’s no point to bringing bear spray if you can’t reach it in time! Learn how to hang a bear bag properly and brush up on what to do if you see a bear.
Image credits:
“Nearing Glacier Pass. Talkeetna Mountain” (CC BY 2.0) by Paxson Woelber
“100 Mile Wilderness (1)” (CC BY-SA 2.0) by John Hayes (gravelboy)
“snowy trail” (CC BY-NC-ND 2.0) by maple’s mama
“Belcarra, April, 2018” (CC BY-NC 2.0) by GMulligan
“18-nft-0012” (CC BY-NC 2.0) by J-W Brown
“STB_9578” (CC BY-ND 2.0) by Bassett’s Irregular Adventures


Post your comments