
When wild camping or backpacking, I usually don’t bother with a shower. I’m fine being stinky for a few days. But sometimes it’s really nice to take a shower. Like when it’s 95 degrees out or your stink has gotten so bad that flies are starting to swarm. 🙂
The problem is that most camp showers are just overpriced bags with a water hose attached. They are made out of cheap materials which break easily. Yes, I once broke a gravity bag-type camp shower. It slipped out of my hands while trying to tie it to a tree branch and popped open immediately when it hit the ground!
There are better camp showers you can buy, such as cool pressurized ones which don’t have to be lifted overhead. This one is pretty awesome. Some, like this one, even have built-in water heaters but are crazy expensive.
If you don’t feel like paying for a camping shower, you can make one yourself. The homemade camp shower designs below range from really simple handheld or gravity showers to more complex DIY pressurized showers.
Want this information (and more!) in printable format?
Get my Camping Cheat Sheets!
The 42-page guide covers everything you need to know to enjoy the outdoors with confidence.
1. Handheld Camping Shower
This is the simplest way to make a camp shower. Just find a large, sturdy container with a lid. Drill some holes into the lid to make a shower head. See the picture below.
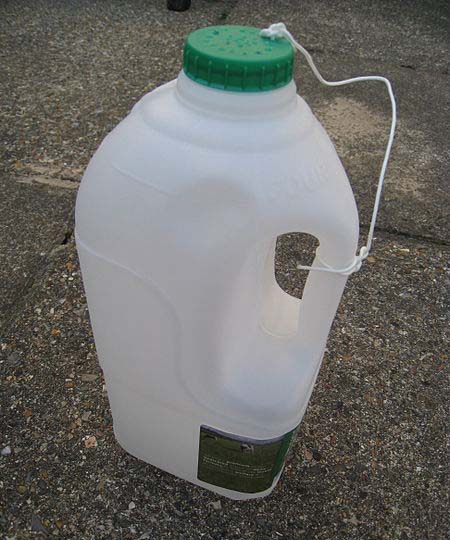
You can also use a sports cap lid for your shower head. It doesn’t create a spray but you can adjust the flow and turn the flow on/off.
Tip: Add a vent to your camp shower (see how it was done in the picture below). This will prevent the pressure from cracking the bottle.
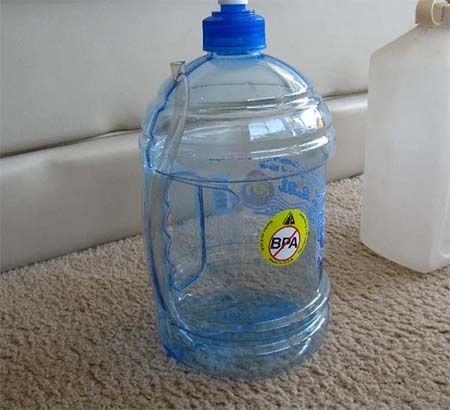
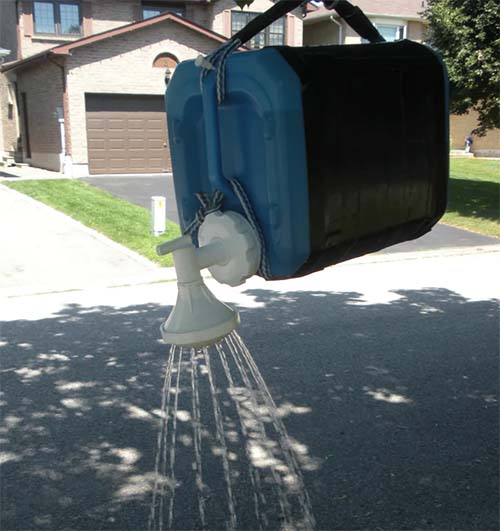
2. Gravity Fed Camp Shower
Here’s another simple DIY camp shower. For this one, you need a portable water storage tank like this one. Choose a tank which has these features:
- 2 gallons in size: If the water tank is smaller, you won’t get enough pressure. If the tank is larger, you won’t be able to lift it easily.
- Spigot: Ideally, the spigot will have adjustable flow
- Air vent: This is must-have. Otherwise the pressure change will crack the tank as its empties.
To make the gravity shower, you’ll just need to add a shower head to the spigot. The camp shower in the picture used a garden watering can head. Just glue-gun it onto the spigot.
Tips for Using the Gravity Shower:
- You’ll need rope to make a handle for hanging the shower. You can find good instructions on how to tie the handle here.
- Remove the air vent plug. This will turn the shower on.
- Once you re-plug the air vent, the water will continue to flow for about 30 seconds.
3. Dry Bag Camp Shower
The problem with using water jugs for your camp shower is that they are bulky. To save space, you can use a dry bag instead. Because the dry bag is flexible, you don’t have to worry about air vents like you do with rigid containers. If you don’t want to bother with the DIY shower, Sea to Summit makes a good one called the Pocket Shower.
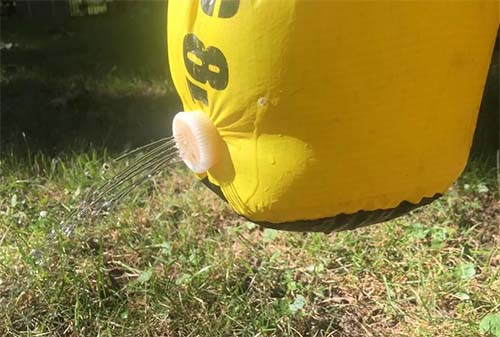
You will need:
- Dry bag
- Plastic bottle with screw threads
- Two bottle caps
- Epoxy
To make:
- Cut the screw threads off of a plastic bottle. Use sandpaper to smooth off any sharp edges.
- Make holes in one of the bottle caps. Then use epoxy to glue an O-ring inside the cap. This is your shower head.
- Glue an O-ring inside the other bottle cap. This one shouldn’t have holes. It is your stopper.
- Cut a hole in the dry bag. The hole should be on the side of the bag, about 1-2 inches from the bottom. Make the hole just large enough to let the screw threads poke through.
- Put the screw threads inside the dry bag and push them through the hole you just made.
- Use epoxy to secure the screw threads in place.
To use:
- Screw on the bottle cap without holes.
- Fill the dry bag. Let it sit in the sun for a while if you want to heat the water.
- Set the dry bag on its side (with the cap up). Now you can change the cap to the one with holes in it.
- Hang the bag and start showering.
You can use this same shower bag as a pump for your camping mattress. Read the instructions here.
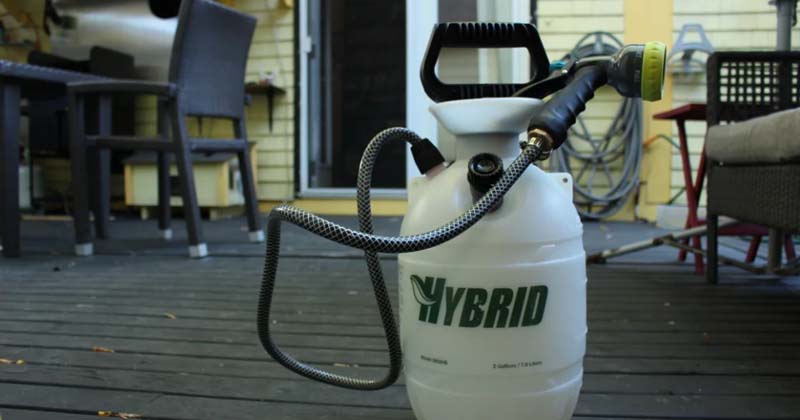
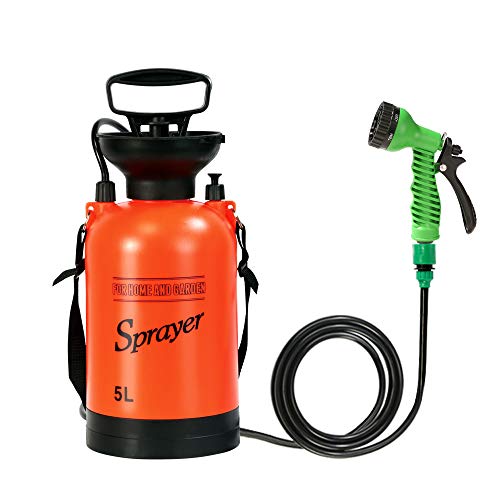
4. Garden Sprayer Pressurized Camp Shower
If you have a garden sprayer which has never had chemicals in it before, you can use it as a camp shower. You just need to create a shower head for it.
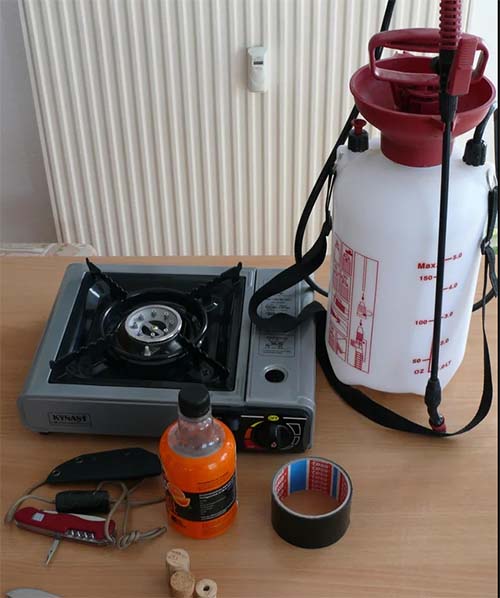
To create the shower head:
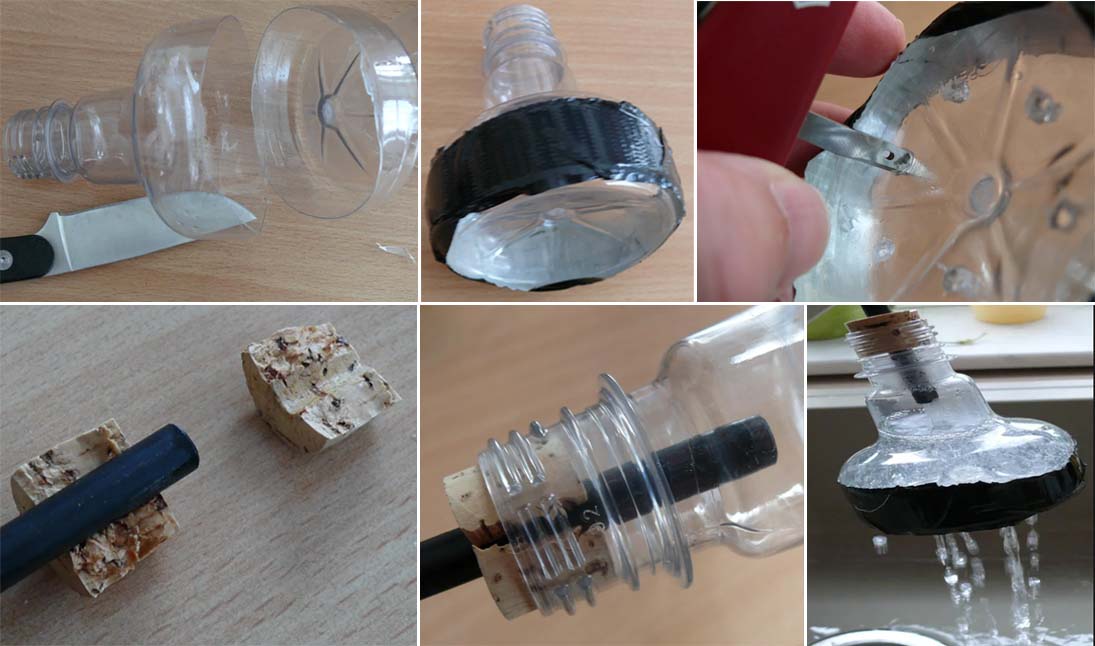
- Get a small plastic bottle with a screw lid
- Cut the bottle in two places to remove the middle section. Throw away the middle section.
- Insert the bottom part of the bottle into the top part. Wrap electrical tape around them to keep in place and prevent leaks.
- Use a scalpel to poke holes in the bottom part.
- Cut a wine cork in half. Make a groove down the middle of each side. The groove needs to be big enough so you can insert the pressure sprayer into it.
- Put the pressure sprayer end into the cork and insert it into the bottle cap. You might need to wrap some tape around it to secure it in place.
Read the full instructions here.
If you don’t want to bother with this, you can just buy a garden sprayer which has a shower head attachment. 🙂
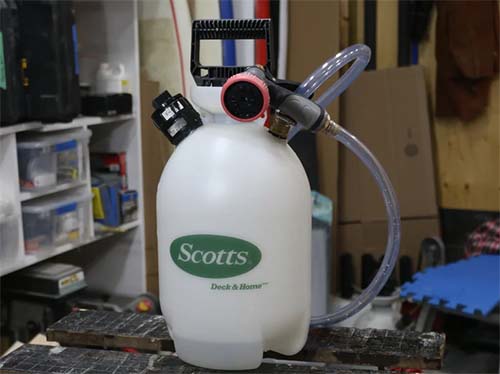
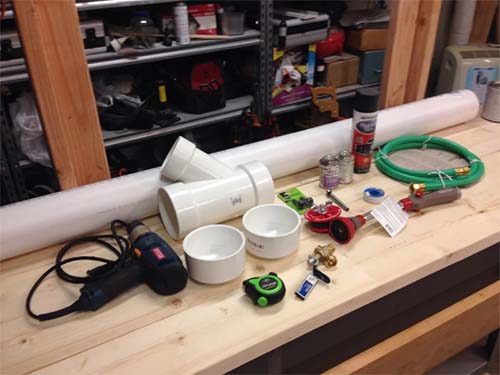
5. Garden Sprayer with Garden Hose Nozzle
This DIY camp shower is similar to the one above. But, instead of using a plastic bottle for your shower head, you use a garden hose nozzle. Then you can use the on/off switch on the nozzle to get a proper shower.
To attach the garden hose nozzle:
- Remove the spraying wand from the sprayer
- Attach a garden hose adapter to the nozzle
- Insert the sprayer hose into the adapter
- Use a hose clamp to secure the hose in place
See the full instructions here.
A problem with this DIY shower is that most garden sprayers have narrow hoses. You might not be able to get enough pressure for the garden hose nozzle to work properly. To make it work, you may need to change the hose. That means you’ll need a few more adapters. In the picture above, the hose has been replaced. Read how to do that here.
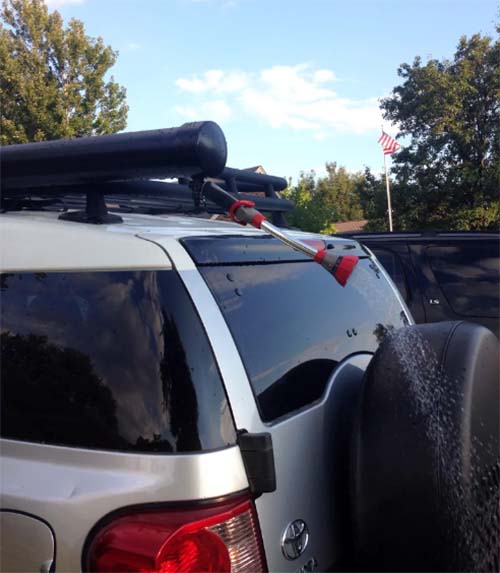
6. Roof Rack Camp Shower
The brand Yakima sells a cool camp shower called the RoadShower which mounts onto the top of your car. The thing is crazy expensive though. It takes some work and a lot of tools, but you can make one yourself. You’ll need to keep it pressurized with a bike pump.
See the instructions here.
7. Siphon Camp Shower
This is one of the coolest DIY showers I’ve seen, but also the weirdest to operate. It works on a siphon principle. To start the siphon flow, you have to suck on a tube. Because of the way it is designed, you don’t get any water in your mouth. You can stop the water flow by hanging up the shower head.
See the instructions here.
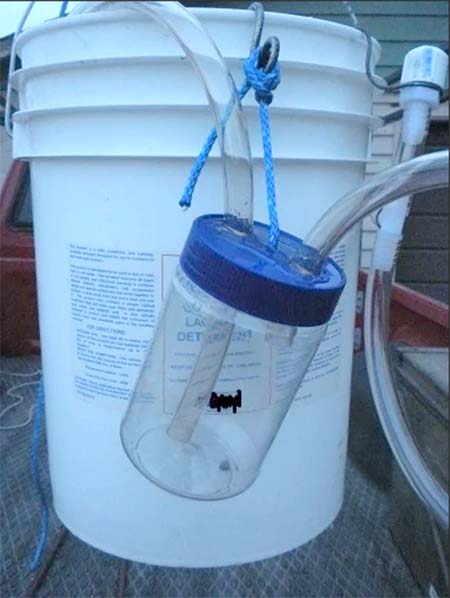
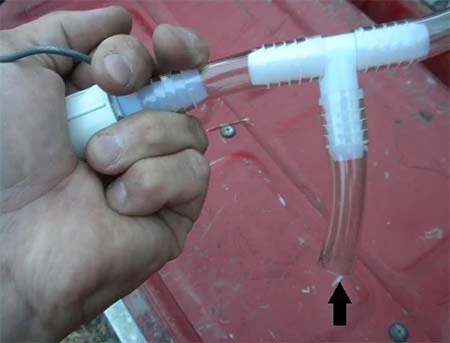
Image Credits:
Affordable Camp Shower by work_simple, https://creativecommons.org/licenses/by-nc-nd/4.0
Roof Rack Shower for Outdoor Activities By Joshuat5, https://creativecommons.org/licenses/by-nc-sa/4.0/
Make a Portable Camping Shower by Simple_Life_Hacks, https://creativecommons.org/licenses/by-nc-sa/4.0/
Portable Camping and Surfing Shower by AndrewW1977, https://creativecommons.org/licenses/by-nc-sa/4.0/
KISS Principle Shower by antonius, https://creativecommons.org/licenses/by-nc-sa/4.0/
Bottle camping shower by Alan-Cottey-W-M, Creative Commons Attribution-Share Alike 3.0 Unported
Simple Handheld Camping Shower by daveulmer, https://creativecommons.org/licenses/by-nc-sa/4.0/
Camping Shower 1 by alliedmilk, https://creativecommons.org/licenses/by-nc-sa/4.0/
Bottle shower by Alan-Cottey-W-M, Creative Commons Attribution-Share Alike 3.0 Unported


Post your comments