

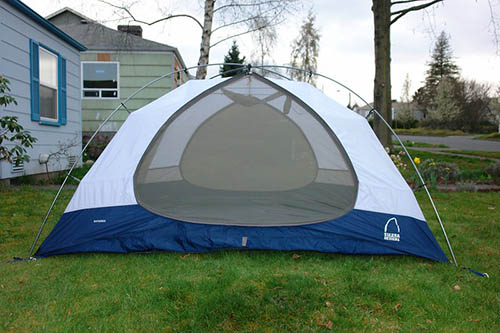
Knowing how to pitch a tent is the most basic skill you need for camping. While there are a lot of different types of tents, all of them can be pitched with these simple instructions.
Important: Set up your tent BEFORE you go camping! You don’t want to set up a tent for the first time at camp, especially if it’s raining or windy. Even if you know how to pitch the tent, still check it before your trip in case anything is missing or broken.
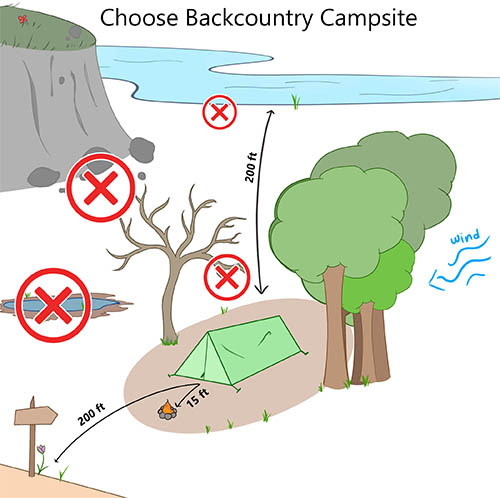
1. Find a Good Spot to Pitch
Campgrounds usually have dedicated areas for pitching your tent. But, if you are wild backcountry camping, you’ll need to find a spot to pitch. The three things you need to consider are:
- Safety: Avoid pitching by hazards such as dead tree branches and steep slopes.
- Comfort: Such as choosing a spot with shade and natural wind breaks
- Leave No Trace: This means not having a negative impact on the environment or bothering other campers.
For more info, read: How to Choose a Backcountry Campsite
2. Check Ground
It’s insanely annoying to crawl into your sleeping bag at night only to realize that the ground is sloped. Or that there’s a big rock right under your back. Avoid this by checking the ground before pitching.
Read: How to Find a Level Campsite (and How to Camp on Sloped Ground)
3. Lay Out Tent
- Tents with groundsheets: Lay the groundsheet out first. Then put the tent on top of the groundsheet.
- Single layer tents: Lay the tent where you want to pitch.
- Two layer tents: Lay just the inner mesh tent where you want to pitch. You don’t need the fly yet.
- Tips:
- Make sure the door is facing the right direction before you proceed.
- If it is windy, stake out a few corners of your tent. You can adjust the stakes later on.
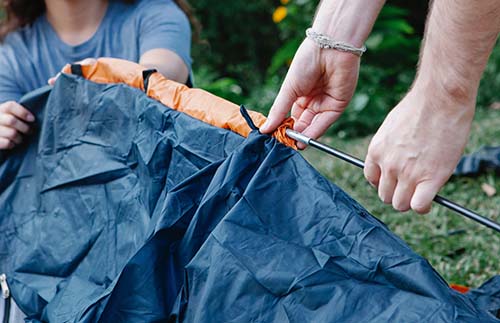
4. Assemble and Attach Poles
Tents with Pole Sleeves
First assemble the poles. Slide the poles through their corresponding sleeves. Once they are all the way through, attach the ends of the poles to the corresponding corners/edges of the tent. More on that below.
Tents with Hooks or Clips
First assemble the poles. Put the ends of the poles in their corresponding corners/edges. You may need someone to hold the poles up while you do this.
With the poles in their upright position, attach the CENTER hooks over the poles first. Then attach the remaining hooks.
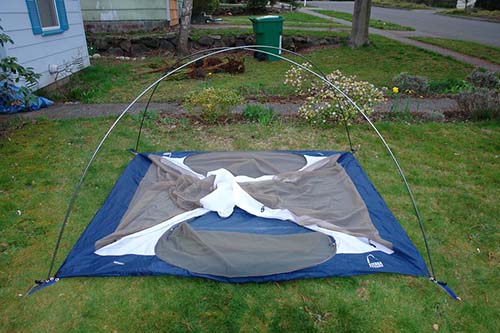
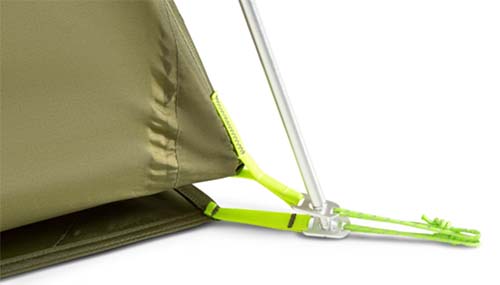
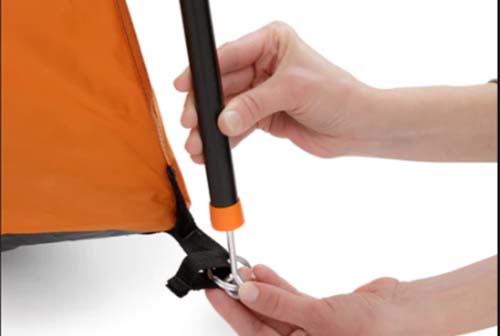
To Attach Poles to Corners:
Grommets:
Most modern tents have grommets (metal holes) on their corners. Simply insert the pole end into the grommet. In the picture below, the pole is going through the inner tent grommet and the groundsheet grommet.
Ring and Pin System:
Some tents still use the old “ring and pin” system. The pin does NOT go into the ground. Insert the pin inside the hollow end of the pole.
5. Put On Rain Fly
If you have a single-layer tent, then skip this step.
- Find the door on the tent fly.
- Toss the fly over the inner tent and pole structure so the door is in the right position.
- Attach the fly. Most modern tents have buckles for attaching the fly to the corners. Some have Velcro wraps underneath so you can connect the fly to the poles.
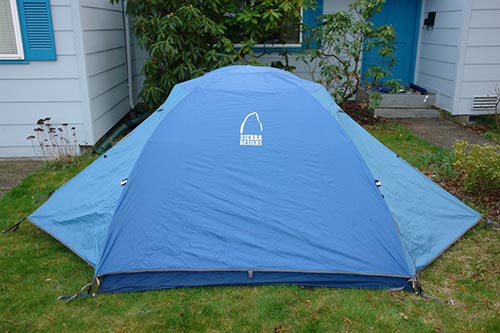
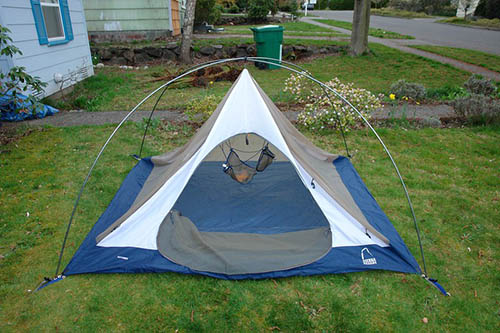
Tent with fly attached. This one has buckles for attaching the fly to the inner tent.
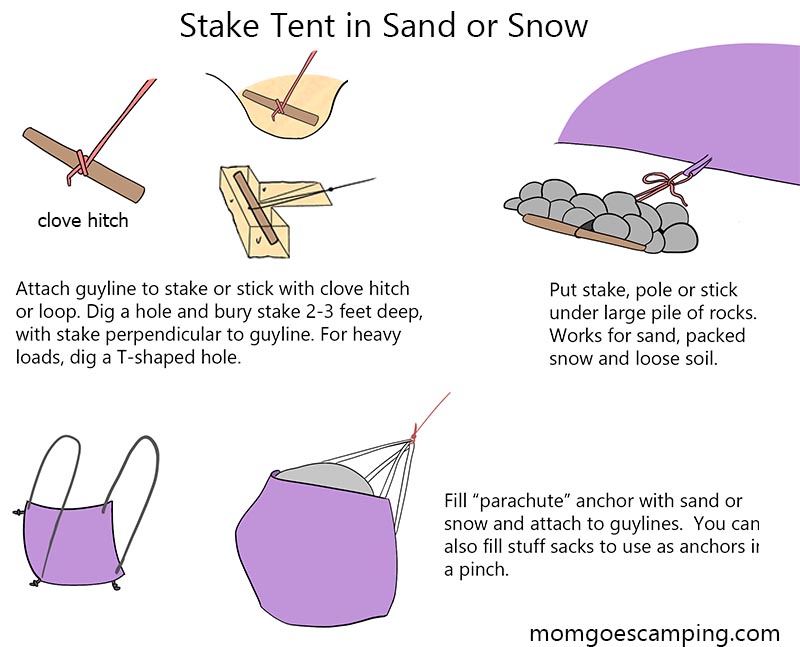
6. Stake Out Tent
Stake out corners first. Then stake out any walls and vestibules. If you are pitching in sand, snow, loose soil or difficult conditions, you may need to use one of the alternative staking methods shown below.
Also Read: How to Stake Out a Tent in Any Condition
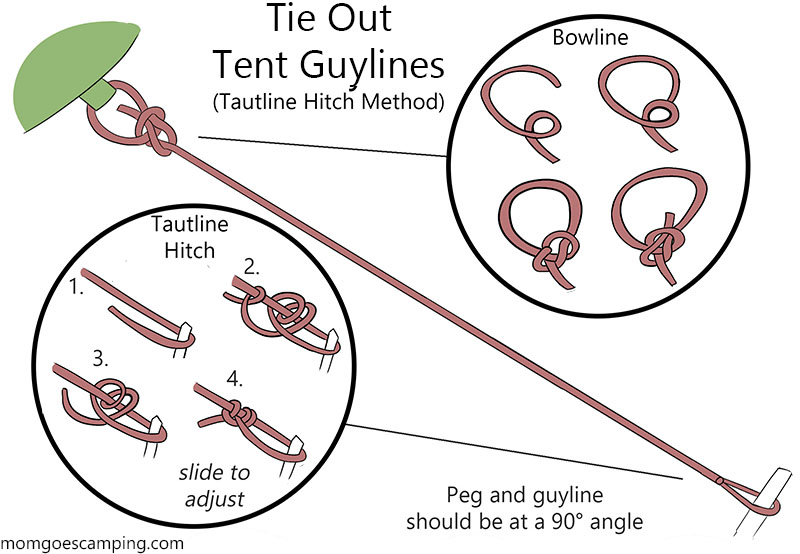
7. Tie Out Tent Guylines
Tent guylines add structure and support to the tent. To get good tension on the guylines, use an adjustable knot like the tautline hitch. See instructions for tying out tent guylines here.
8. Open Vents
If your tent has vents, open them. This will help prevent condensation in the tent.
Also read: How to Prevent Tent Condensation
Wants this info (and more) in PRINTABLE format? Get my
Camping Cheat Sheets: An Illustrated Manual
Since you made it to the end of this post, I’ll even give you a discount. 🙂
Click here to buy them for 50% off!
Image credits:
“DSC00175.JPG” (CC BY-SA 2.0) by RJL20,
“DSC00174.JPG” (CC BY-SA 2.0) by RJL20,
“DSC00168.JPG” (CC BY-SA 2.0) by RJL20,
“DSC00160.JPG” (CC BY-SA 2.0) by RJL20,
“Pitching the tent” (CC BY-NC-SA 2.0) by echobase_2000


Post your comments