
Tarp shelters can do a great job of protecting you from the elements so you have a nice night’s sleep – but only if you tie the tarp out correctly. Below, I’ll go over the methods you can use to tie the tarp ridgeline and guylines, what to do if a grommet or loop breaks, tensioning walls, and which tarp knots to use.
What Can Happen If You Tie Out a Tarp Incorrectly?
No, tying a tarp shelter isn’t as simple as draping the tarp over some rope! If you don’t get the ridgeline and guylines tied out with the right knots, you can have these problems:
- Collapsed ridgeline
- Sagging
- Loud flapping in wind
- Water dripping
- Stakes loosen
- Walls gradually lose tension
Tip: I recommend getting REFLECTIVE paracord so you don’t walk into your ridgeline or trip on the tie-out points at night. I’m speaking from experience here 😀 At the very least, choose a bright colored paracord — you will be less likely to lose it/forget it when packing up.
How to Tie Out a Tarp, Step-by-Step Instructions
1. Decide On What Setup You Want to Use
There are dozens of different tarp shelter setups. The choice comes down to the amount of protection you need from the elements and comfort.
For beginners, an A-frame shelter or lean-to shelter is probably the best choice. For more info, see: 27 Best Tarp Shelter Setups (with Pictures)
2. Hang the Ridgeline
The first thing you want to do is hang the tarp ridgeline. In the pictures shown here, I’ve shown a horizontal ridgeline between two trees. Some tarp setups require diagonal ridgelines, but the staking out method is the same.
Method 1: Fixed Ridgeline
- Find two sturdy trees. They should be approximately 10-15 feet apart, or a big further away than the length of your tarp.
- Tie rope end #1 around the first tree with a running bowline knot. Ridgeline height depends on the size of your tarp and how much headroom you want.
- Tie rope end #2 around the second tree with a tautline hitch. Tighten the tautline hitch to tension your ridgeline.
Also read: Tarp Knots
Method 2: Sliding Ridgeline
This method attaches the ridgeline directly to the tarp. You can then slide it into position. This is great for hammock camping because you can slide the tarp exactly over your hammock.
3. Tension Tarp on the Ridgeline
A lot of people just drape the tarp over the ridgeline. This is often a big mistake. The tarp will gradually slide down the ridgeline, causing problems like sagging walls. To prevent this, you need to tension the tarp on the ridgeline.
*If use made a sliding ridgeline, then you can skip this step.
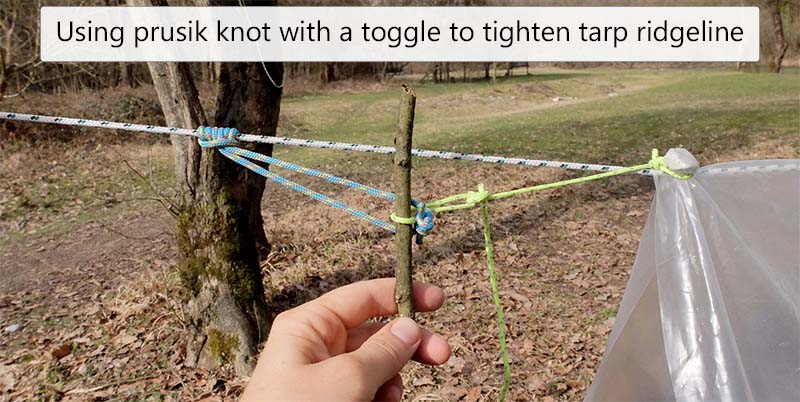
Prusik Knot Method:
- Tie a prusik knot around the ridgeline.
- Drape the tarp over the ridgeline. Make sure it is positioned properly!
- Tie the ends of the prusik knot around the tarp’s grommet or loop.
Don’t want to untie your prusik each time? You can also use a toggle stick, as shown in the picture below.
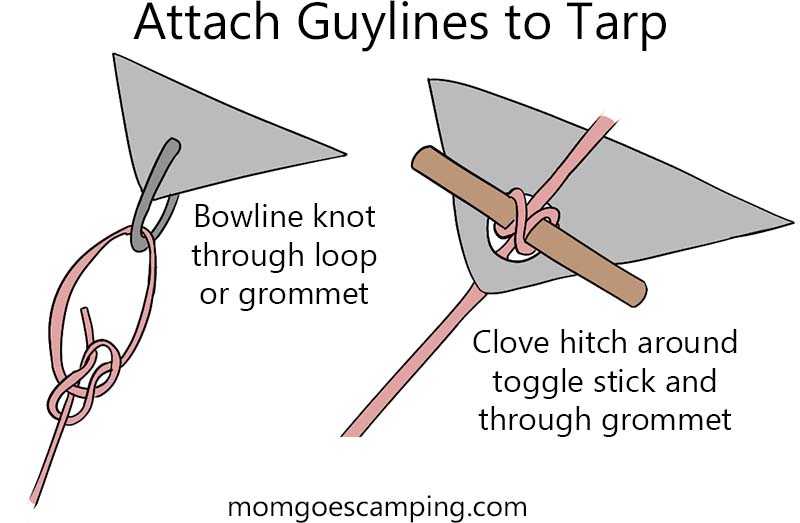
4. Attach Guylines
You may be able to stake some points of your tarp directly to the ground. However, it’s best to use guylines to tie and stake out the tarp.
The guylines give you some flexibility (such as if you discover there’s a big rock in the ground right where you need to stake out!). They also make it easier to tension tent walls.
To attach the guylines, first locate your tie-out points for your shelter setup. Then attach some rope. I like to use a bowline. You can also use toggle sticks, which allows you to remove the guylines easier later on.
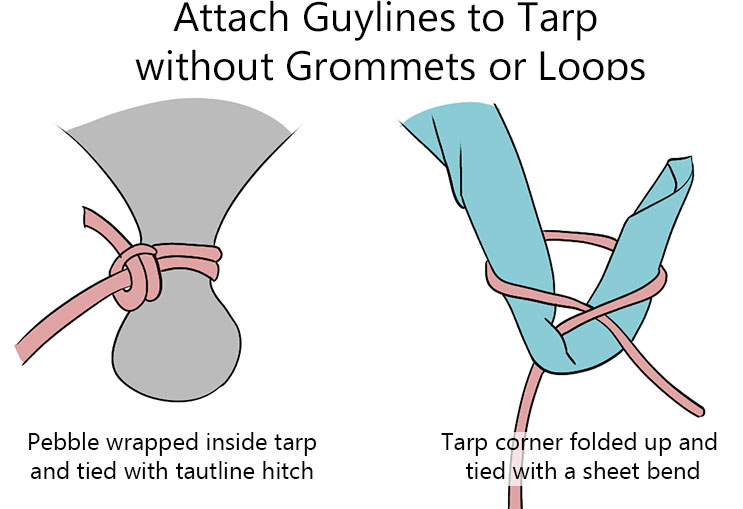
Tie Out Tarp with Broken/No Grommets or Loops?
Grommets and loops on tarps (especially cheap tarps) are notorious for breaking. Luckily, there are two easy fixes for this.
One option is to wrap something small and smooth (like a pebble) in the tarp corner. Then tie a tautline hitch around the pebble.
Another option is to use a sheet bend to tie the guyline directly to the tarp corner.
5. Tie Out Tarp Guylines
Like with the tarp ridgeline, it’s important that the sides of your tarp are taut. You’ll want to use an adjustable knot like the tautline hitch to get good tension on all sides. Otherwise your tent will sag. If not tied out properly – such as if your knot loosens – the shelter can gradually sag on you through the night.
- Tie a tautline hitch in the free end of the guylines.
- Pull guyline outwards. Get it into position so it is taut but not straining the tarp material.
- Stake out guyline. Put the stake through the tautline hitch you made. Then push stake into ground. Slide the tautline hitch up to increase tension around the stake.
- Repeat for all tie-out points.
- Adjust tension. Slide the tautline hitches to adjust the wall/ceiling tension of your tarp shelter.

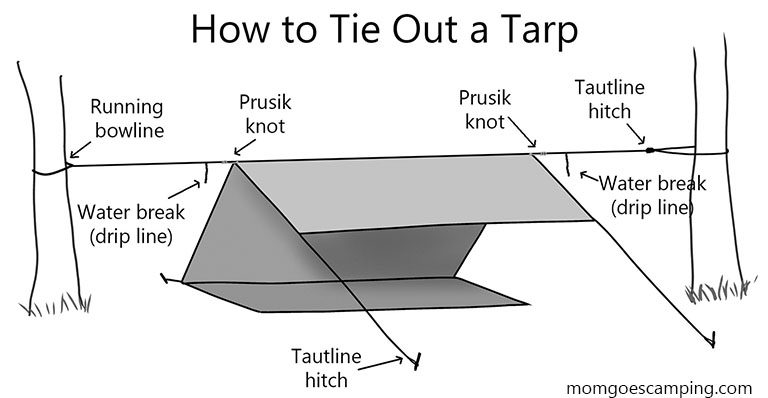
6. Attach Drip Lines (Optional)
A common problem with tarp shelters is that water drips down the ridgeline and falls into the shelter. To prevent this, you can tie “drip lines” to your ridgeline. Attach the driplines a inches from the edge of the tarp.
When you are all done, your tarp shelter setup should look like this!
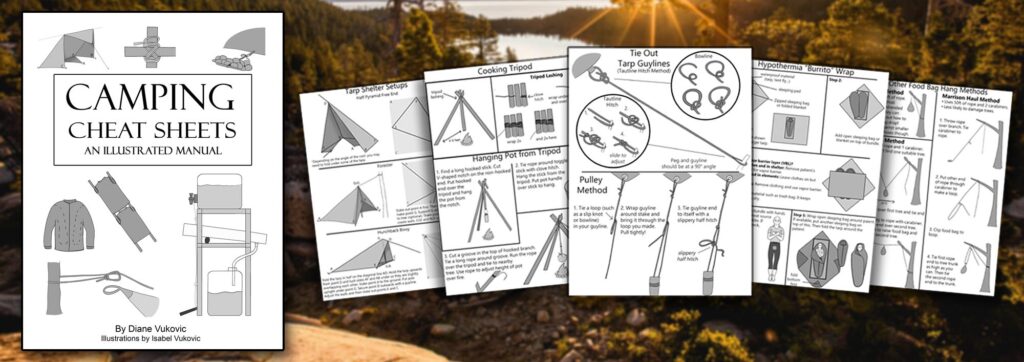
Want all this info in PRINTABLE format?
You need my Camping Cheat Sheets
The guide has over 42 pages with illustrated instructions for setting up a tarp, campfire cooking, wilderness first aid, and much more!
Since you made it to the end of this post, I’ll even give you 50% off 😀


Post your comments