
The first time I tried to sharpen a knife, I ended up with a really screwed-up edge and had to have a pro help me fix the blade…
Make no mistake: sharpening a knife requires skill!
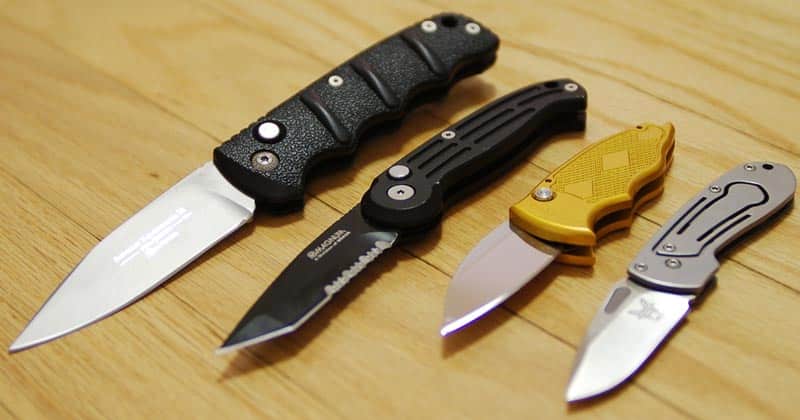
Good thing that it was just a crappy, generic knife. I didn’t mind that it got messed up. But now I’ve started buying better-quality knives that I can actually use outdoors (see these Top Outdoor Knives for Under $70).
I don’t want my precious blades messed up! So, I’ve compiled some pro tips for sharpening knives. These tips apply for all types of knives and blades. Happy sharpening!
Know Your Blade Angle
The most important part of sharpening a knife correctly is getting the angle right. To get the angle right, you’ve first got to know your angle!
You can look on the manufacturer’s page to find this info. Or, if you really can’t find it, Sharpening Supplies recommends these guidelines:
- Hunting Knives, Pocket Knives, and Survival Knives: 25 to 30 degrees
- Smaller Knives such as Boning Knives: 18 to 25 degrees
- Machetes: 30 to 35 degrees
- Razors and X-Acto Knives: 12-18 degrees
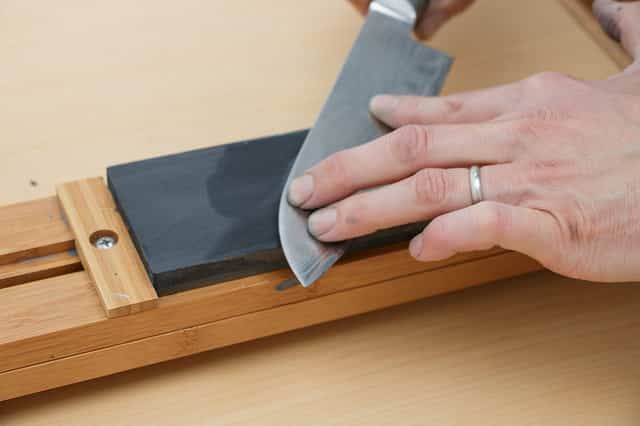
Start with a Whetstone
There are a lot of different types of sharpening stones out there. While ceramic and diamond stones might be superior to whetstones in a lot of ways, it is still best to go with a whetstone – especially if you are just learning to sharpen.
As Survival Sullivan points out here, diamond and ceramic sharpeners remove more material quickly. So, you’ve got to have a very steady hand and keep the angle perfect while using them.
By comparison, whetstones are much more forgiving.
An important thing to note is that you should never use a power-driven grinding wheel to sharpen your outdoor knife. While this may be alright for some kitchen knives, a grinding wheel will burn the temper off your blade!
Prep Your Stone before Sharpening
How exactly do you prep a whetstone?
- Clean the stone: All the shavings and oil on the stone can cause it to get dirty quickly. So clean it before you use it. Put it under some water and scrub it with an old toothbrush for a few minutes.
- Wet the stone: It is called a whetstone for a reason. You must soak the whetstone in water before using it for approximately 5 minutes.
- Stabilize the stone: Put a towel under the whetstone so it won’t slide around while you sharpen. Pros often make a holder for their whetstones, as shown in the picture.
- Add oil: You’ve got to put a bit of oil on a whetstone. This will help carry the shavings away from the stone, prevents friction and heat (which could warp the blade), and prevents the pores of the stone from getting clogged with shavings. Less than a teaspoon should suffice! Mineral oil is the most commonly-recommended oil for a whetstone because it is food-safe.
This whetstone has its own custom vice to keep it stabilized during sharpening
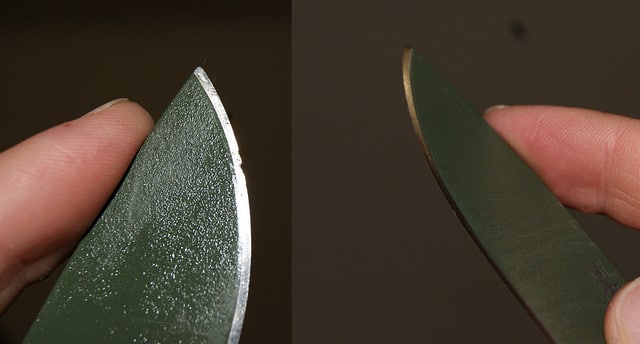
Use the Sharpie Trick
According to Buck Knives, it was Al Buck who came up with this trick – and it is probably the best knife sharpening tip you’ll probably ever hear is this.
You simply draw a black line over the knife bevel with a sharpie or permanent marker.
Then take a couple strokes with the knife over the stone. If you’ve maintained the proper sharpening angle, then all of the sharpie should be gone. If you haven’t maintained the angle, then you’ll still see black on the bevel.
- If there is still black on the bottom edge of the knife but the top is clean, then you are laying the knife too flat and need to increase the angle.
- If there is still black on the top edge of the knife but the bottom is clean, then you are holding the knife too high and need to lower the angle.
Start with the Right Grit
You might think that you always need to start with the coarser grit and work your way to the finer grit on the knife. But this isn’t always the case. Wilderness Today gives this advice:
- Knives with soft blades wear down faster. For these, start with a coarse grit and progress to a finer grit. But leave the edge rough since it wears down so quickly. You probably don’t even need to use your finest grit!
- Knives with harder blades, such as a Damascus knife, don’t wear down so fast. For these, start with a medium or fine grit.
This knife blade is soft and very damaged, so it will need a coarser grit.
Know When to Switch to Finer Stone
If you are starting with a coarser grit, you run the risk of over-sharpening your knife and taking away too much material.
How do you know when it is time to progress to a finer grit?
The key is in the burr.
As you sharpen one side, some material will build up on the edge of the knife. This is called a “burr” and is fairly easy to see while you use a coarse grit. The burr is harder to see once you’ve gotten to the finer grit, which is why some pros even wear magnifying glasses while sharpening!
Even if you can’t see the burr, you can still feel it. Never run your finger along the edge of the knife – you will cut yourself! But you can run your finger from the spine to the edge to feel the burr.
As you switch sides while sharpening, you should feel the burr switch from side-to-side. When you can see/feel this, it means it is time to move to a finer stone.
***Remember not to switch sides after each stroke. This will make it hard for the edge to build up a burr. Instead, use at least 5 strokes per side before switching.
Count Strokes
There is a lot of conflicting advice about how many strokes should be used per side before switching. In general, the experts say that you should use at least 5 strokes per side. If the knife is really dull, you may need upwards of 10 to 15 strokes before switching sides.
But the experts do agree on one thing: you must use the same number of strokes per side!
This ensures that you are taking away the same amount of material on each side. So count the strokes so you don’t accidentally do too many strokes on one side.
Sharpen Your Knives Before They Get Dull
The more dull your knives are, the harder they will be too sharpen (not to mention that using a dull knife is dangerous!). So sharpen your knives often! Remember, if you are using an assisted opening knife, it needs to be clean before you store it or it will get dull very quickly.
Get the Sharpening Motion Right
Use your dominant hand to hold the knife by its handle and place your other hand over the face of the blade (keeping your fingers away from the edge!).
Now you need to firmly apply pressure to the knife as you push or drag it along the whetstone in an arching motion. The arch shape ensures you get the entire blade to the stone. Gizmodo recommends imagining that you are trying to shave a very fine layer of stone from the top and move the knife as if it is slicing meat.
If you find that you are having trouble keeping a consistent angle, Buck Knives recommends using circular motions for sharpening.
- With the edge facing right, keep the edge on the surface of the stone and use clockwise motions (count them!).
- Turn the blade over for the edge is facing ledge. Now use the same number of counterclockwise motions.
- Repeat until you get the desired sharpness.
*Remember that you should hold the knife firmly but do not apply too much pressure! As Gear Junkie says, “let the stone do the work.”
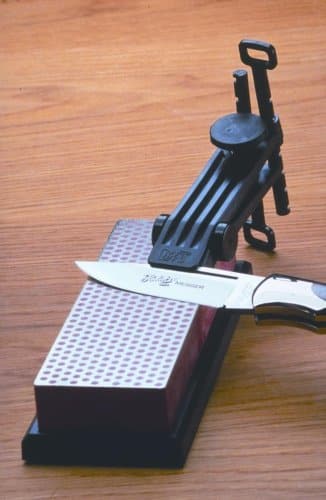
Get a Sharpening Guide

It takes a lot of practice to consistently get the angle right for sharpening a knife. Instead of torturing yourself, get a sharpening guide. There is no shame in using one of these (especially since you’ll have the most precisely sharpened knives of anyone you know).
To use a sharpening guide, you simply clamp your knife into it and set the angle. Then you glide the knife across the stone. It is a bit annoying that you have to reclamp the knife when you switch sides, but it is less annoying than struggling to get a perfect angle. 🙂
A good option is the DMT sharpening guide. It’s a lot cheaper than taking your knives to a pro for sharpening.
What knife sharpening tips can you add? Let us know in the comments?
Image credits:”sharpening” (CC BY 2.0) by michael pollak
“Sharpening with a Whetstone” (CC BY 2.0) by Didriks
“collection” (CC BY 2.0) by scottfeldstein


Post your comments