When hiking or backpacking in freezing weather, you run the risk of your water freezing. Even if the water doesn’t completely freeze, drinking icy-cold water can also cause problems since it will reduce your body temperature.
So, how do you prevent water from freezing while hiking in winter?
Here are some solutions for preventing water bottles from freezing, and the best water bottles and bottle insulators for winter.
Quick Answer
Your best choice for winter hiking is to get a wide-mouth HDPE Nalgene bottle or a Hunersdorf water bottle. Fill these with hot water and then insulate the bottle to keep the contents warm. You can also use an insulated thermos flask for hiking in winter. They are heavier but do a better job of keeping your drinks hot. Just make sure any thermos flask you use has a wide mouth and is easy to drink from with gloved hands.
Problems with Water Bottles when Winter Hiking
When going hiking in freezing weather, you have to deal with these potential issues:
- The water can freeze in your bottle
- Water can get into the cap threads or tube/mouthpiece (for bladders) and freeze, making it impossible to get open
- Drinking cold water will make you even colder
- It’s hard to open water bottles with gloved hands, which means you might not drink enough water while hiking and become dehydrated.
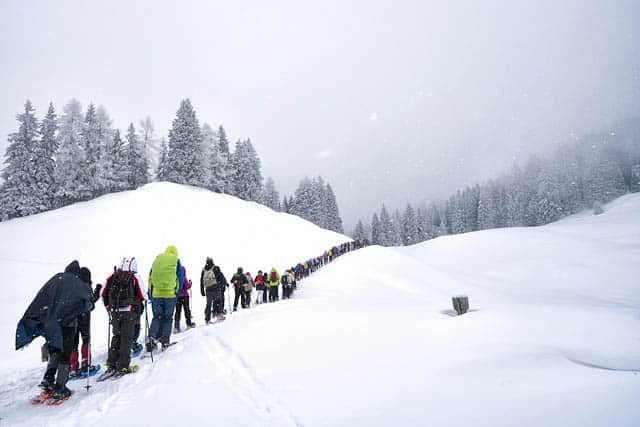
Winter hiking is beautiful, so long as you are prepared!
Best Water Bottles for Winter Hiking
Nalgene and Hunersdorf Bottles (Recommended)
Nalgene bottles are great for winter hiking because many have wide mouths. This means that you can easily fill them with boiling water. Don’t try to do this with a narrow-mouth bottle!
The downsides of Nalgene bottles in winter?
Some types of Nalgene bottles have been known to crack. If you get wet while hiking in freezing weather, this could mean hypothermia and death.
You MUST use a Nalgene bottle made from high density polyethylene HDPE. These won’t crack on you. They are also lighter than normal Nalgene bottles (3.75oz vs. 7oz). You can buy one here on Amazon.
Alternatively, you can use the Hunersdorf water bottle by Liberty Mountain. It is recommended by mountain guides since it can hold boiling water and won’t crack or leak. They are 1.5 liters and have a large cap which is easy to unscrew, even with gloved hands. Like Nalgene bottles, they are easy to clean. The only real difference is that they don’t have a piece of plastic connecting the lid to the bottle.
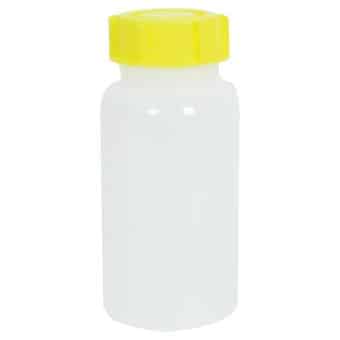
The Hunesdorf bottle, also called Relags bottle, is white with a yellow or white large cap.
Insulated Thermoses
There’s a lot of debate as to whether insulated thermoses and flasks are good for winter hiking. Some people swear by them because they allow you to keep drinks hot — and a hot drink will do wonders for warming you up while you hike. Others cite problems with them, like that insulated thermoses tend to be very heavy. Some have caps that are difficult to remove with gloves.
If you are going to use an insulated bottle for hiking, choose one which has a wide mouth and preferably a flip-top for easy access. A carabiner hook is also useful for attaching the bottle to your pack or jacket.
Some of the best thermoses recommended by winter hikers are:
- Thermos Direct Drink Flask: 470ml, weighs 10oz, wide mouthed, flip top
- CamelBak Forge Insulated: 500ml, weighs 12oz, wide mouthed, flip top,
- Thermos insulated bottle: 530ml, weighs 11oz, flip top, anti-slip grip on bottle
- Clean Canteen insulated wide: Various sizes, weighs 10.6oz (weight for 16oz bottle), wide mouth, carabiner hook
- Hydro Flash insulated wide mouth: These come in large sizes up to 64 fl. oz. They have carabiner hooks and are fairly weight light for their size.
Water Bladders
Some hikers do use water bladders in winter. The idea is this:
- Keep the bladder next to your back. Body heat should prevent it from freezing.
- Use an insulator for the bladder (like this one) and an insulator for the hose (such as this one).
- Each time you take a drink, blow into the hose. This ensures all water in the mouthpiece and hose goes back into the bladder so it won’t freeze (hose insulators simply don’t work well enough to prevent the hose/mouthpiece from freezing!)
The main issue with this hydration method is it is almost impossible to fill a water bladder with boiling water without burning yourself or getting wet.
There are some exceptions though, like the MSR DromLite bladder. It is wide mouth so easier to fill and it can take boiling water.
Wine Botas (aka Wineskin Bota Bags)
While I personally haven’t tried this, some expert-level hikers swear by wine botas. You can carry the wine bota under your parka next to your chest. Your body heat keeps it from freezing.
One hiker had this tip: Swap the carry strap for nylon webbing with a buckle that goes over your shoulder. Then you can remove the bota without having to remove your parka.
Note: Hikers warn that cheap wine botas should not be used, since they might leak. If you are going to go the bota route, pay the money for a good product.
PET Bottles (Not Recommended)
For 3-season hiking and backpacking, thicker PET bottles (the kind that bubbly water and Gatorade come in) are great. They are very cheap and incredibly lightweight.
I’ve heard of people making insulators for PET bottles and bringing them for winter hikes. However, there is a big problem: You can’t fill PET bottles with boiling water!
Since you will probably want hot water while hiking in winter, this is a HUGE drawback. Even if you don’t mind freezing yourself by drinking cold water, you also won’t be able to use the PET bottle for things like a boot warmer.
Non-Insulated Stainless Steel Bottles (Not recommended)
Don’t use a stainless steel water bottle when hiking in very cold weather. The metal can drastically change size when it is hot vs. cold. This means the lid might not fit well, causing it to leak. The only benefit of having a stainless steel bottle is that you can heat them directly on the fire (without the lid, obviously). Still doesn’t seem worth it though!
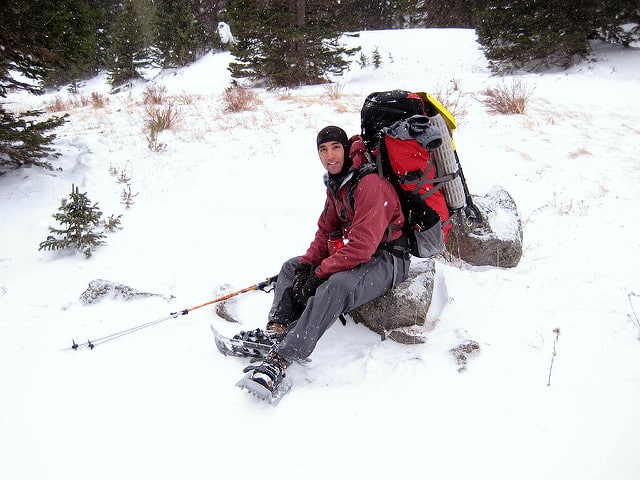
Taking a hydration break. Good thing Nalgene bottles are easy to open with gloves on!
How to Keep Water from Freezing while Hiking in Winter
There are a few solutions for keeping water from freezing while you hike in sub-freezing weather. Likely, you’ll need to use a combination of these methods.
1. Bottle Insulators
These are also called “bottle parkas” or “bottle jackets.” You absolutely need a bottle insulator when hiking in very cold temperatures.
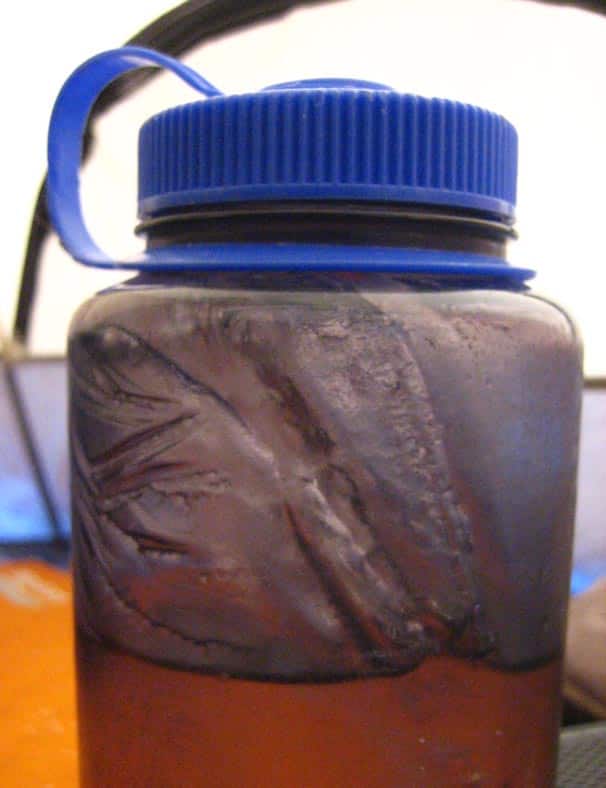
Even boiled water will get cold quickly without insulation around the bottle.
When choosing a water bottle insulator:
- It should insulate the lid of the bottle too. Otherwise the water around the cap threads can freeze. Unfortunately, most bottle sleeves don’t cover the lid.
- Avoid insulators which have to be unzipped. This means you’ll have to take your gloves off to access water.
- Get one with a carabiner clip. So you can clip it to your front backpack straps, where it is easily accessible.
Recommended Water Bottle Insulators
- Nalgene 32oz bottle insulator: It is one of the only water bottle insulators which also covers the lid. It zips closed but there is a large tab on the zipper so it’s easier to open with gloves on.
- Liberty Mountain bottle insulator: This one fits 32oz Nalgene bottles as well as the Hunesdorf bottles. The drawstring means it *might* fit some narrower bottles too. It doesn’t have a lid so isn’t the best insulator for really cold weather.
- Koverz 24oz and 32oz bottle insulators: These insulator sleeves are designed to fit narrower bottles like Camelbak 24oz bottles as well as 32oz bottles. They come in cool designs and have a removable carry strap.
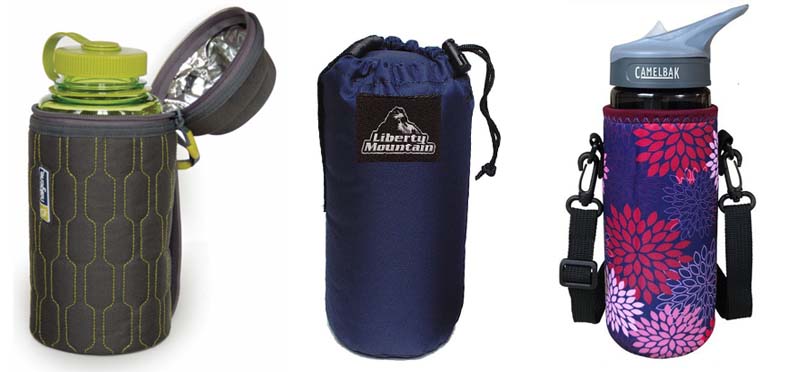
L to R: Nalgene, Liberty Mountain and Koverz bottle insulators
There are also a lot of ways to make a DIY bottle insulator, such as using:
- Wool sock
- Mitten
- Metal-coated bubble wrap
- Beer cozies
- Old foam-cell sleeping pad, cut and taped into shape
- Flexible insulation + duct tape for a hinge and Velcro to hold the top and bottom closed
2. Carry Water Bottles Near Your Body
If you keep water bottles near your body, they will generally stay warm enough not to freeze. Either keep them right along your back in the pack. Or put them inside your jacket.
Note that in really cold weather, even water carried near your back can freeze. Put boiling water into the bottles, use an insulator, and wrap it before placing it near your back.
*Put any other water bottles that you aren’t drinking from right away in your pack, next to your back, where they won’t freeze.
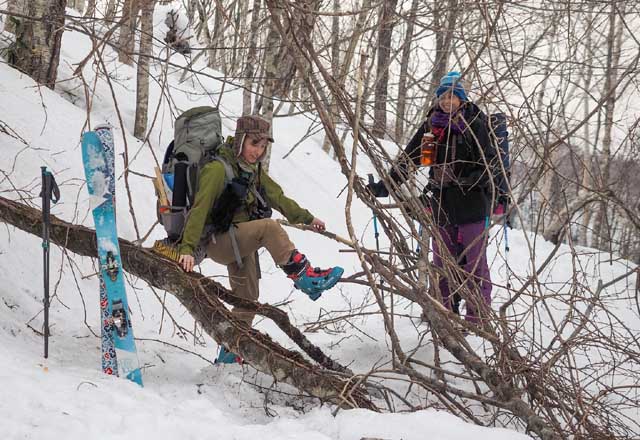
See how these smart skiers are carrying their Nalgene bottles on their front straps, where they are accessible. If the water isn’t accessible, you won’t drink enough.
3. Store the Bottle Upside Down
It might seem counterintuitive, but you should keep your water bottle upside down. If the bottle is right-side up, then tiny bits of water will be left in the cap threads. This water will quickly freeze, making it impossible to open your water bottle.
However, if you store the bottle upside down, then there will be lots of water sloshing around in the lid. This takes much longer to freeze. Plus, the sloshing motion will generally prevent freezing.
4. Sleeping with Your Water Bottles
A lot of people recommend pouring boiling water into your bottle before going to sleep when winter camping. Then you put the bottle inside your sleeping bag. This keeps you warm plus prevents the water from freezing.
But it is also risky.
You need your sleeping bag to keep you alive. What if the water bottle leaks or cracks? Not only will your sleeping bag be wet, but you will be too.
Instead, put your water bottle next to your feet on your sleeping mat. Or, take the precaution of putting your hot water bottle in a waterproof sack before you put it in your sleeping bag.
Also Read: How to Melt Snow for Drinking Water
What water bottle do you use when hiking in winter? Does it freeze? Let us know in the comments!
Some resources for this article:
https://backpackinglight.com/forums/topic/water-bottles-for-winter/
https://backpackinglight.com/forums/topic/44928/
https://outdoors.stackexchange.com/questions/766/how-to-carry-water-in-freezing-temperatures
https://sectionhiker.com/forty-belows-water-bottle-boot-system/
https://bushcraftusa.com/forum/threads/backpacking-with-a-thermos.182007/,
https://backpackinglight.com/forums/topic/98874/








3 Comments
Nick
August 17, 2020 at 1:49 pmFor water-bottle insulators with a zippered closure, it’s easy enough to add a zipper pull or short length of cord — as one would use to guy down a tent) — to the zipper to make it easier to grab with gloves or even mittens.
I attach them to all my zippers — on the tent, jackets, etc. — i use in the winter. And there are even reflective or glow-in-the-dark pulls and cordage which make the zipper easier to find in the dark.
And carrying water frozen in a cooking pot doesn’t seem like a good idea. There needs to be a bit of liquid water in the pot when melting snow or ice to avoid burning/scorching the bottom of the pot. If you try to melt a solid block of ice, the ice on the bottom melts firsts, and that water can vaporize quickly from the surface of the pot before more melt water from the ice can replace it, and the pot can scorch.
Diane
August 20, 2020 at 2:03 pmGood tip about the glow in the dark cordage. I wouldn’t have thought of that — definitely will make finding bottles easier
mdm
August 27, 2020 at 11:44 pmI’ve had good success using insulated steel bottles/thermos. I’ve got an REI thermos and a 26oz RTIC bottle. Used them in temps below 0F without issue. Sometimes I put tea/coffee in them other times cold or warm water. I’ve even boiled water in the morning, put it in the thermos….hiked till lunch and used the hot water to make a hot soup.
I’ve seen other hikers use similiar bottles. Never heard about issues with the metal contracting/expanding/breaking/leaking.