

For a long time, I got by without using a windscreen for my canister stove. If it was particularly windy, I would just make sure to set up the stove next to a tree stump or boulder to block the wind.
But, on my last backpacking trip, it was insanely windy. There were no natural wind shields on the bare terrain. I watched as the wind blew the flame several inches away from my cook pot. It took forever to boil water like that. So, I decided it was time to make a wind shield.
*Click here to jump to the instructions.
Why Use a Windscreen with Your Backpacking Stove?
If you’ve ever tried to calculate how much fuel to bring backpacking, you know it’s insanely complicated. You have to calculate things like: the fuel consumption of your stove, the fuel quality, cook time for your food, and the efficiency of your setup. Wind is one of the things that can ruin your setup’s efficiency.
How much fuel does the wind rob you of?
In a test performed by Tony Bushwalking, he found that it took more than 5x the amount of fuel (5g versus 25.4g per 80C water temperature increase) without a windscreen. Not only is that a lot of fuel wasted, but a lot of time too.
This isn’t the only study either. MSR reports that just a 5mph wind can cause you to use 3 times more fuel. An old Backpacking Light Magazine article found this too.
Fuel is expensive and bulky. And it’s a pain in the butt if you run out of it while on the trail (here’s how you can cook over a campfire if you must). So, it’s in your best interest to carry a windscreen. The weight of the windscreen balances out with the weight of fuel you are saving.
Are Windscreens Safe on Upright Canister Stoves?
The easiest way to make a windscreen is just to get a big piece of sturdy foil or ultralight metal. Then you wrap this around your entire stove setup. Voila! Wind blocked.
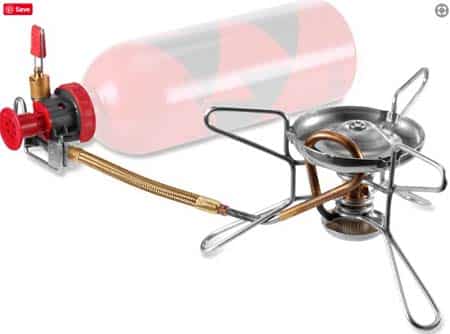
This setup works well with alcohol or solid fuel tablet stoves. It also works great with gas stoves where the burner is set apart from the canister via a hose, such as with the or (REI links).
However, windscreens on upright canister stoves can be dangerous. It has to do with how the windscreen traps heat and reflects heat back towards the canister. The canister can get too hot and explode! This is why manufacturer instructions advise against using windscreens with their canister stoves.
Some people still use wrap-around windscreens with upright canister stoves. The consensus is that if the canister is “ouch hot” to touch, then it is dangerously hot. That means you need to monitor the temperature of the canister by occasionally touching it while you cook.
It is completely safe to use wrap-around windscreens on alcohol stoves like this.
It is also safe to use wrap-around windscreens with stoves like this because the screen doesn’t go around the canister.
Not sure what to eat while backpacking? Check out my eBook. It has over 50 ultralight, calorie-dense, healthy recipes for the trail plus loads of info on planning backpacking meals. Learn more here.

Safe Windscreens for Canister Stoves
Instead of using wrap-around windscreens with upright canister backpacking stoves, you can adapt the design so it is safer. The key points to remember about safety are:
- The windscreen should not surround the canister, only the stove.
- Heat should be reflected up and not down onto the canister.
There are a few store-bought options for these safe windscreens. Optimus makes a clip-on windshield (Amazon link) that fits every EN417 (screw-on) gas canister. Snow Peak makes a (REI link). If you have a OD1R Micro stove, there is the Soto Micro Windscreen (Amazon).
You’ll notice that the designs on these are pretty simple: A piece of metal goes around the burner. So, I decided to mimic the design and see if I couldn’t make my own DIY windscreen for my canister stove.
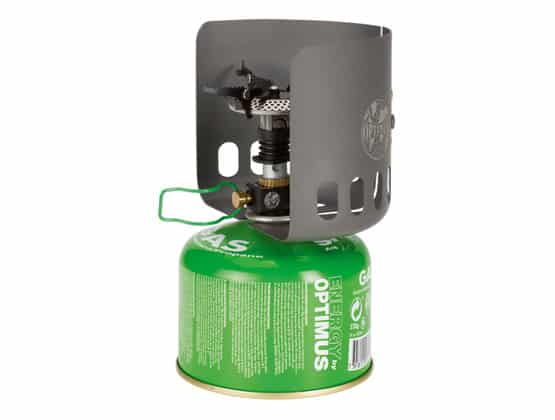
The Optimus windscreen attaches to any screw-on type gas canister. Get it here.
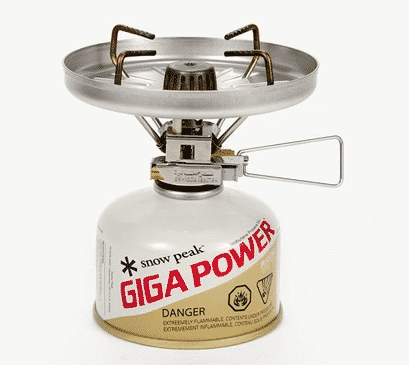
Snow Peak GigaPower stove with windscreen. .
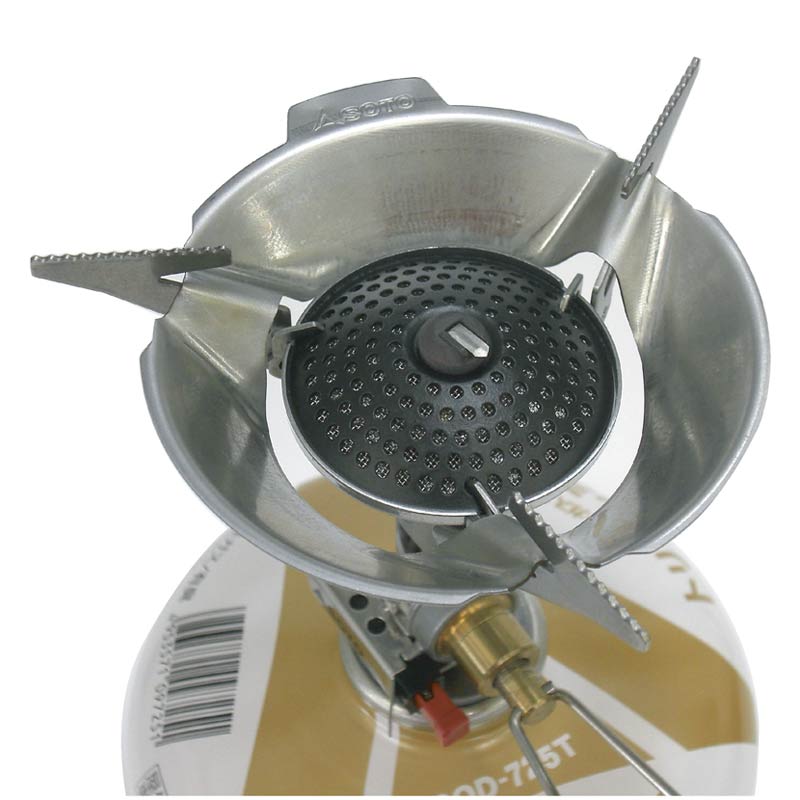
Soto Micro windscreen. Get it here.
DIY Stove Windscreen Instructions
Admittedly, it took me a few tries to get the windscreen right. The first couple of attempts didn’t work out. I’m going to talk about those failed attempts so you can figure out which DIY windscreen design makes the most sense for you.
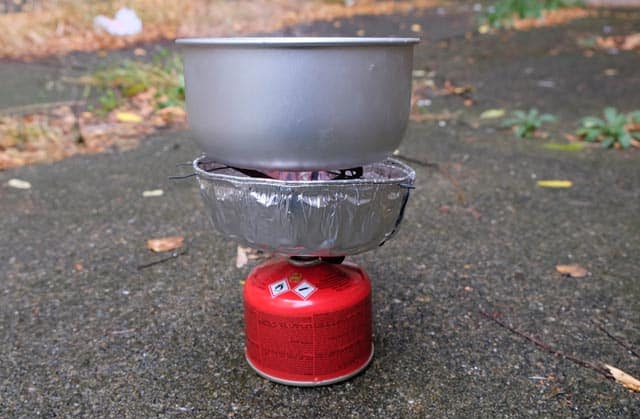
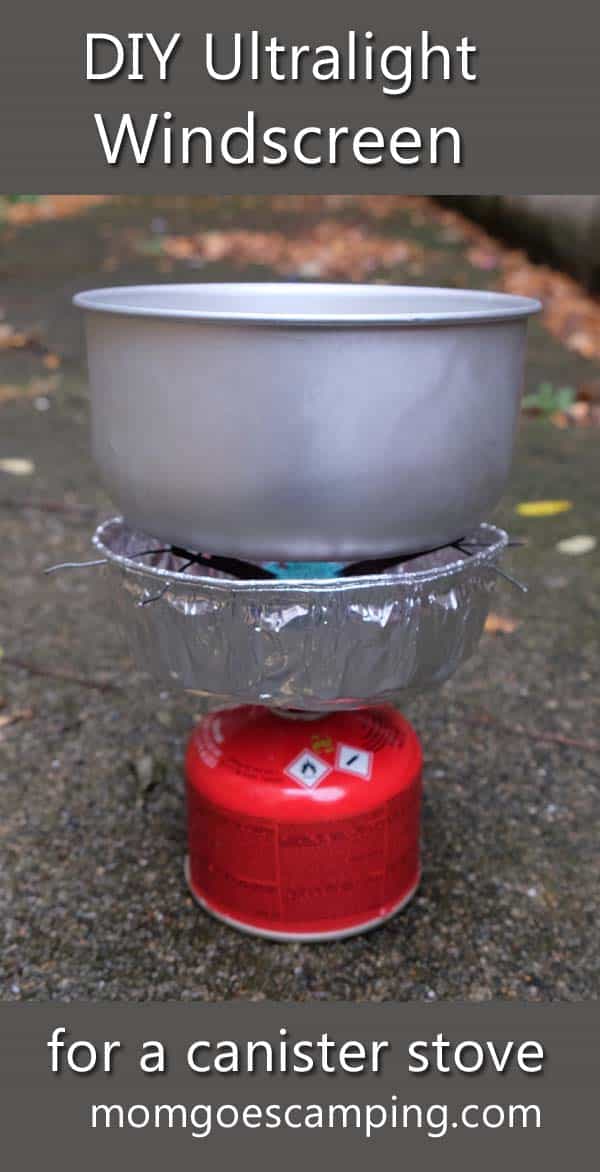
The successful DIY windscreen is made so it nests in my cook pot. It only weighs 16g (0.56 ounces!) so doesn’t really add anything to my cook setup weight (especially considering how much fuel it saves me).
Supplies Needed:
- Disposable pie tin (I used a 7-inch one)
- Scalpel (scissors or tin snips will also work)
- About 15 inches of sturdy metal wire
- A small piece of thinner wire or a couple of paper clips
- Cutting surface (I have an awesome cutting mat; some pieces of cardboard would work too)
Failed Attempt 1:
I first tried to make a clip-on style windscreen that goes right above the canister. To make it, I made some slits down the sides of the pie tin so I could bend it into shape. There were three problems with this design:
- The bottom of the windscreen ended up being really flimsy. It wouldn’t sit straight on the canister. I imagine that wind would just make it worse.
- Once you cut the top edge of the pie tin, it loses its structural integrity. I thought about using wire around the edge to make it stronger but it just seemed like a pain in the butt.
- Burner access: With this style of windscreen, you can’t access the gas control knob. The solution is to leave a portion exposed. However, this didn’t seem possible with flimsy tin.
For this to work, you’d have to get a sturdy material. This guy used 0.004 stainless steel to make a conical windscreen. Personally, I’d rather just buy a windscreen than go to the trouble of getting stainless steel and worry about slicing my fingers apart while cutting it.
Attempt #2:
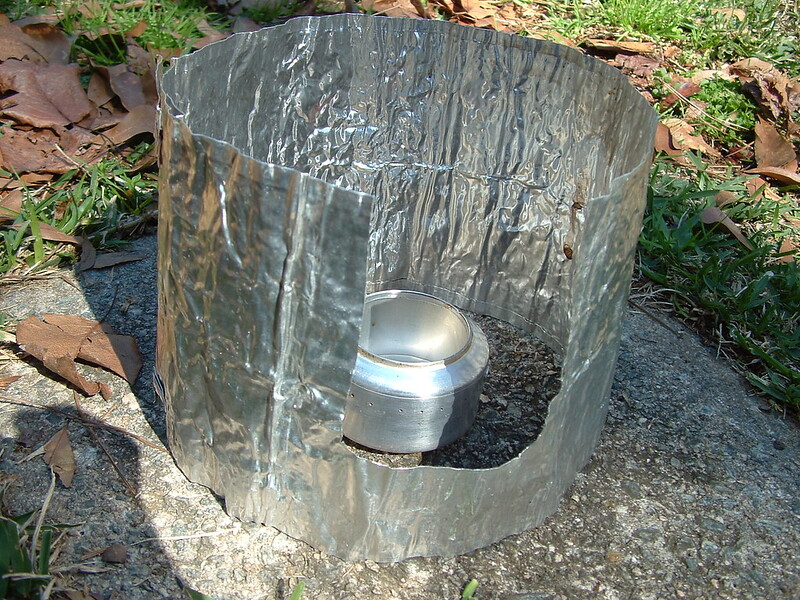
This version was based on this DIY windscreen design at The Trek. With that design, a piece of metal is wrapped around the stove (but not the canister). It is held in place with metal hooks placed in the existing holes in the stove.
The difference with my design is that the pie tin keeps its bottom, so it also reflects heat upwards to the pot.
The issue with this design is that you have to attach the windscreen to the metal hooks on the stove. It’s actually not that big of a deal. However, those hooks would definitely get HOT. What if I wanted to pack up the stove immediately after using it? I’d have to wait for the hooks to cool down first.
This issue led me to think of a solution where I could attach the windscreen through the holes in the stove but without burning my fingers.
DIY Windscreen Instructions:
Here are the instructions for the windscreen which I ended up using. While I haven’t tested how much time/fuel it saves me in windy conditions, it definitely does a good job of blocking wind and making my cook system more efficient. The idea to use wires through the existing holes in the stove came from here.
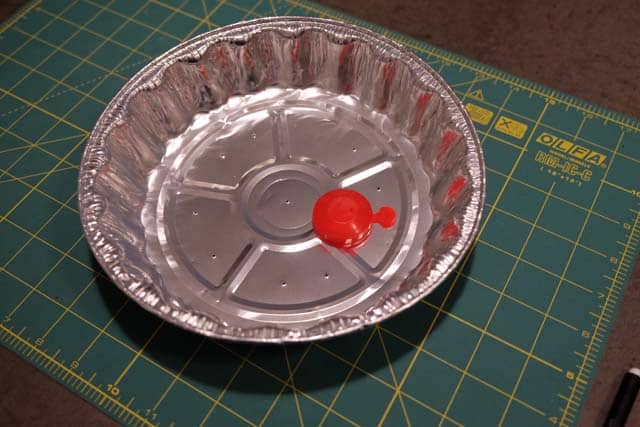
- Flatten the edges of the pie tin as best as you can.
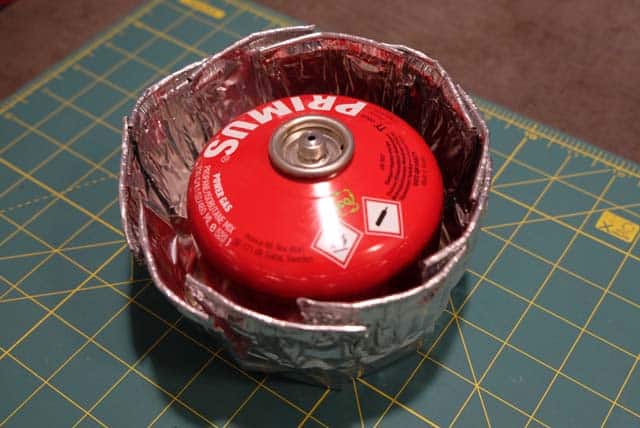
- Cut a small slice out of the pie tin. You need to do this so you can bend the pie tin into shape. My cook pot is fairly wide (6 inches across), so I only removed a small slice out of the tin. Start with a small slice and remove more if necessary.
- Carefully push the pie tin into your cook pot. This is done so the windscreen will nest in your pot. There will be some crinkling and overlapping of metal on the bottom. This is ok. Just try to keep the upper edge of the pie tin as straight as possible. You don’t want one side to be much higher than the other.
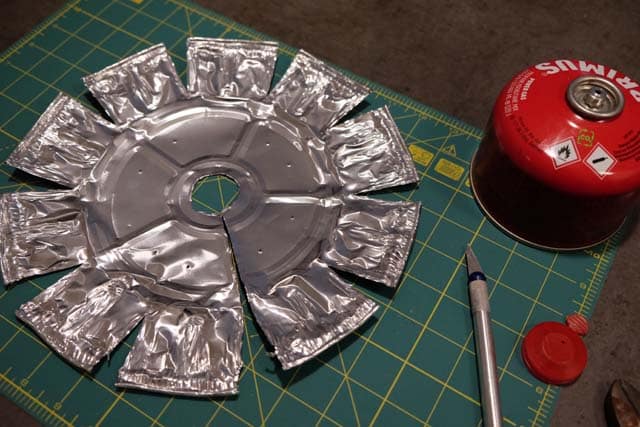
- Use wire or paper clips to hold the windscreen together. It should be completely round now and fairly sturdy.
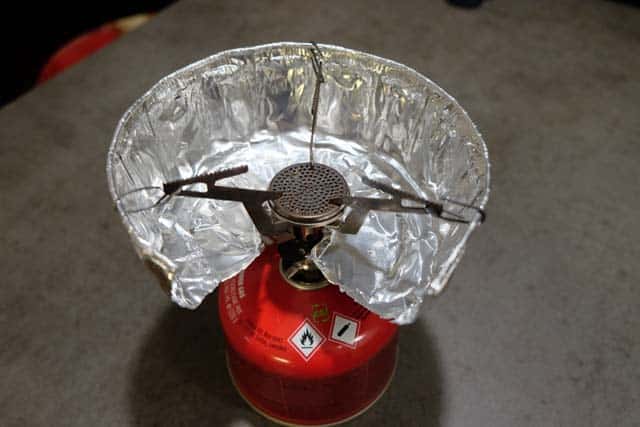
- Cut a hole in the middle. The hole should be shaped so your stove can fit through it (while the stove is folded). Try to keep the hole as small as possible.
- Put the windscreen on the stove. It will flop over a bit. The next step will fix this problem.
- Use sturdy wire to attach the windscreen to the stove. I wasn’t too precise about this. I just poked the wire through one side of the windscreen, through holes in two “arms” of the stove, and out the other side of the windscreen. Do this three times. Now your windscreen should be sitting in position.
Optional: Add air holes
It seems counterintuitive to add air holes to a wind screen. However, if enough air doesn’t get to the stove, then the flame will go out. Even if the flame doesn’t go completely out, it might not be burning efficiently. That’s why the store-bought windscreens have holes in them.
How do you know if you need air holes? The stove flame should always be BLUE and not orange. Orange flame is a sign that the stove isn’t burning efficiently and is producing carbon monoxide. It can be deadly!
With my windscreen, I didn’t add any air holes. Enough air was already getting through from the bottom hole and the gap between the windscreen and pot. If your windscreen is taller and goes all the way up around the pot, you may need air holes. Just check to see if the flame is orange and if it’s staying lit.
Squishing the pie tin into my pot so it nests nicely.
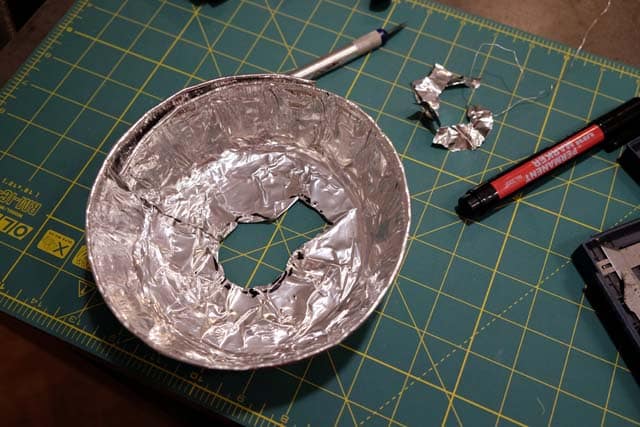
Cutting a hole for the stove to go through in the middle.
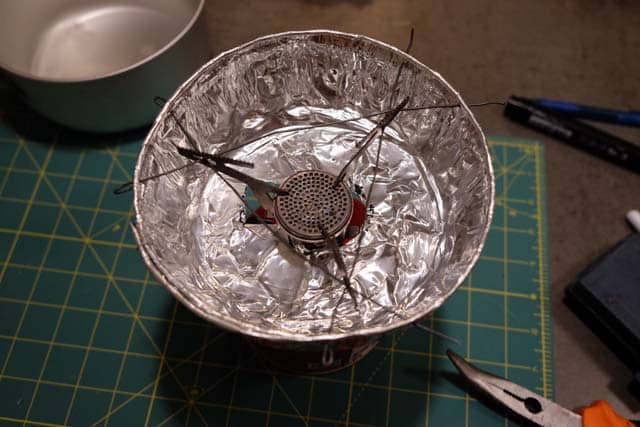
Inserting wires to hold the windscreen in place.
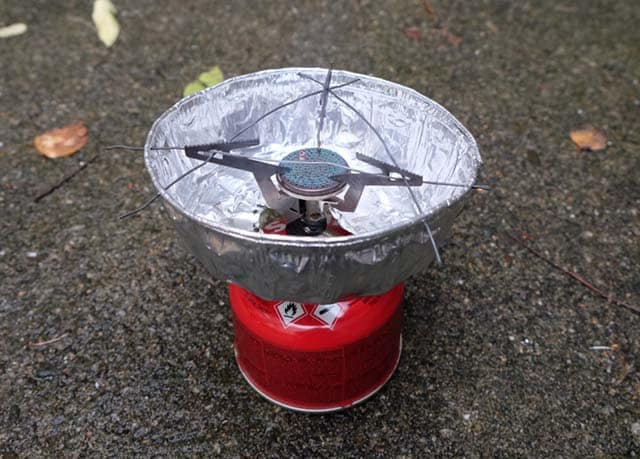
Testing the windscreen on a windy day.
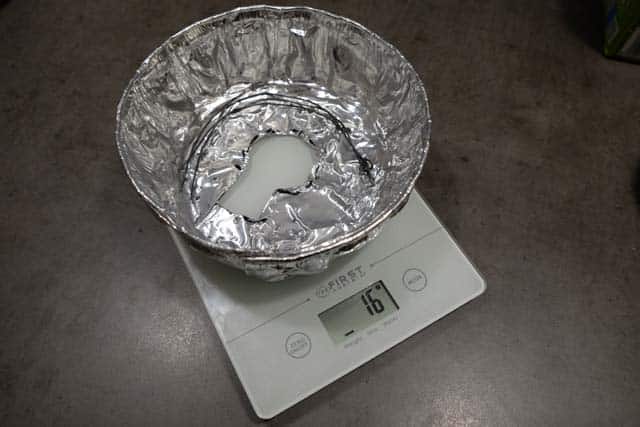
Total weight was just 16g (0.56oz)!
Important:
This DIY windscreen worked really well for me. However, you should always test gear before taking it on a trip! After making your windscreen, take it outside (don’t use it inside; CO poisoning is a serious risk!) on a windy day. You could even set up a fan to see how it holds up against serious wind. I also stuck the windscreen directly into the flame for a minute to make sure the material wouldn’t melt or catch fire.
If you don’t feel like making your own windscreen, you can get the clip-on windscreen by Optimus here. It works on any standard screw-on gas canister–but you must have a narrow pot. Wide pots won’t fit inside it!
Have you made your own windscreen for a canister stove? Let us know in the comments if you have any tips or ideas!
Image credit: “Alcohol Stove with Windscreen” (CC BY-NC 2.0) by stusic
Pin this if you like it!


8 Comments
john
May 10, 2022 at 12:51 pmhi, i think if you poke some reasonable size holes in the bottom of the dish/wind break the flame can breath and be more efficient. The flame may become more blue in colour also? Just a thought.
Annie
June 23, 2022 at 3:55 amDifferent brands of pie tins might be different. Mine (pillsbury) melted when I tested it…
Diane
June 23, 2022 at 9:24 amGood thing you tested it first!
Bill T
April 14, 2023 at 6:48 pmDiane’s instructions worked very well. However, rather than cutting a hole in the middle and removing the material, I ended up cutting slots away from the center so that I could fold triangles downward to make an opening while leaving the material attached. Once fitted over the stove, I was able to fold the pieces back towards the stem to hold the windscreen in place. This eliminated the need for the wires to stabilize the windscreen.
Diane
April 15, 2023 at 2:31 pmThat is a smart design update! Thanks for sharing
tirod
June 18, 2023 at 2:00 amThere’s some question about why a windscreen would initiate an explosion of an Isobutane canister. The flame is directed up, as the gas is released it cools the canister – a known issue for winter camping. A cook pot can reflect some heat downward yet that isn’t a known issue of any regard when in use.
I’m thinking the lack of any credible source for this is based on legal weasel language where someone somewhere could possibly misuse one by defeating common sense.
Some facts: Isobutane flame temps run over 3,000 F, yet that won’t melt a cook pot, which are frequently aluminum, stainless steel, or titanium. For the most part users are attempting to prevent more than 212F as anything above that burns food.
Searching online there are two prevalent videos portraying an explosion, one is using a tall vertical butane canister used inside camp stoves and what happens when thrown into a campfire. The others are shooter video related as part of a gaming scenario, not reality. Neither is a valid use situation any more than putting a 20# gas grille tank into a bonfire. Absent anyone showing what the actual canister temps are in use with/without a screen, precaution is a good thing to exercise, but stating “it can’t be done safely” would then imply we can’t use them at all.
Im wondering if it’s not just more internet lore being passed around to benefit the industry. Cant have people knocking out turkey pan windbreaks for almost nothing when all the major campstove makers offer windbreaks for $$.
Diane
June 18, 2023 at 1:09 pmI hear you — but the fact that no brands sell wind screens for canister stoves which enclose them is (IMO) a sign that this one might not be lore. Otherwise, they’d just take their alcohol-type wind screens and rebrand them as screens for canister stoves. I’ll stick to my DIY solution rather than risk an explosion in the backcountry!
TravellingBones
September 3, 2023 at 1:24 amNice idea! I maybe improved this a bit?heres my design:
I used a 9in pie plate, disposable but seemingly thicker aluminum. Cut it are 12 o’clock to center and at 4 o’clock to center and used the 60% partition. Cut out a semi circle around the center to about 1.3 inches from the crippled sides. Then curl like a funnel and pin it together w some wire. I made little wire loops for the top to hang on the stove arms.