
Campfire cooking can be one of the best parts of camping and outdoor gatherings. Food simply tastes better when it’s cooked on a fire. At the very least, you enjoy it more.
Knowing how to cook over a campfire is also a useful skill to know. If your stove runs out of fuel, you will still be able to cook meals.
There are many ways of cooking over a campfire, and some methods are better than others depending on the food, meal type and what equipment you have available.
Here I will go over the ways to cook over a campfire, their pros/cons and what equipment you need.
Do You Need Special Equipment for Campfire Cooking?
No, you don’t need any special equipment like cast iron or grill racks to cook over a fire. Humans have been using fire to cook for 2 million years and some of these primitive methods still work wonderfully.
That said, having certain equipment can make campfire cooking easier.
For example, cast iron can go straight into the fire without worry that the handle will melt. Tripod stands reduce worry that your pot will fall off its hook.
The more complex and larger your meals, the more likely you will want some equipment to make cooking easier.
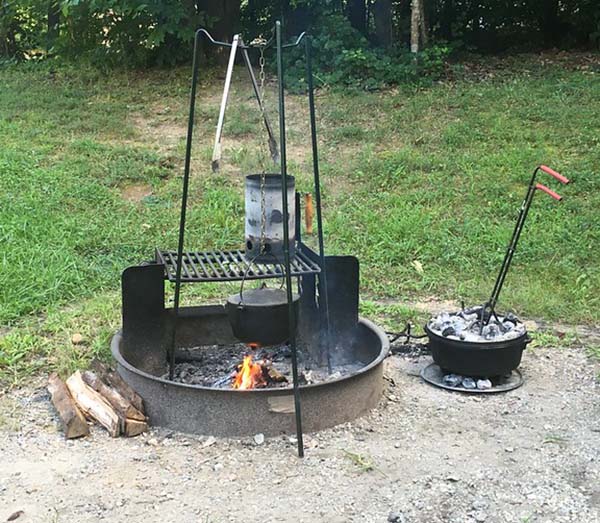
This campfire cooking set consists of a grill rack, tripod and cast iron Dutch oven.
Image credit: “camp cooking” (CC BY 2.0) by vastateparksstaff
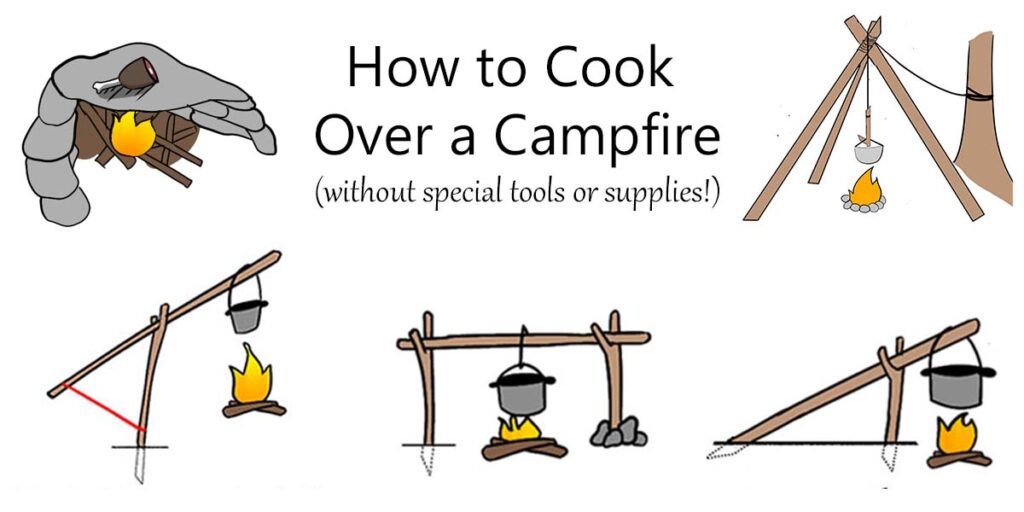
How to Cook Over a Campfire
1. Grill Rack
- Best for: Wide range of foods
- Pros: Readily available at many sites. Can cook directly on rack or use it for holding pots and pans over the fire.
- Cons: Gets dirty and hard to transport.
A grill rack is one of the easiest ways to cook over a campfire. Many campsites and picnic areas even have grills built over the fire pits. Otherwise, you can buy a cheap wire rack or even use the rack from your kitchen oven.
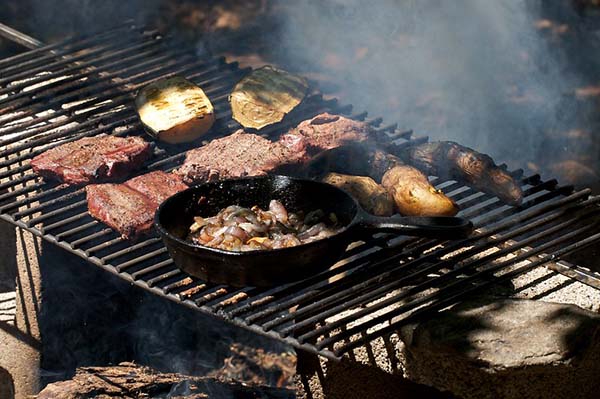
Grills racks are typically used for meat, fish, large vegetables and foil pouches.
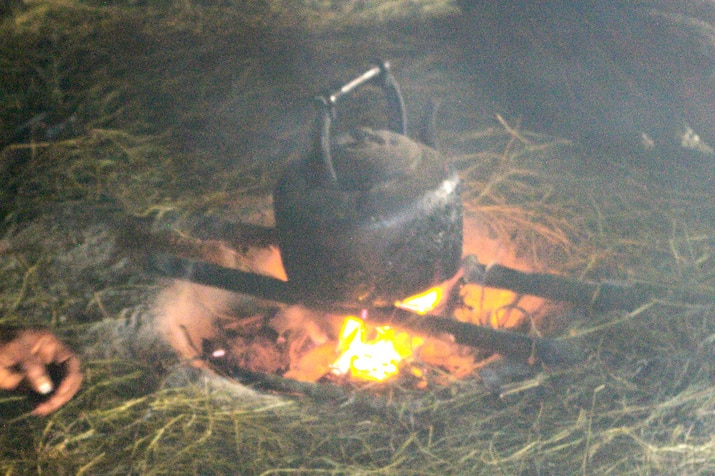
2. Cooking Cranes
- Best for: Slow-cook meals in a pot (soups, stews, beans…)
- Pros: Easy; can adjust height of pot over fire
- Cons: Pot must have handle, learning curve
A cooking crane suspends a pot over a fire. There are several ways to make these. The key is to make sure the “crane” stick is anchored securely. You don’t want it to fall down, bringing your entire pot of food with you!
To use a cooking crane, you need a pot which has a hanging handle. But don’t use a pot with an insulated handle! The handle will melt if you put it too close to a campfire! For one person, I like the Toaks Titanium Cook Pot (750ml, 3.9oz).
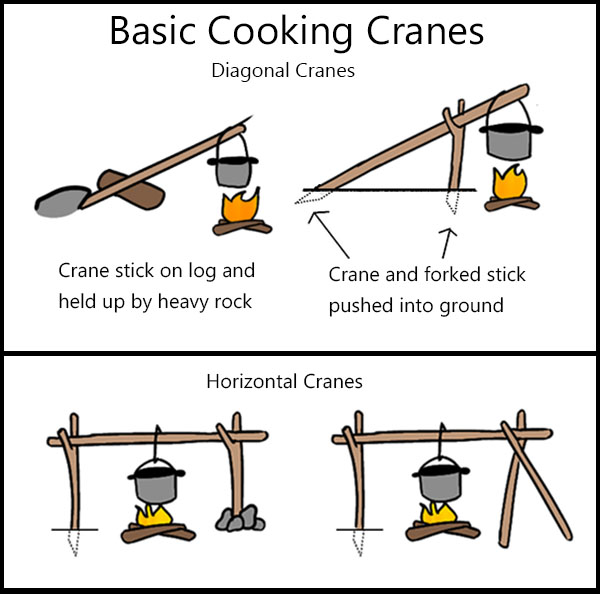
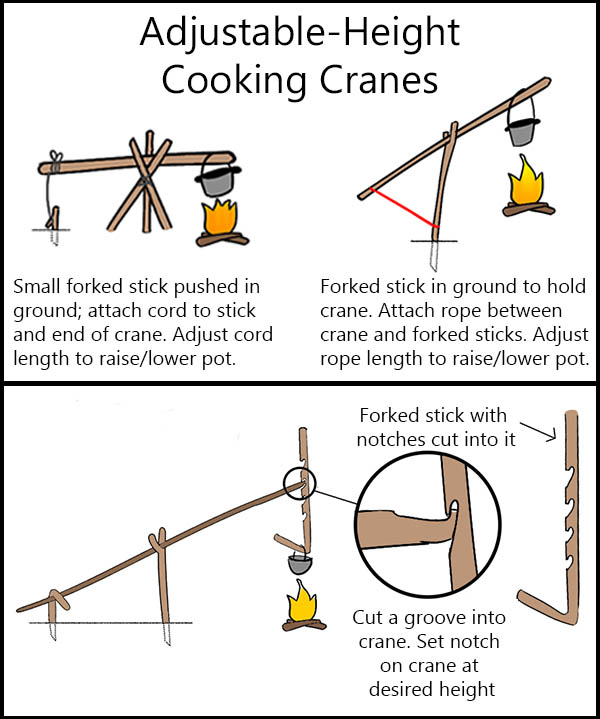
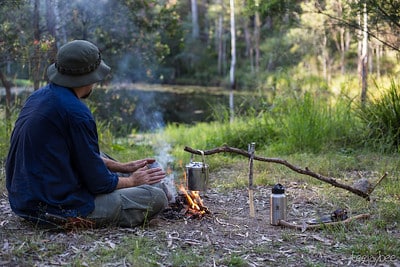
A pot hanging off a small cooking crane

You can even make an adjustable-height pot hanger for your crane out of sticks
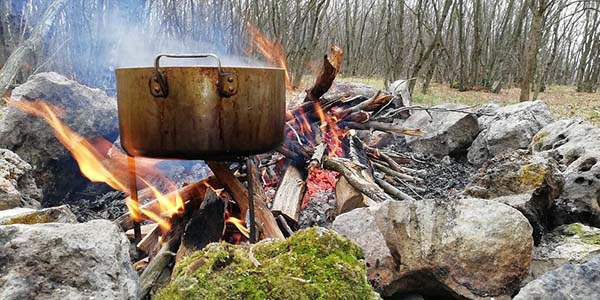
3. Cooking Tripods
- Best for: Slow-cook meals in a pot (soups, stews, beans…)
- Pros:Easy to make; can hang large pot
- Cons: Pot must have hanging handle
A cooking tripod is used to hang a pot over a campfire. Like with a crane, you’ll need to use a pot which has a hanging handle. It’s a bit easier to adjust the pot height with a tripod though.
While it’s possible to make a small cooking tripod, this method is best for large pots or meals which require lengthy cooking. Think soups, stews or beans.
For more info, read: Guide to Campfire Cooking Tripods
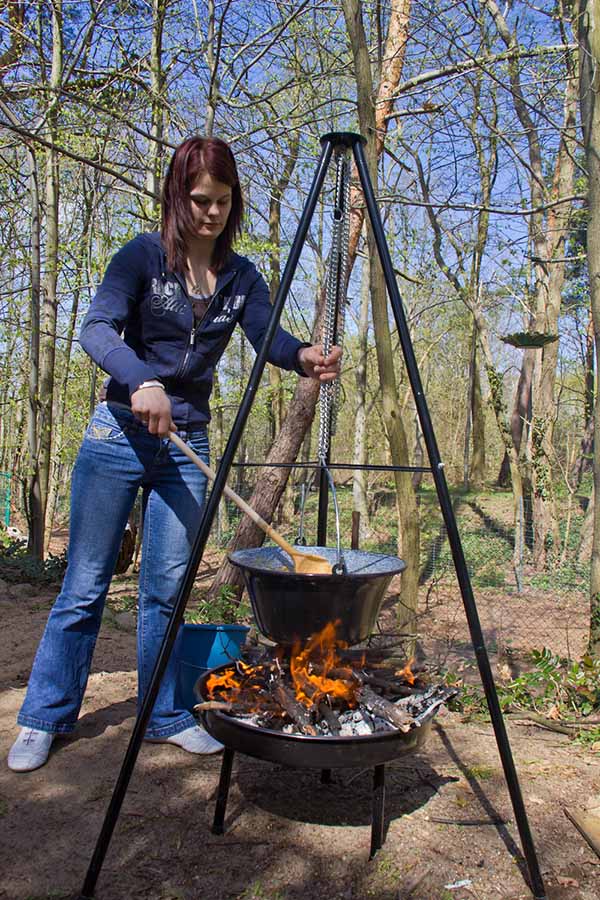
You can buy metal cooking tripods like this one.
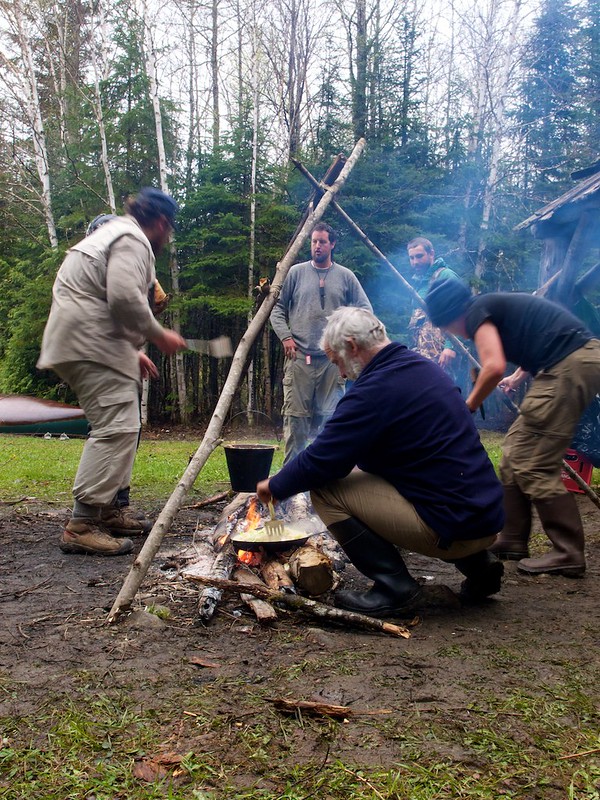
You can make a cooking tripod out of three long, sturdy sticks tied together with rope.
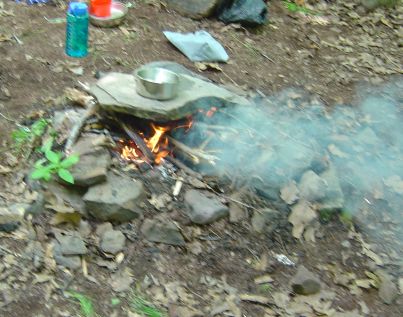
4. Cooking Stand
- Best for: Soups and stews
- Pros: Low learning curve, adjustable to size of pot/pan, blocks wind
- Cons: Bottom of pot can easily burn; ashes get into food
A pot stand simply holds your pot or pan over the fire. You can buy pot stands or make one yourself out of rocks, logs or even mud. Simply space the stand so it fits your pot.
While easy to set up, cooking with a pot stand can be tricky. The pot is usually very close to the heat, so the bottom of your pot can burn. Ashes get into your pot if you add more wood or blow on the fire.
For these reasons, it’s best to use pot stands for liquid meals which are cooked with a lid on, such as soups and stews.
A store-bought campfire cooking stand
This cooking stand was made out of rock and clay
5. Trench
- Best for: Quick cook meals in a pot or pan
- Pros: Blocks wind, use multiple pots or pans at once
- Cons: Risk of spilling pot/pan; poor airflow
To make a cooking trench:
- Dig a hole in the ground. If you want to use multiple pots/pans at once, then dig a longer, narrow trench.
- Make a fire in the trench. Let it burn down so you have a good bed of coals.
- Put thick branches over the trench. These will serve as your pot/pan stand.
- Set pot or pan on branches.They serve as your pot stand.
- Replace branches. If the branches start to burn down, then you’ll need to replace them or the pot will fall over.
Alternatively, you can dig your trench so it is slightly narrower than your pot. The upper walls of the trench will serve as a pot stand. However, the pot blocks airflow and access to the fire, so it’s harder to control.
Below is a picture of how the trench campfire cooking method looks in real life.
6. Frying Rock
- Best for: Meat, fish
- Pros: Don’t need a pot or pan
- Cons: Potentially dangerous; hard to find suitable rock
With a frying rock, you cook the food directly on a hot rock. It’s great for frying food (hence the name). However, it’s not always easy to find the right rock. Wet rocks can explode, so you need to be cautious.
To make the frying rock:
- Find a large, flattish rock. Do NOT use rocks which were in or near water. The water can expand in the rock and explode!
- Prop the rock up. You can prop it on logs or other rocks. You can even build a C-shaped wall to hold the rock; the wall will block the wind. The frying rock needs to be approximately 8-12 inches from the ground.
- Make a fire under the rock. If you are scared that the rock will explode, stand back at least 100 feet, wait and see!
- Oil your food. Ideally, you oil the food before you put it on the rock. There’s no point in oiling the rock as it will get absorbed too quickly.
- Cook on top of the rock. When the rock is very hot, put some food onto it.
7. Coal Roasting
- Best for: Foil packet cooking, potatoes
- Pros: Very easy
- Cons: Takes a long time
Instead of cooking over the campfire, you can bury food in the coals. Ideally you would put the food in foil packets to keep them from getting ashy, but you can also put foods with thick skins like potatoes directly into the coals.
If you don’t have foil to wrap the food in, you can theoretically wrap it in natural items like leaves. In practice though, this is difficult because the food will inevitably fall out of the leaves, causing it to get covered in ashes. It’s important that the leaves are non-toxic. When it doubt, don’t use them!
To cook over coals:
- Make a fire. Keep feeding the fire until you’ve got a large bed of coals on the ground. When in doubt, make more coals!
- Push some coals aside. Using a stick, move some of the bigger coals off to the side of the fire pit. This lets you keep the rest of the fire going in case you need new hot coals.
- Put your food packets on the coals. You can also pile coals on top of the food packets.
- Be patient!Coal roasting takes time.
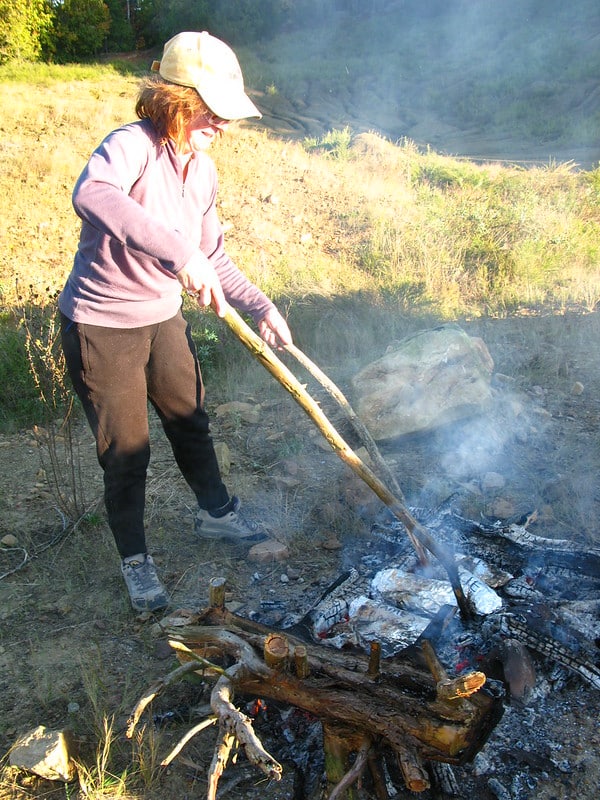
Using long sticks to flip the foil packets on the coals
8. Skewers
- Best for: Small pieces of meat and vegetables, hot dogs
- Pros: Low learning curve, easy cleanup, no equipment needed, quicker cooking
- Cons: Food must be cut into small chunks, not for large amounts of food
Skewers are wonderful for cooking small pieces of tender meat or vegetables. Smaller pieces means more surface area, so the food is cooked faster. It gets nicely charred on the outside while being soft inside. However, it requires some prep time to chop all of the foods uniformly for the skewers.
You can buy long skewers for campfire cooking. If you have a good outdoors knife, you can also make your own skewers from long sticks. Cleanup is easy because you can just throw the skewers into the fire when you are done.
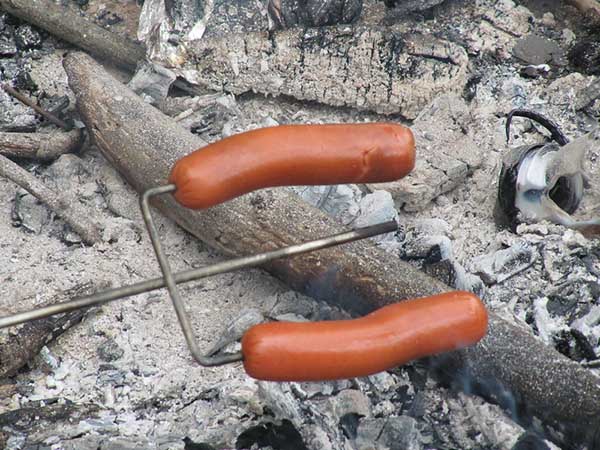
Hot dogs – a camping staple – are also great on skewers.
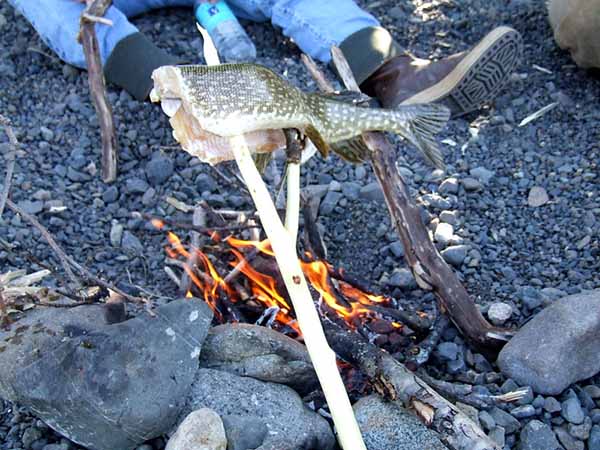
Or roast fish on DIY skewers from sticks
9. Spit
- Best for: Fatty cuts of meat, cylinder shaped cuts (such as lamb leg), whole animals
- Pros: Low effort
- Cons: Need large fire, takes a long time
The spit is one of the oldest methods of campfire cooking. It works great for fatty cuts of meat. As the spit spins, the meat will “self-baste” because the fat drips back onto the meat.
For even cooking, you’ll need a cylindrical cut of meat, such as lamb leg or pork shoulders. For large groups, you can do entire animals on the spit.
The slow cooking makes even tough meat juicy and tender. However, it takes a long time to spitfire roast. Someone will have to remember to spin the spit or you’ll need a motorized spit.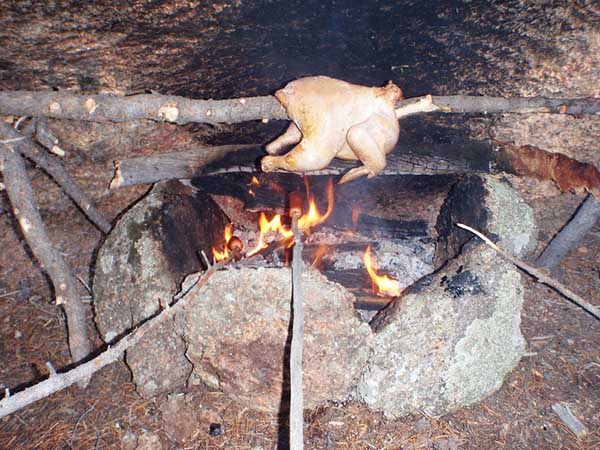
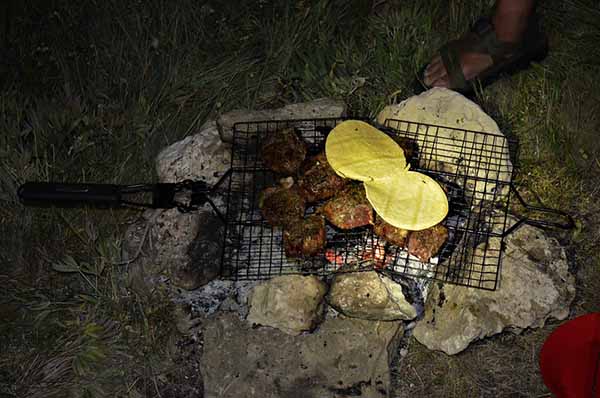
10. Grill Basket
- Best for: Delicate foods like vegetables, fish fillet and toast
- Pros: Quick and easy
- Cons: Hands-on, easy to burn foods
To use a grill basket, you put foods in the basket, close it, and hold it over the campfire by the handle. The basket helps hold foods together so they don’t fall apart while cooking. It’s great for foods that you otherwise couldn’t cook on a grill rack, such as fish fillets and toast.
You need to be careful to hold the grill basket steadily above coals and flip often. Pay attention or the delicate foods can burn!
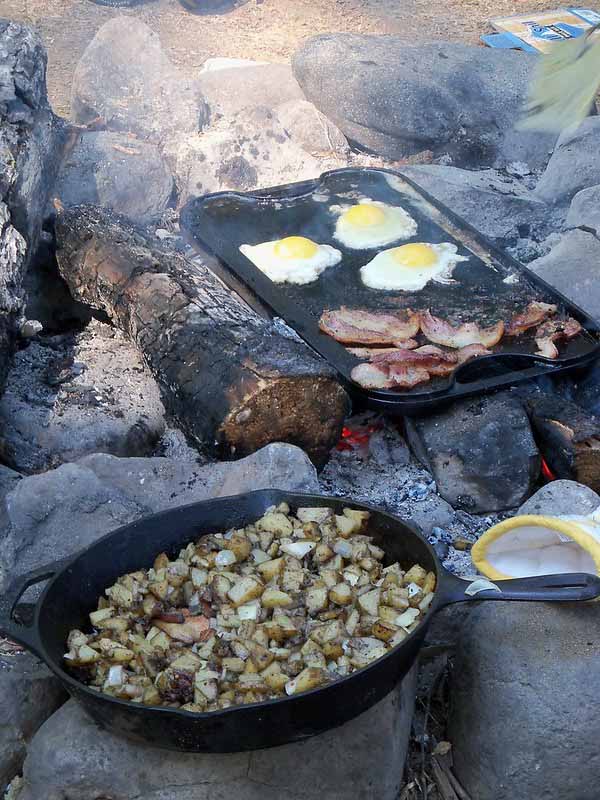
11. Cast Iron
- Best for: Wide variety of foods
- Pros: Can cook directly on fire, good heat retention
- Cons: Heavy, sets often expensive, moderate learning curve
Cast iron cooking has become very popular with campers. There are no wooden or plastic parts, so you can put cast iron cookware directly onto coals or in the fire.
There are cast iron skillets, pots, griddles, frying pans, biscuit pans and even sandwich makers. This makes cast iron cooking very versatile.
12. Dutch Oven
- Best for: Stews and other slow-cook meals, casseroles, large pieces of meat, breads and biscuits
- Pros:
- Cons:
A Dutch oven is a large, heavy pot with a lid. The shape and lid help distribute and hold heat. Most Dutch ovens today are made out of cast iron but they can also be made out of ceramic or copper.
Dutch ovens are a very versatile piece of cooking equipment. Usually it’s used like a slow cooker to make stews or cook large or tough pieces of meat. They are great for baking too though, such as campfire cinnamon rolls. With the lid off, you can even use the Dutch oven for frying foods.
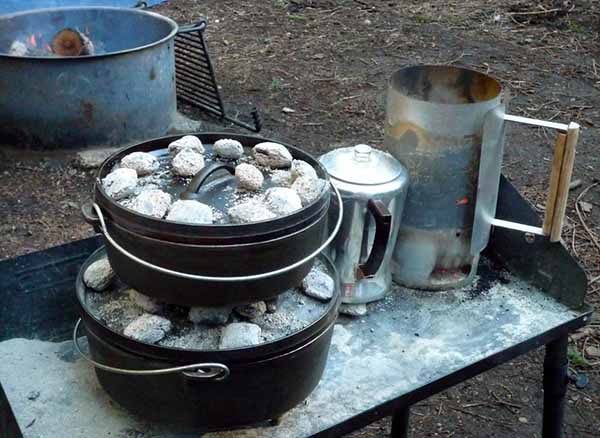
Coals piled on top of the Dutch oven
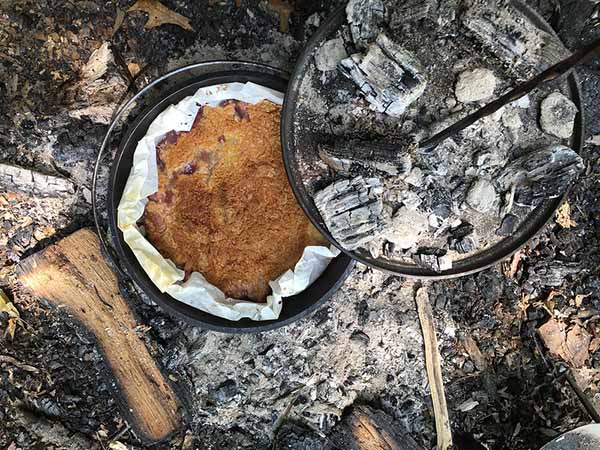
Making campfire cake with a Dutch oven
Tips for Cooking Over a Campfire
Cook over COALS, not fire.
Don’t put your pot directly over the fire. The flames move around too much, creating uneven heating. Instead, let the fire burn down into a bed of coals. Cook over these coals and you’ll get a more consistent heat.
You need more coals than you think.
For large or slow-cook meals, you’ll need a large bed of coals. To do this, make a fire and keep feeding it. Don’t start cooking until you’ve built up lots of coals!
Adjust the height of the pot.
An inch or two can make a big difference to how quickly and evenly your food cooks. Before you build your fire, test your setup to make sure the pot height is right.
Also Bring a Camp Stove
While campfire cooking can be a lot of fun, it’s not always possible or practical.
It might start raining or windy conditions might make it unsafe to build a fire. Or maybe you simply don’t want gather wood and build a fire for each meal!
This is why you should always have a camp stove with you too.
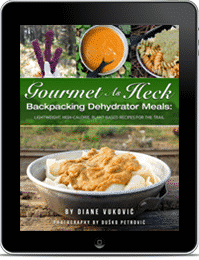
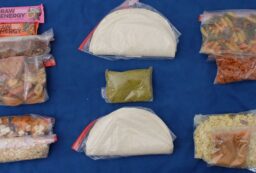
Not sure what to eat while outdoors?
Then get my eBook! It has over 50 lightweight, tasty recipes that you can make on a dehydrator. Just add water and you’ve got a delicious meal. The book also has lots of tips and tricks for planning backpacking meals. Learn more here.
Below are pictures of some of the recipes you’ll find in the book. Get the book here.
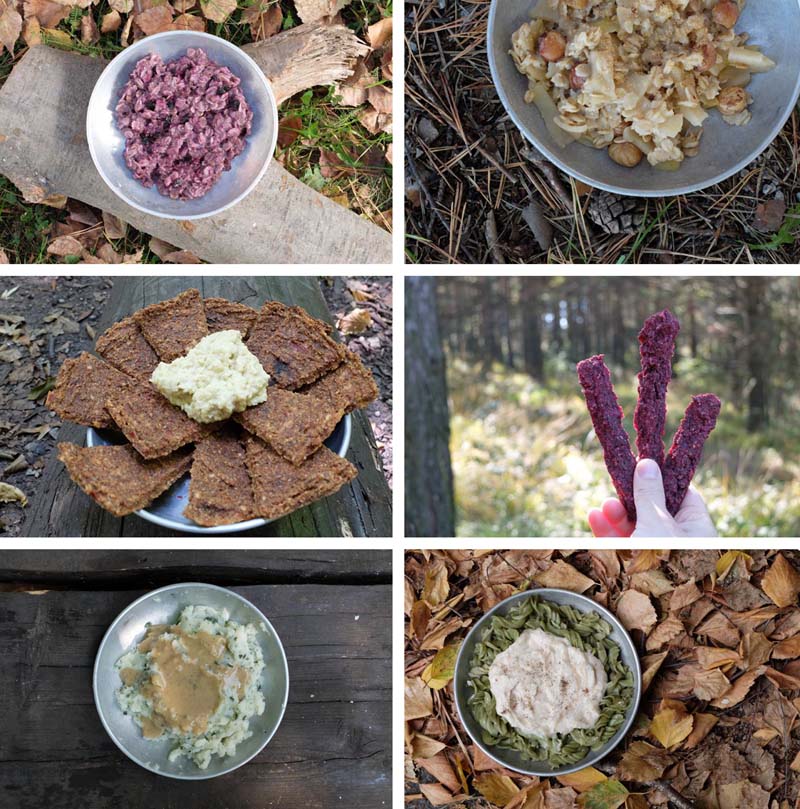
From left to right: Blueberry chia oatmeal, pear cardamom ginger oatmeal, red pepper crackers with hummus, beetroot “salami”, mashed potatoes with white bean gravy, & pasta with buttery white bean sauce
Image credits:
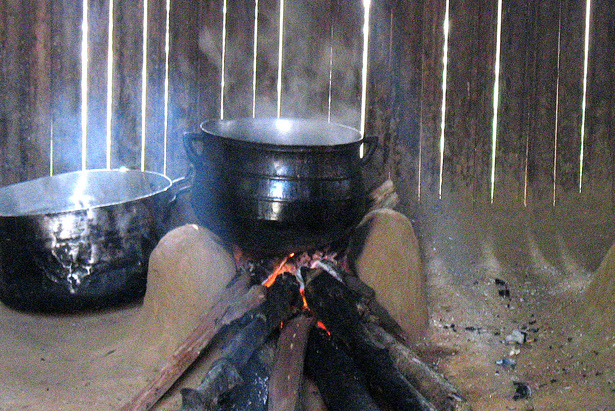
Richard Wasserman Cooking Fire Inside Dani Hut CC BY NC ND 2.0, Found on Flickr
Luke and Kate Bosman IMG_1922.JPG CC BY NC ND 2.0, Found on Flickr
Maximusnukeage CampCooking.jpg CC BY-SA 3.0, Found on Wiki Commons
“Turning the Hobos” (CC BY 2.0) by OakleyOriginals
“Classic Campfire Foil Dinners” (CC BY 2.0) by woodleywonderworks
“Carving Project – Cooking Crane” (CC BY-NC-ND 2.0) by teejaybee
“PA140047” (CC BY 2.0) by ProAdventure
“Cooking at Munsungan Stream” (CC BY-NC 2.0) by Nick Gallop,
“Cooking Over a Fire” (CC BY-NC 2.0) by Chiot’s Run,
“camp cooking” (CC BY 2.0) by vastateparksstaff
“IMG_7791.jpg” (CC BY 2.0) by Hello Turkey Toe
“KW14/52 cooking” (CC BY-NC-ND 2.0) by JudithTB
“Hot Dogs Over Campfire” (CC BY 2.0) by ricketyus
“Pike on a Pike” (CC BY-NC 2.0) by Travis S.
“Cooking on Campfire” (CC BY 2.0) by hellogeorgitodorov
“Chicken on a Spit” (CC BY 2.0) by halseike,
“Food and Connection” (CC BY-NC-SA 2.0) by AlyssssylA,
“and Tortillas” (CC BY-NC-ND 2.0) by Seattle.roamer
“Breakfast in Camp” (CC BY-NC-SA 2.0) by gharness,
“cherry dump cake” (CC BY 2.0) by vastateparksstaff


2 Comments
Arlen smith
November 12, 2021 at 10:45 amCooking outside in the wind is dumb when all it takes is a 14 ounce 40” chimney to cook inside a tent or tarp shelter.
Google “chimpac “
Diane
November 12, 2021 at 1:38 pmOr you can just make a wind screen for your stove. 🙂 Much easier than putting a chimney in your tent. My main tent is tiny anyways and I’d never cook inside of it because of CO poisoning and fire risks.