I’ve written about how to clean and whiten animal bones before on my website. However, skulls from horned animals like deer, moose, caribou, and elk require a slightly different approach which I will go over here.
Want to become a bone cleaning expert? Check out my eBook. It’s got lots of tips and tricks about how to clean and whiten all types of animal bones. Get it here for $4.99
Jump to:
- What Are Antlers?
- Preserving Shed Antlers
- Velvet Antlers
- Cleaning Skulls with Antlers
- Mounting and Displaying
What Are Antlers?
Antlers aren’t just beautiful, they are also very intricate and downright cool parts of the body. They start off as living tissue and then turn into something which is more akin to bone.
In whitetail deer, antlers start growing when the male is about 6 months old. Growth is triggered by how much light there is. More light means the animal produces less of the hormone melatonin, which kicks off the antler growing season. Numerous other hormones are also involved in antler growth.
Cool fact: Antlers are the fastest growing tissue in the animal kingdom. They can grow one-half to over an inch per day! By contrast, human hair only grows at about one inch per month. (1)
Velvet Antlers vs. Hard Antlers
When the antlers first start growing, they need a lot of nutrients to sustain their rapid growth. Lots of blood and water flow throughout the antlers, which is why they are softer during this early period. During this period, the antlers are covered with a soft fuzz called velvet.
By the end of the growing season in fall, a burr starts to form at the base of the antlers. This burr cuts off blood flow. The antlers start to harden and the velvet falls off. They go from being full of blood to being mostly (80%) calcium and phosphorus.
The velvet which falls off the antlers is actually very high in nutrients and is eaten by many animals. It’s also been used in lots of folk medicines. (2, 3)
Antlers vs. Horns
The methods of preserving antlers below will NOT work on horns. Unlike antlers, horns are not bone structures. Horns are actually made of two parts: The outer part is a sheath made out of keratin, which is the same material that our fingernails are made out of. The inner part is a bone core.
The horn sheath is very fragile. If you soak them in water, the sheath will crack and distort. Likewise, if you leave the skull to beetles or other insects, the insects might eat the horn sheath.
If you want to save the horn sheath, you will need to remove it from the skull and clean it out before proceeding with any of the other steps (removing tissue, degreasing, whitening). I talk more about how to preserve horns in my eBook (get it here)
Preserving Shed Antlers
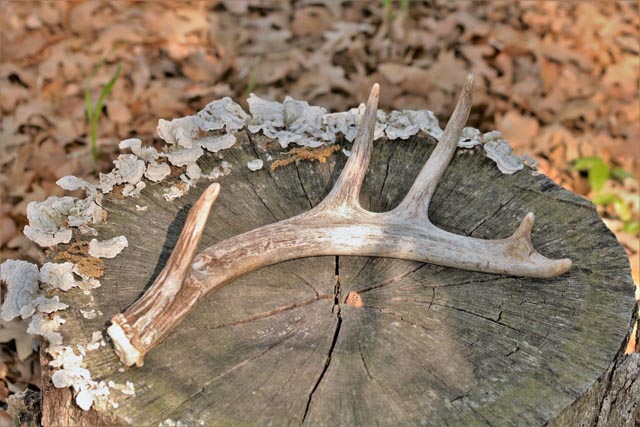
By the time a deer (or moose, elk, caribou…) has shed its antlers in fall, all of the living tissue in the antlers will have dried up. This means that these shed antlers are very easy to preserve. You don’t even have to do anything – just leave them somewhere to dry and you are finished.
However, antlers can sometimes lose their color or crack. Follow these steps to ensure your antlers are preserved for a lifetime:
Step 1: Cleaning the Shed Antlers
If the antlers aren’t too dirty, you can do this simply by rubbing them with a cloth. However, if the antlers are very dirty, then you’ll want to soak them in soapy water for a few minutes (Dawn dish soap works well). Then take a soft-bristled brush and gently scrub away the debris. You can also try scrubbing them with a bit of baking soda.
What if the antlers are really dirty, such as covered in moss?
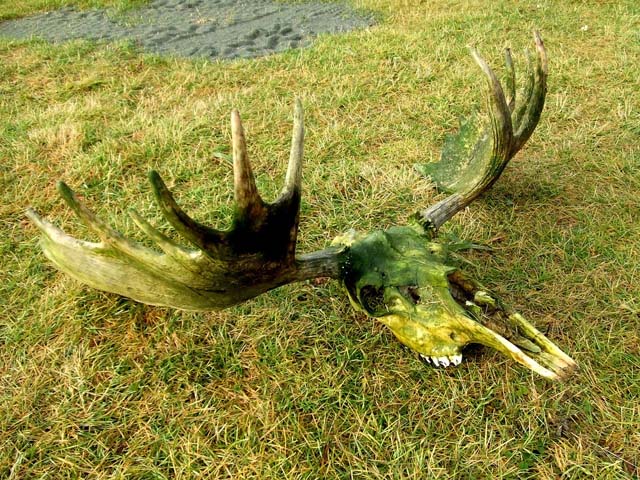
You can spray a bit of hydrogen peroxide onto them and then scrub. This will help remove stains and discoloration.
However, the hydrogen peroxide will also whiten the antlers a bit, which ruins their natural color. But, the moss and dirt would have probably already ruined the color anyway. You can always try to re-color them later (as talked about Step 3).
Step 2: Let the Antlers Dry
Let the antlers dry at least a day or two before you put any coating on them. Otherwise the coating might trap moisture inside the antlers, causing them to rot or crack later on.
Step 3: Coloring Stained or Whitened Antlers
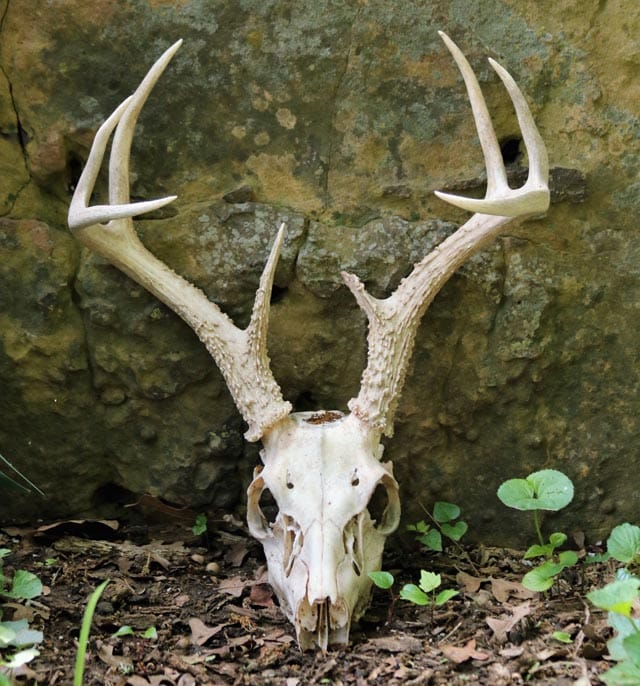
If the antlers were left outside in the sun for a long time, they might lose their color. Likewise, if you had to use hydrogen peroxide to clean the antlers, they might be whitened. IMO, I think the natural color looks better on antlers. There are some things you can do to bring the natural color back.
Here are some options:
- Tea
- Henna
- Coffee grounds
- Wood stain (use matte and not shiny)
- Acrylic paint: make sure it is applied in a VERY THIN coat
Step 4: Protective Coatings for Antlers
Putting a coating on the antlers will help preserve the natural color from fading. It can also prevent moisture from getting into the antlers (which might be an issue if you live somewhere humid).
There’s a lot of controversy about which is the “best” coating for antlers. Everyone has their favorite.
Here are some options that won’t make an unnatural shiny coating:
- Linseed oil
- One part linseed oil + one part turpentine
- Old English furniture scratch cover
- Scotts Liquid Gold
- Wood stain (flat exterior clear polyurethane: Should say for EXTERIOR use and non-yellowing on the can)
Tips for Applying the Coating:
- Use a rag for linseed oil. For polyurethane, use a soft-bristled paint brush.
- Several light coats are better than a few thick coats.
- Choose “matte” over “shiny” when buying any sealants
Velvet Antlers
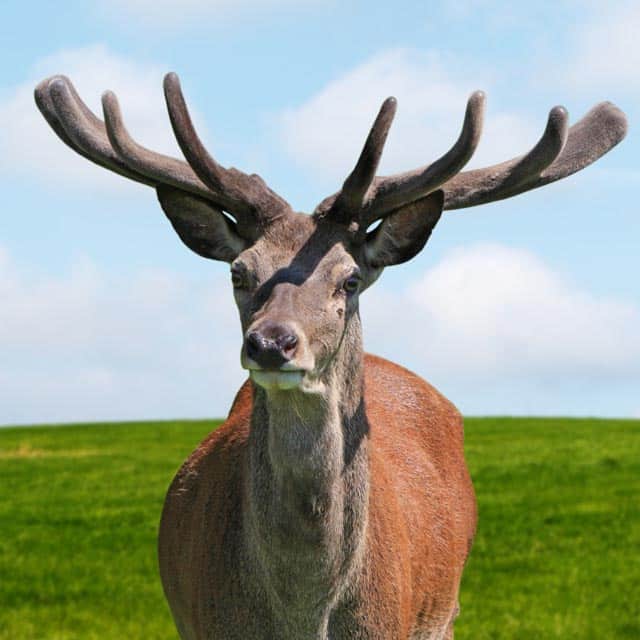
Preserving velvet antlers is actually very tricky and usually requires professional equipment. The reason it is so tricky is because velvet antlers are mostly made of living tissue. You have to preserve the actual antlers and then pickle the velvety hide.
If you don’t get all the blood out of the antlers quickly and dry them, then they will start to rot! Likewise, there’s a lot of problems with insects and rodents eating the velvet.
Even if you do manage to preserve the interior bone part of the antler, it’s a lot harder to preserve the actual velvet. Often, the velvet will start to fall off if you touch it. Many professional taxidermists won’t even offer guarantees on velvet antlers because they are so tricky and sensitive.
I mention this not to discourage you, but to be realistic: It is tricky to preserve velvet on antlers. So don’t be disappointed if it doesn’t work out.
In the Field:
If you won’t be able to take the antlers home for a while, then you will need to take steps in the field to preserve them.
The simplest method is this:
- Sever animal head and skin it. Remove as much flesh as possible.
- Or, if you don’t want to keep the entire skull, remove the antlers from the skull or saw off the skull plate. Here’s a video that shows you how.
- Poke holes in the tips of the antlers with a needle or knife point.
- Hang the antlers upside down. This will help blood drain out of the antlers.
- Try to keep the antlers out of the sun and as cool as possible. It’s important that the antlers are high enough up so animals can’t get to them.
This method should keep the velvet antlers safe for about 24 to 48 hours. However, it really depends on the antlers and conditions. Some velvet antlers turn to rotting, stinking mush in less than a day. Others do okay for a few days.
If you are able to get your hands on formaldehyde or other professional equipment, then you can start the preservation process in the field. This involves bringing a hypodermic needle and injecting the velvet antlers with formaldehyde. There’s a good description of how to do it here.
I personally wouldn’t recommend this because formaldehyde can be very dangerous to work with – especially while outdoors. If you get some of it on your fingers (like when trying to move antlers that haven’t dried yet), you could end up with serious injuries.
At Home
The key to preserving velvet antlers is to dry out all of the living tissue quickly before it starts rotting. There are three main ways that taxidermists (pros and amateurs alike) will do this with velvet:
Option 1: Rittels Preserve-It
There’s a taxidermy product called “Rittels Preserve-It” which many people have used to preserve velvet antlers with success. Here’s what you need to do:
- Poke many small holes throughout the velvet antlers
- Get a hypodermic syringe and fill it with the preserving solution
- Start at the base of the antlers and start pumping solution into the antlers; you’ll need to inject it into the veins.
- Keep injecting until the solution starts coming out of the holes you made. You want to force blood out of the antlers. The solution dripping out should go from pink to clear.
- Paint some of the solution (or spray it) onto the outside of the antlers.
- Hang the velvet antlers upside down and let them dry for 2-3 weeks.
Note that a lot of professionals say that this method doesn’t work well. That’s because it is so difficult to get the solution throughout the entire antlers. You end up getting the preserver around the injection only. Eventually, the velvet antlers start to rot. Maybe the antlers actually do dry out well – but the velvet falls off at the slightest touch. (4)
Option 2: Alcohol Soaking
Alcohol is a cool substance because it forces water out of surfaces. If you soak velvet antlers in pure alcohol, the blood and water will be forced out and dry the antlers. The alcohol also kills any bacteria that might be in the antlers.
Here’s how to use this method:
- Submerge the antlers in alcohol for about 12 hours
- Then put the antlers in a solution of Borax for 12 hours. You want to use as much Borax as possible in your solution while still getting a clear solution. If the solution isn’t clear, you’ll end up Borax residue on the velvet.
- Repeat step 1.
- If the horns aren’t hard by this point, then repeat all the steps. It’s important that the alcohol soak is the final step. (5, 6)
Option 3: Tanning Solution
Instead of using alcohol, you can get tanning solution from a taxidermy supply shop. Then soak the velvet antlers in the solution for about 3 weeks.
After soaking, hang them to dry. It can take several weeks for them to get fully dry.
Freeze Drying Velvet Antlers
Some professionals will freeze dry velvet antlers to preserve them. There’s also debate about how well this method works. The process is generally really good at preserving the appearance of the antlers, but it doesn’t actually remove blood (it just dries it). So freeze dried velvet antlers can smell bad.
In any case, you won’t be able to this at home. Freeze driers are really expensive. You can’t do it in a normal freezer because of the condensation that ends up forming – not to mention that it would take months if not years to do it in a home freezer!
Cleaning Skulls with Antlers
It’s actually really easy to clean bones of animals that have antlers. That’s because antlered animals are herbivores, and so their bones aren’t as greasy as those of omnivores like bears, opossums, or pigs (which are a pain in the ass to degrease).
To clean the skull with the antlers, all you really need to do is remove the tissue and whiten with hydrogen peroxide. The trick is to keep the antlers from getting messed up in the process. Here’s how to do it.
Step 1: Removing Tissue
There are a lot of ways to clean tissue off of animal skulls. I talk about them in this post. Before you start removing the tissue, check out the status of the antlers. Are they hard? Or are they still velvet?
If the antlers are hard…
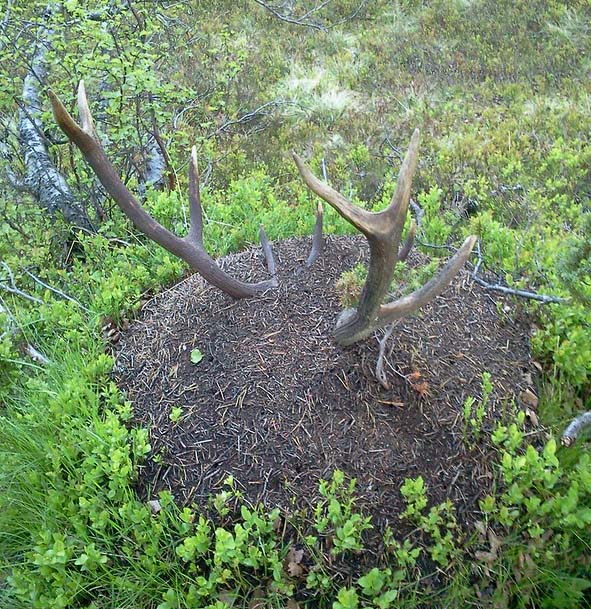
I personally prefer leaving the skull outside for bacteria and insects to clean. This is very effective at getting rid of hidden bits of tissue in the skull. You can also bury the skull. Leave the antlers sticking out of the ground so they don’t get stained by dirt.
Note that many small animals actually chew on bones and antlers to get nutrients. You should put a wire cage around the skull/antlers to keep them safe.
Soaking (aka maceration) also works well to remove tissue. The water won’t damage the antlers. A lot of people recommend boiling skulls because it’s the fastest way to get tissue off. However, it can also damage the bone. If you are in a hurry, simmer instead of boil and make sure the antlers are sticking out of the pot.
If the antlers are still velvet…
Then you’ll need to preserve the velvet antlers before you proceed with tissue removal. Otherwise, bacteria or insects will eat the velvet antlers.
Also never simmer skulls with velvet antlers. Even if the velvet antlers are preserved, the steam coming up from the water will damage the velvet!
Step 2: Whitening Antlered Skulls
The best way to whiten bones and skulls is to soak them in a solution of hydrogen peroxide. If you don’t know how to do it, see these instructions on how to whiten bones. However, as a general rule, you should never whiten antlers. They don’t look nearly as good when whitened. It’s better to keep their natural color.
That means you need to find a way to soak the skull without getting the antlers. Here are some solutions:
Wrap the base of the antlers with plastic wrap
You’ll need to wrap around them at least 6 times. Then follow this with electric tape, making sure the antlers are wrapped very tightly. The plastic wrap should keep hydrogen peroxide from touching the horns during whitening.
Make a Hydrogen Peroxide Paste
This is a trick I came up with for whitening really large skulls. Here’s what you do:
- Make a paste out of hydrogen peroxide and baking soda
- Paint it onto the skull, taking care to avoid the antlers
Once you have whitened the skull, you can then coat the antlers as talked about in the section about Preserving Shed Antlers.
Mounting the Antlers for Display
Once you’ve got the skull and and whitened and the antlers coated, then you can display them. There are a lot of ways to do this. Some people like to make cool art projects out of the antlers. I hang necklaces from mine.
Or you can go the traditional route and get a European Skull Mount kit. Below are some good options. Make sure you check the size of the mount before getting it. Some are only suitable for small skulls and antler racks!
Check out these mount kits:
- Skull Hooker Skull Mount Kit (for entire skulls)

- Antler Mount Kit (for just antlers w/o skull cap)
- Skull Hooker European Trophy Mount (for antlers with skull cap)
- Solid Oak Table Display (for entire skulls)







14 Comments
SWoos
December 6, 2020 at 4:37 amHi, thank you for sharing. Do you have a way to get green off of sheds or antlers? We have had some sitting around for a while and they are kind of mossy now, and I would like to use them for a project. Ideas?
Diane
December 7, 2020 at 10:29 amDid you try scrubbing them with baking soda? If that doesn’t work, then hydrogen peroxide will whiten them. It might take a few coats to get all the green off (you can spray it on or even soak the antlers in it – see this post /how-to-clean-animal-bones-hydrogen-peroxide/). Just be warned that the hydrogen peroxide will make them white and not as natural looking. It’s a matter of personal preference. If you are using them for a project, then this might not matter.
PA Lohr
September 4, 2021 at 10:13 amWe found some antlers that were chewed a bit so the marrow is exposed. Do we need to remove the exposed marrow? If so, any tips?
Diane
September 6, 2021 at 2:49 pmContrary to what all those dog-chew antler companies say, antlers don’t actually contain marrow. The spongy area inside antlers is where the blood vessels were. If the antlers are still really soft or leaking stuff, then maybe there are still velvet? I wouldn’t worry about the chew marks though if nothing is wet inside.
Kristina
August 15, 2022 at 7:54 amOur piece of antler is already old and dried out, but still has the marrow in the center. My friend is attempting to hollow it out and make a pipe out of it.
What would be the best way to remove the hardened marrow following the curve of the antler without accidentally poking through the bone.
ANY ideas or advice would be greatly appreciated and Thank You in advance.
Diane
August 16, 2022 at 8:30 amI’ve never done that. But here are some good resources from people who have (love the Taxidermy forum btw!):
https://www.taxidermy.net/threads/260242/
https://www.taxidermy.net/threads/164960/
https://www.taxidermy.net/threads/427500/
Linda Wurm
December 9, 2022 at 4:52 amI was gifted a pair of shed moose antlers. One has evidence of rodent feasting, but not too bad! I am wondering if it is safe to utilize one of these paddles as an appetizer platter? It has been washed with mild dish soap.
Thanks!!
Diane
December 9, 2022 at 10:55 amHmmm… that’s a tricky one. I wouldn’t feel safe eating directly off of a pair of antlers (and I’m the type of person who follows a “30 second rule” for eating off the ground). God knows what bacteria could be lurking in there. Maybe they could be baked in the oven to sterilize them, but that might cause them to crack, so isn’t worth the risk. Even if you did manage to sterilize them, the antlers are porous. They’d absorb oils/etc. from the food and get dirty.
My suggestion would be to seal the antlers. But it would have to be something safe for food though, since you don’t want to put food directly on certain lacquers.
Or just use the antlers as a base for a plate. Put the plate on the antlers and the food on the plate. That’s the easiest option which is safe and still lets you display them nicely 🙂
Joan
July 22, 2023 at 11:28 pmI am in the process of cleaning an elk skull and antler. I’m wondering if there are any tricks in cleaning the teeth? I’ve downloaded your book but it only talks about replacing teeth that have fallen out. Luckily, i haven’t lost any so far!
Diane
July 28, 2023 at 2:38 pmIf hydrogen peroxide isn’t whitening the teeth, then it is probably plaque! Apparently (never tried this myself) the best way to remove plaque from animal teeth is with a small carbide tip on a dremel tool.
Joan
July 28, 2023 at 10:35 pmThanks, I’m still trying the V40 and a dental pick, They’er still bubbling, but a Dremel sounds much better.
Mary
September 7, 2023 at 12:38 amGreat post and it’s wonderful to FINALLY see a writer steer readers away from boiling or simmering the skull. I use plain water maceration in the sun (covered) followed by peroxide. The antlers on this skull are somewhat faded. I’m looking for suggestions on if I should lightly stain them or not. Do you suggest man-made stains or natural (such a coffee, wet aspen bark, etc.
Diane
September 8, 2023 at 9:55 amManmade stains are definitely going to work better than natural ones. But if you only need a little bit of color, then natural stains will work. I don’t know about wet aspen bark. Coffee works well enough and it is easier to apply than some other natural stains without it getting splotchy.
Mary
September 7, 2023 at 12:45 amWell silly me….I had used one of the hyperlinks so I did not see your advice on staining antlers. Anyway…..great to read your information which is correct (no boiling, no bleach!). It’s amazing how many “pros” recommend one or both. You have a new follower now.