
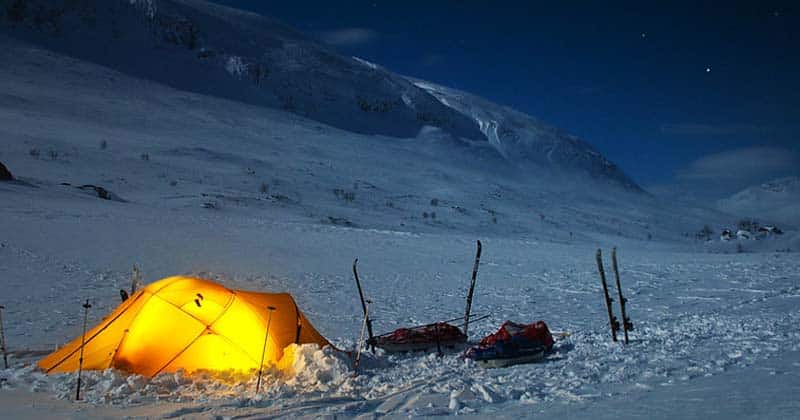
Winter camping definitely has its benefits, like being able to visit popular destination without the crowds and enjoying beautiful white vistas.
But, for the unprepared, a winter camping trip and end up miserable or be downright dangerous. So, if you are planning a cold weather or winter camping trip, read these tips first.
The tips are broken down into these categories:
Safety
1. Do Your Research!
Deciding to sleep outdoors in the dead of winter may seem like it would be a bit dangerous, because it absolutely is.
Some winter camping risks include:
- Hypothermia
- Frostbite
- Avalanche
- Getting lost
- Snow blindness
- Sunburn
- Chapped skin
- Slip and fall accidents
Make sure you do your research into the risks so you know what to do if they occur. More importantly, know what to do to prevent these risks.
For example, you will probably need a good GPS to navigate in snowy conditions. Gear like microspikes can help prevent slip and fall accidents. And hand warmer packets can prevent your hands and feet from getting too cold.
2. Put an Emergency Kit in Your Vehicle
Lots of backcountry roads are not plowed frequently in winter. If a sudden snowfall occurs, you may be stuck for a long period. Likewise, if your vehicle breaks down, it can take a long time for help to arrive.
Make sure you have an emergency kit in your vehicle with at least several days of supplies. You should have one of these for everyday anyway. 🙂
3. Have an Exit Plan
When planning a camping trip, it’s always best to think of “worst case scenarios” and have an exit plan. In winter, an exit plan is even more important.
If you are new to winter camping, then don’t set up camp too far away from your vehicle in case you need to make a hasty exit.
Bonus Tip: The Winter Camping guide by NOLS (National Outdoor Leadership School) is one of the best books on the subject. I highly suggest you give it a read before going on a winter camping adventure.
Winter Camping Gear
4. Plan On Lots of Extra Gear
Winter camping means you’ll need a lot of additional gear to help you stay warm and safe. Depending on the conditions, you may need to bring:
- Four-season tent
- Shovel
- Microspikes
- Avalanche pole
- Goggles
- Hand warmers
- Heater
- Insulated pad for sitting
Not sure what to bring on your trip? See this winter camping gear checklist.
5. Consider a Larger Tent
Not only do you need more gear for winter camping, but you the gear also tends to be much larger. For example, winter sleeping bags are much wider than 3-season bags.
If your tent is too small, you may not be able to fit all of your gear in the tent. Your puffy sleeping bag might end up touching the tent walls too, which can create a condensation disaster.
6. Apply Waterproofing Before Your Trip
Reapply before each winter camping trip. This is not the time to have a leaky tent or jacket!
7. Keep Electronics Warm
Most batteries don’t work well in freezing temperatures, so keep electronics next to your body during the day and in your sleeping bag at night.
Clothing
8. Resist the Urge to Wear Extra Layers
It’s easy to put on too many layers, especially in the morning before you’ve had to warm up. Then you get active and start sweating through the layers. Only wear the minimal amount of clothing you need to stay comfortable on the move so you don’t sweat too much.
Bonus Tip: Tuck in and cinch up! You want to make sure your insulating layers aren’t extending past your shell or they can get covered with snow, which promptly melts and gets your clothes wet.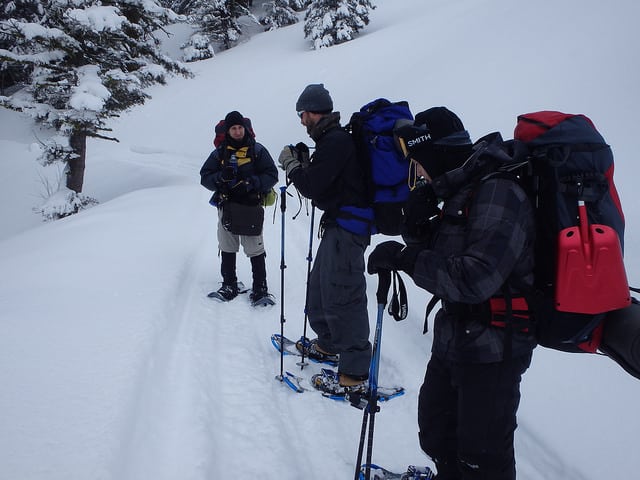
9. Invest in Wool Base Layers
Just like during any other time of the year, use three-layer clothing method when camping in winter. But, when camping in winter, the material choice matters even more.
For winter camping you really want wool base layers. Wool is warmer, wicks moisture better, still insulates well when wet, and doesn’t smell nearly as bad as synthetics (seriously, your tent will stink if you wear synthetics!).
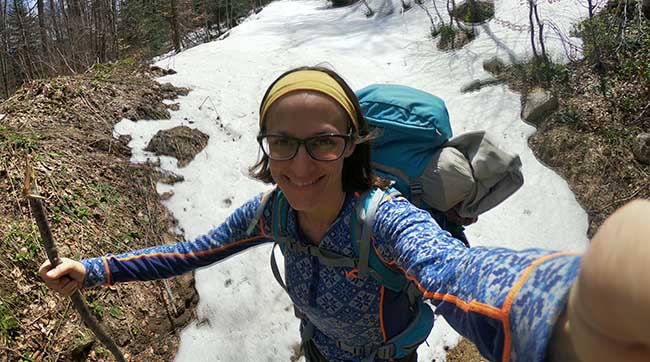
Me in my Kari Traa Merino base layers. Also read: Is Merino Wool Worth It?
10. Choose a Hard shell with Good Ventilation
A hardshell is usually better than a softshell for winter camping. The softshell will only keep you warm while you are active. Once you stop moving, you will get cold quickly. By contrast, hardshell jackets trap heat well.
It’s important that your winter hardshell has good ventilation though. Otherwise you will end up sweating. Unless it is actively snowing, you’ll probably keep your hardshell off while moving around.
11. Allow Body Heat to Travel
- Keep clothing loose to create a “chimney.” Loose clothing will trap air and keep your circulation going. It also allows warm air from your body to flow upwards to warm your face.
- Wear suspenders instead of a belt.It’s a lot more comfortable and allows heat to travel up towards your core.
12. Layer Your Hands and Feet Too
Just like you need to layer clothing on your body, you also need to layer your hands and feet. Otherwise they end up wet and cold.
For your feet, this means wearing a liner sock and insulating sock (like a thick wool sock). Your boot is the shell layer. Also read: How to Keep Feet Warm Hiking in Winter
For your hands, you wear a liner glove with an insulating glove over it and a shell mitt on top of this. Some mitts have an insulating layer in them already, so you don’t have to put on three separate layers. See these best winter hiking mitts.
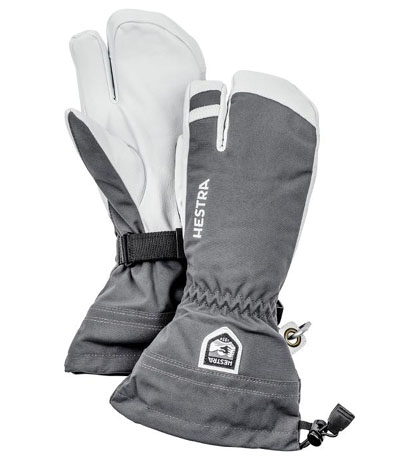
These hardcore Hestra gloves have a removable liner.
12. Bring Spares
It’s easy to lose mittens, hats and scarfs when camping. This can quickly mean frostbite, so you’ll want AT LEAST one spare of each.
You’ll also want to bring two pairs of liner socks per day. If your feet get wet, you can change into a dry pair.
13. Keep Boots from Freezing
Even if you wear gaiters, your boots will still likely end up wet. When you go to bed, the wet boots can freeze into a solid block!
Yes, your boots will “thaw out” once you put them on, but it’s uncomfortable to put them on. And, depending on the conditions, it could take HOURS thaw out boots and your feet might already have frostbite by then.
Prevent Boots from Freezing at Night:
- Bring a lightweight waterproof bag with you. Or, invert your sleeping bag stuff sack for this purpose.
- Put your boots in the bag and then put them in your sleeping bag.
- Or wrap the bagged bots in some clothing and use them as a pillow.
How to thaw frozen boots:
- Put hand warmers into each boot before putting them on.
- Or bring two water bottles. Put hot water in the bottles, wrap a sock around the bottles, and put one bottle in each boot.
- Don’t use a fire to thaw frozen boots. You’re more likely to melt them!
14. Don’t cover your mouth
As tempting as it will be, don’t cover your mouth or even your chin. Condensation from your breath will moisten the balaclava or buff, causing ice to form over it and give you frostbite.
15. Protect Exposed Skin
Cold, dry winter air will quickly chap your exposed skin – especially your lips and around your nose. This is unsightly and painful! Use Vaseline or balm (I like this one) to coat all of your exposed skin.
16. Pack Insulated Booties
After a long day of hiking in snow boots, you’ll be happy to have soft, warm booties to put on so your feet can breathe. These booties are all good picks.
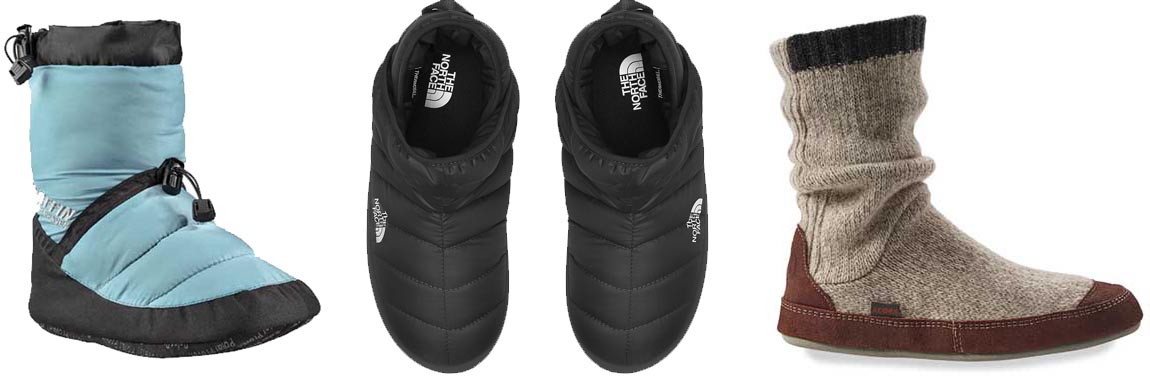
From L to R: Baffin Base Camp, The North Face Thermoball booties and Acorn Slouch Boots
Setting Up Camp in Winter
17. Start Early
When camping or hiking in winter, setting up camp is more difficult and takes much longer. Like when you need to set up your tent with gloves on. Or have to trample down snow to make a kitchen.
Remember that daylight hours are limited in winter. Make sure you give yourself plenty of time to set up camp.
Bonus Tip: Wear a watch so you can keep track of the time. You won’t want to pull your phone out with gloved hands!
18. Find a Good Site
Even if you are exhausted, spend the extra time to find the perfect spot to set up camp. It will make winter camping more comfortable and safe.
Pitch by:
- Landmarks: To help you find your way back to camp
- Natural wind blocks: Otherwise you may need to build a snow wall for a wind break.
- Running water: It will save you time and fuel since you won’t have to melt snow.
- Sunlight access: Pitch somewhere the rising sun will hit your tent, warming it up faster in the morning so frost melts and you can dry gear.
19. Clear or Pack Snow
Never pitch your tent on unpacked snow.
- Your body heat can melt the snow underneath the tent, causing you to sink down.
- If the temperature suddenly gets warmer, the snow under the tent will melt and cause your tent to collapse into a puddle.
- You can tear a hole in the tent when you step into it on soft snow.
If the snow isn’t deep, it’s best to clear it away completely. In deep snow, you’ll want to pack it down. Wait for at least 10 minutes after packing so the snow has time to harden.
20. Use Snow Anchors Instead of Pegs
In snowy conditions, you won’t be able to stake the tent into the ground. Instead, you’ll need to use one of these alternative methods. Of the three, parachute anchors are the easiest because you don’t have to dig up snow.
Also read: How to Stake Out a Tent in Any Condition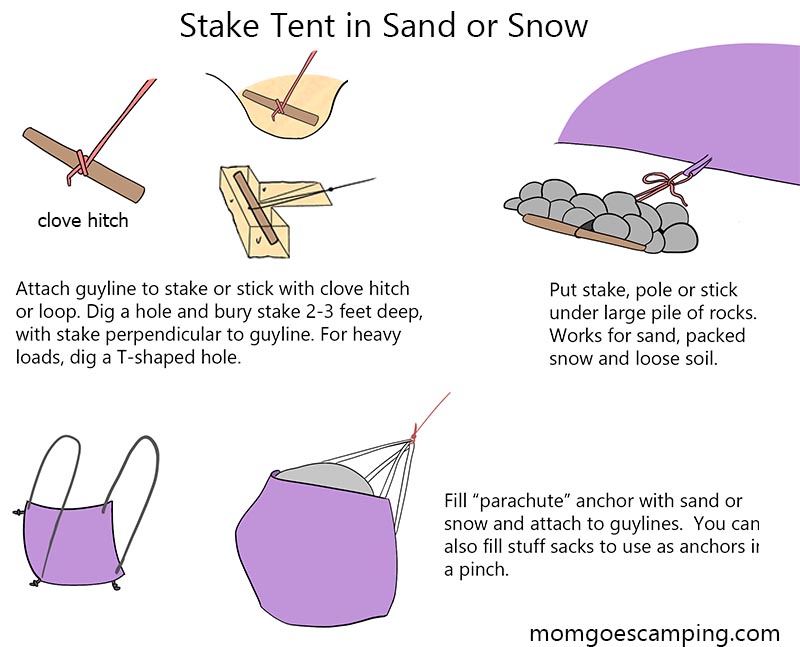
Staying Warm and Dry
21. Use a Heater
It is not cheating to use a heater when camping in winter! You’ve got several options:
- Wood heaters
- Propane heaters
- Candle lantern heaters
Wood heaters need to be used in tents with a chimney flue, such as a hot tent. Propane heaters can be used in normal tents, so long as you have adequate space around them and ventilation. For backcountry camping, a small tea light heater – ideally held in a candle lantern for safety – can produce a surprising amount of heat.
Read this post about the best tent heaters and how to use them safely.

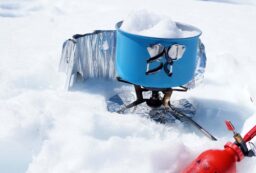
The UCO candle lantern produces a surprising amount of heat!
22. Be Careful about Hot Water Bottle
One of the most common winter camping tips is to put a bottle with hot water into your sleeping bag before bed.
Doing this is VERY RISKY.
If the bottle leaks, YOUR SLEEPING BAG WILL GET WET and lose its insulating properties. You also suffer evaporative heat loss.
Just watch this video of a winter camping trip gone wrong: the guy’s water bottle leaked and drenched his sleeping bag and pad. Luckily he had a down suit or probably would have needed emergency evacuation for hypothermia.
Note that even good water bottles are prone to leaks in winter because:
- Water freezes in the threads so the bottle lid doesn’t close properly.
- Pressure builds up in the bottle because of the steam, which can cause the bottle to crack and leak.
Your sleeping bag is what keeps you alive while winter camping. It’s really not worth the risk of water leaking just to warm up a bit faster.
If you do must use the hot water bottle trick…
- Only use water bottles which can handle boiling water. Otherwise they might crack.
- Pour the boiling water into the water bottle and close the lid.
- Give the bottle a bit of a shake. This will melt any frozen water in the threads.
- Open the lid to let pressure escape.
- Repeat this 3 more times. This is the only way to ensure there isn’t too much pressure in the bottle.
- Keep the water bottle in a wool sock or dry bag to catch any leaks, just in case.
23. Prevent Condensation
Our bodies lose about ½ a liter of water while sleeping through perspiration and breathing. This water builds up in the tent as vapor. When the warmer air in the tent touches the colder tent walls, condensation can form.
If the tent is really poorly ventilated, then condensation might even rain down on you from above! Your sleeping bag or other crucial gear can easily end up wet. Since wet = cold, condensation can be a dangerous problem.
You’ll need to take steps like ventilating your tent and wiping down tent walls to prevent condensation. For more info, read: How to Prevent Tent Condensation
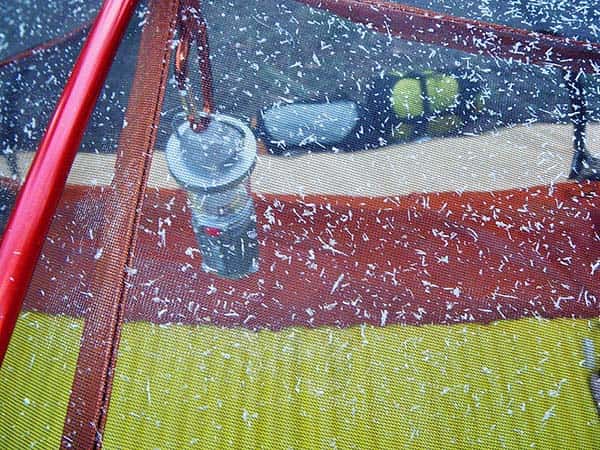
On very cold nights, the condensation will even turn into ice crystals on the tent wall. It will melt in the morning sunlight and get everything wet!
24. Use a Vapor Barrier Liner
Even when you aren’t doing much, the human body releases approximately 400ml of water per day as perspiration. If you are active – such as doing camp tasks in the snow – you can easily sweat over ½ liter per hour.
This sweat normally would be dissipated through your layers. However, when the air outside is colder, it ends up condensing in your insulation layer. The wet insulation loses its loft so can’t trap heat well. Your skin ends up wet, so you get cold from evaporative heat loss.
A vapor barrier liner (VBL) is a waterproof barrier that you wear over your base layer. VBLs can are often worn on the hands, feet, core and inside down sleeping bags.It prevents sweat from moving to the insulation layer. You may feel clammy, but you stay warm.
25. Don’t put your face inside the sleeping bag.
As tempting as it may be, never wriggle down into your sleeping bag so it covers your face. Your breath actually contains a lot of vapor and this vapor will get your sleeping bag wet. Instead, use a balaclava to keep your face warm at night.
26. Get Warm before Bed
Slipping into a cold sleeping bag can be a miserable experience, and it can take a while for the bag to warm up if you are cold before you get in. Instead, you should warm up before you get in your bag. Do this by:
- Eat before going to bed: The metabolic boost means your body has calories to burn for staying warm while sleeping.
- Run around before getting into bed: This will get your blood going and increase body temperature before you get into your sleeping bag. The sleeping bag will retain some of that warmth.
Also read these 13 Pro Tips to Sleep Warmer in Your Sleeping Bag (Regardless of Rating)
27. Sleep with Your Feet Inside Your Pack
So long as it isn’t going to squish your sleeping bag insulation, sleep with your feet inside your pack. It helps trap heat better. Plus, if you end up touching the tent walls, the pack will keep your sleeping bag dry.
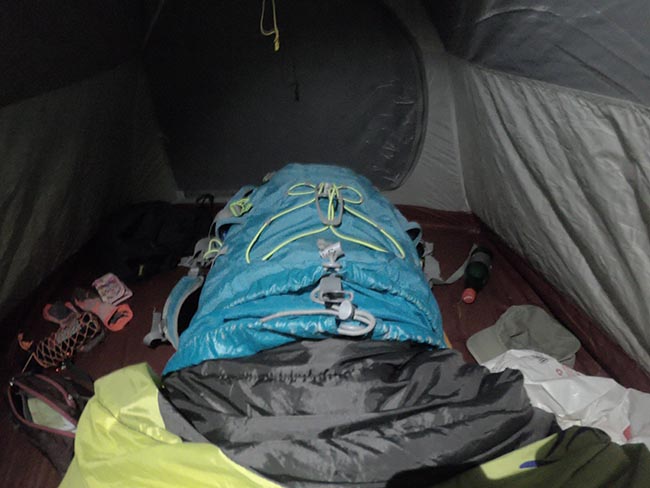
Putting your feet into your pack not only keeps them warmer, but also keeps your sleeping bag from getting wet from condensation.
Food, Water and Winter Kitchen
28. Use White Gas Stove and Fuel
Forget about gas canister stoves. These stoves are very inefficient or stop working completely in cold weather. Yes, you can do things like sleep with the canister but it’s not worth the hassle and inefficiency on a true winter camping trip.
Use white gas instead. This fuel works well in sub-freezing temperatures. It actually ends up being cheaper because it is so much more efficient than gas canisters in winter.
Important:
- Bring rubber gloves! If you need to refuel your stove, be warned thatWhite gas can “supercool” in cold weather. If spill liquid fuel on your hands while refueling, you can get instant frostbite on your hands.
- Pack extra fuel: If you plan on melting snow as your main water source, plan on bringing two to three times as much fuel as you would have normally.
- Don’t forget about your stove sinking. The heat from your stove will melt the snow underneath. Either clear the snow underneath it or have a small insulated pad to put it on.
29. Calculate Extra Calories
Your body will burn through fuel quickly to stay warm, and from the extra effort it takes to hike through snow. It’s likely you will need at least 4,000 calories of food per day. If you are a larger person or doing really intense activities, you might need 6,000+ calories per day (source).
How many calories of food to bring? One study found people used 34% more calories when hiking in at temperatures of 15-23F compared to 50F. Other research puts the number at 23% and the Army only calculates 10% more calories for soldiers exercising in cold weather.
Use this calculator to figure out how much food to bring backpacking on a warm-weather trip. Then budget 25-50% more calories. It’s better to play it safe than sorry!

*Not sure what to eat? Check out my ebook.
It has 50+ calorie-dense backpacking recipes, including lots of meals which don’t require cooking.
30. Leave “Starter Water” for Melting Snow
When melting snow for water, remember to leave about a half cup of water as a “starter” for the next batch.
Why? If you just pile snow into your pot, the bottom of the pot will come in direct contact with very hot flames without a way to transfer the heat upwards.
You will end up warping your pot!!! Plus, melting snow goes a lot faster if there is already a bit of water in the pot.
31. Store Water Correctly
Now that you’ve melted snow, you will need to transfer it to a water bottle. Having a wide-mouth bottle makes this a lot easier.
Once it’s in the bottle, you then need to prevent the water from freezing. This usually means tricks like keeping the water bottle in an internal pocket, storing it upside down or using an insulator.
For more, read: Best winter water bottles plus how to keep water from freezing.

The hunesdorf bottle, also called Relags bottle, is by far considered the best winter hiking water bottle. Get it here.
Hygiene
32. Bring a Pee Bottle
Getting up in the middle of the night to pee in winter is no fun. But it’s also not fun to lie in your sleeping bag unable to sleep because you have to pee so badly but don’t want to leave the warmth. The solution? A pee bottle.
A wide-mouthed Nalgene bottle works best for this. Ladies – you can use a Go Girl urination device to pee directly into the bottle instead of risk peeing all over yourself. Remember to label the bottle so you don’t accidentally drink from it!
33. Follow Leave No Trace
Leave No Trace still applies in winter! Ideally, you should always pack out your human waste. However, the LNT does say it is okay to bury poo in snow if you can’t pack it out.
Remember that the poo will still be there when the snow starts melting, and will be a disgusting sight for other nature-lovers. Be sure you bury your poo deep in snow and FAR AWAY from trail routes. It also needs to be 200 feet from water sources.
Toilet paper and wipes still need to be packed out. Bring doubled zip-lock bags for this. You can cover the exterior bag in duct tape so the contents aren’t visible. Or line the bag with foil so you can’t see inside.
34. Don’t Get Lost When Going to the Bathroom
When going to the bathroom off-trail, be sure you can find your way back. It is very easy to get lost in the snowy whiteness! Tie a bright-colored bandana to a tree within visibility of your bathroom spot, or make sure your hiking buddy stays in view.
Bonus Tip: Bring Morale Boosters
One thing about winter camping in the snow which doesn’t get talked about much is how boring it can get. The daylight hours are very short and the nights are very long. Assuming you are done with camp tasks and dinner by 7pm, you’ve still got nearly 12 hours until sunrise! You could go to bed early, but then you’ll wake up at 4am with nothing to do.
To keep the winter nights from getting boring or downright depressing, bring some morale boosters like:
- A lantern. The light at night really improves mood! Wind-up lanterns are great because you don’t have to worry about extra batteries and winding gives you something to do.
- Entertainment, like a book, radio, or deck of cards. Preferably it’s something you can do while wearing gloves.
- Really good food. You’ll enjoy the night more when you’ve got a badass hot meal to eat.
- Or, something to smoke is lighter weight than alcohol. J Plus it won’t make you have to pee a zillion times like alcohol does.
Image credits:
“Tent” (CC BY 2.0) by blachswan“NZ | camping” (CC BY-ND 2.0) by thestritzi“Safety tent” (CC BY-SA 2.0) by hugochisholm“camping!” https://www.flickr.com/photos/designsquid/5138514822/ (CC BY-SA 2.0)
“Snow Camping” (CC BY-NC-ND 2.0) by bdbhaiti
“Upper Mesa Falls in Winter #1 – Idaho” (CC BY-NC 2.0) by petechar
“Sun Valley” (CC BY 2.0) by jurvetson
“Snow Camping” (CC BY-NC-ND 2.0) by bdbhaiti
“A little breezy down low (by J. Valdez)” (CC BY 2.0) by Tim Berger
“Tent” (CC BY 2.0) by blachswan“NZ | camping” (CC BY-ND 2.0) by thestritzi“Safety tent” (CC BY-SA 2.0) by hugochisholm“camping!” (CC BY-SA 2.0)
“the 2 place-tent of Andreï at Camp3” (CC BY-NC 2.0) by twiga269 ॐ FEMEN
“Sarek NP (S) – Full moon” (CC BY-NC-ND 2.0) by Michiel van Nimwegen
“Condensation crystals on my tent” (CC BY-NC 2.0) by Al_HikesAZ


Post your comments