
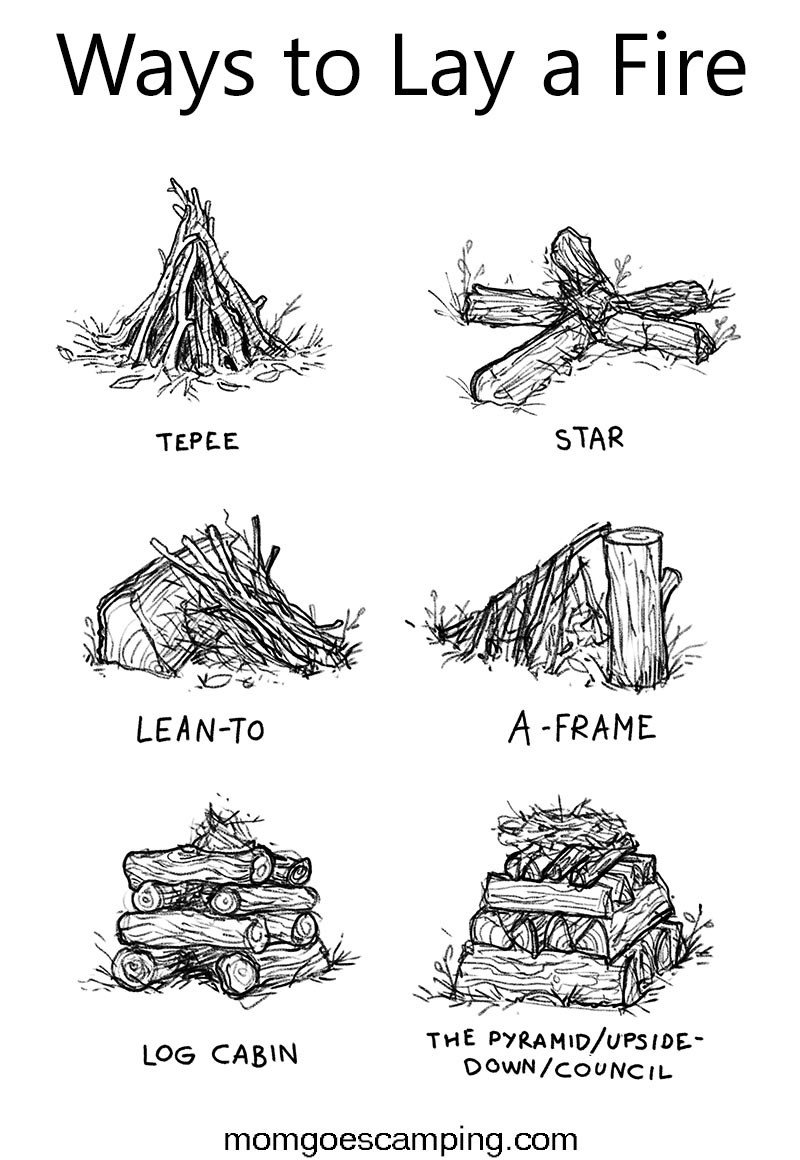
There are numerous ways to arrange your kindling and fuel wood to get a fire going. These are called “fire lays.” Depending on the circumstances, some ways of laying a fire are a lot better than others. For example, you’d want to use a different fire lay in wet conditions than in dry conditions. Here I will go over the 6 main ways to lay a fire, when to use them, and their pros/cons.
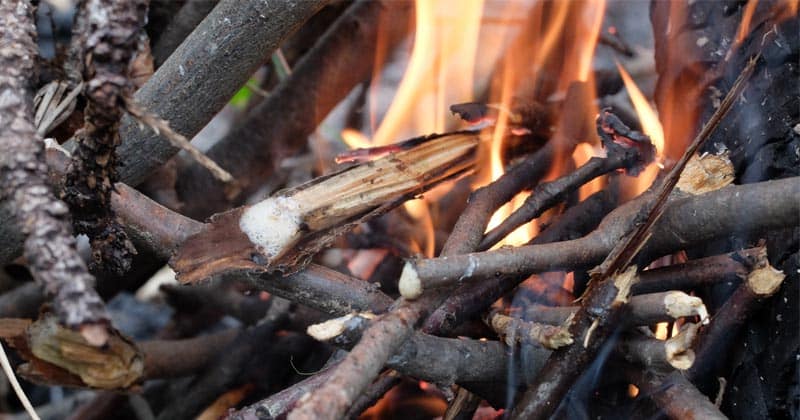
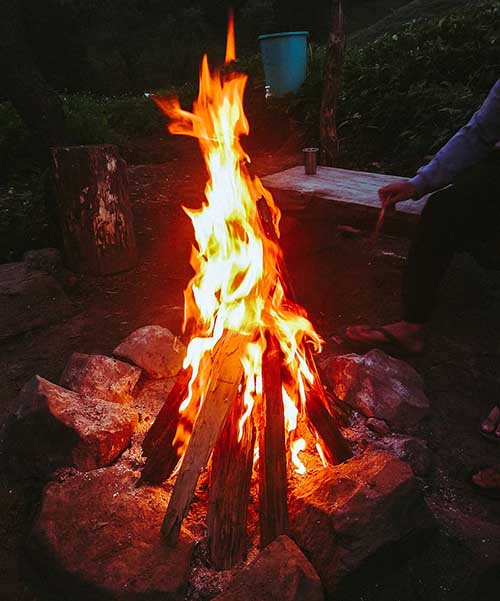
1. Teepee Fire Lay
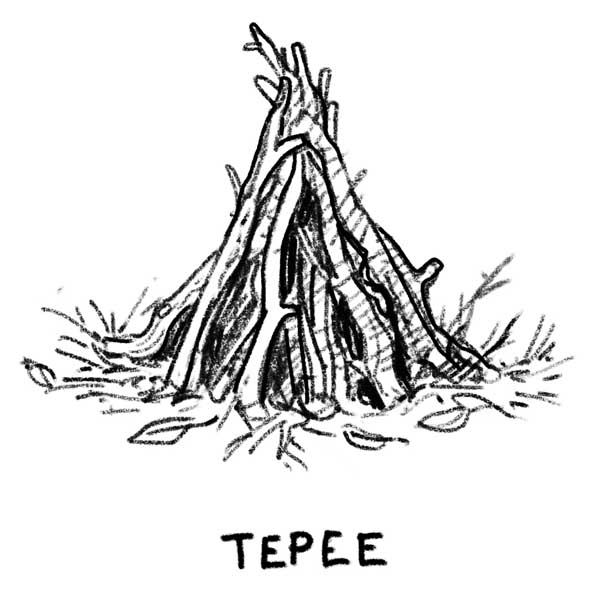
The teepee (also called tipi) fire lay is the most commonly used. It’s easy to light and you can easily adjust the size of the fire. The downsides are that the fire will burn through a lot of wood quickly. The configuration also doesn’t protect against rain or wind.
- Pros: Very easy
- Cons: Uses lots of wood; no protection from rain or wind
Instructions:
- Put some tinder in the middle of your fire circle. Toilet paper or cotton balls covered in Vaseline work well.
- Start with very small sticks.
- Arrange the sticks into a teepee shape over the tinder. Make sure to leave a little “door” so you can light the tinder later.
- Keep adding more sticks to your teepee. Use larger sticks as you build up the teepee.
- Reach in through the “door” and light the tinder.
2. Lean-To Fire Lay
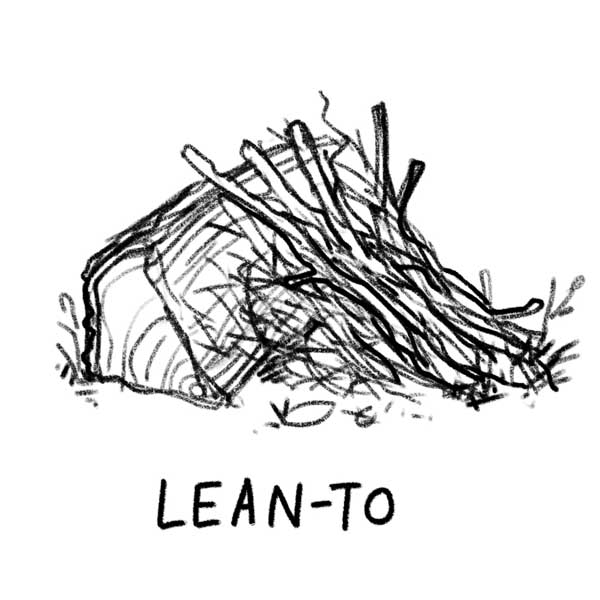
The lean-to fire lay creates a “roof” over the fire. The roof protects the fire from rain or wind. I’ve actually used these several times to get fire going in the pouring rain. But it’s definitely a next-level skill and it takes some practice.
- Pros: Good for rainy or windy conditions
- Cons: Takes more skill to build; restricts airflow so harder to light
Instructions:
- Find a large log or rock. This is the main “wall” for your lean-to.
- Prop small sticks on the wall. This is the start of your lean-to “roof.”
- Keep adding sticks on top of the frame, using larger sticks as you build up.
- Build a teepee fire underneath the roof.
- As the teepee fire burns, it will ignite the sticks on the roof above it. Those sticks will then ignite the sticks above them, and so forth.
- Keep adding sticks to the wall as it burns down.
Lean-To Fire Lay on a very windy day
Here’s an A-frame fire. It’s drizzling rain in this picture but the fire stayed lit so long as we kept putting wood over the “frame”
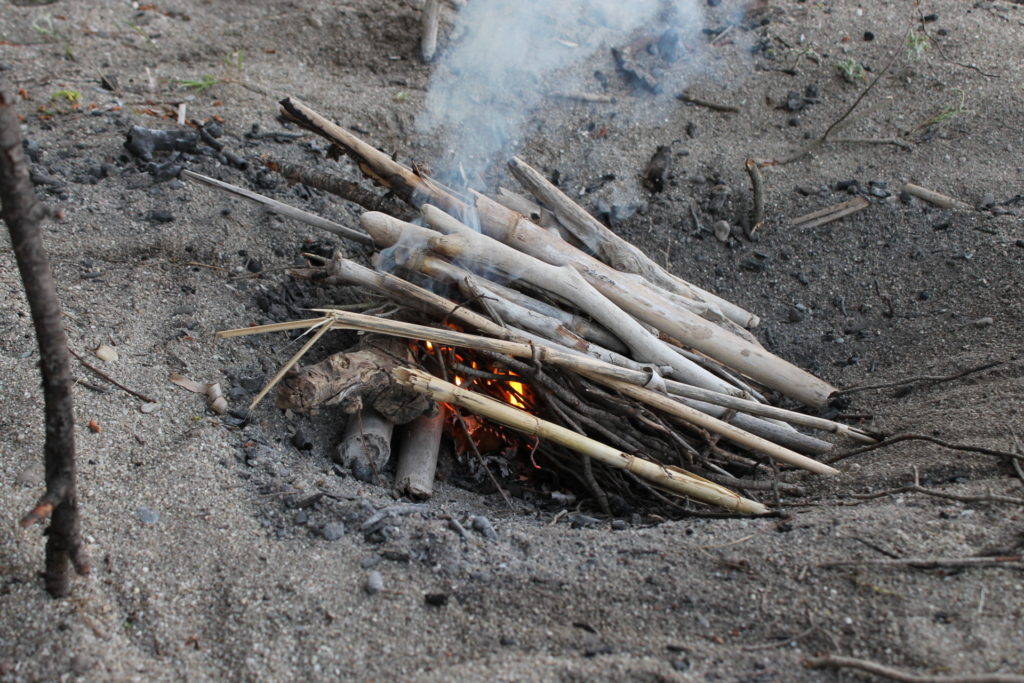
3. A-Frame Fire Lay
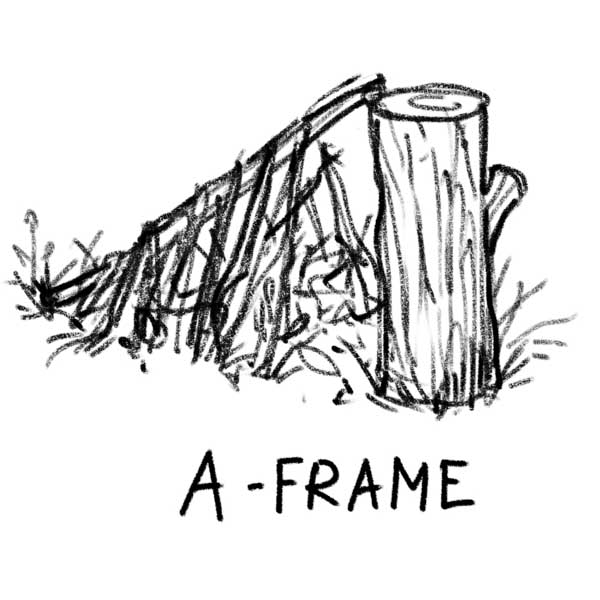
The A-frame fire lay is similar to the lean-to: both create a roof over the fire which protects it from wind and rain. With the A-frame though, your central “beam” will eventually ignite and burn down, so it isn’t as good if you want a very long-lasting campfire.
- Pros: Good for rainy or windy conditions
- Cons: Takes more skill to build; restricts airflow so harder to light; central beam will eventually burn down
Instructions:
- Find a longish, thick branch or log. This is the central “beam” for your A-frame.
- Prop the beam on something, such as a rock or log.
- Lay small sticks on both sides of the beam to make walls.
- Keep adding sticks to build up the walls, using larger sticks as you build up.
- Build a small teepee fire underneath the main beam.
- As the fire burns, it will ignite the sticks on the roof above it. Those sticks will then ignite the sticks above them, and so forth.
- Keep adding sticks to the walls as they burn.
It was drizzling rain this day, but the A-frame lay kept the fire from getting wet
4. Log Cabin Fire Lay
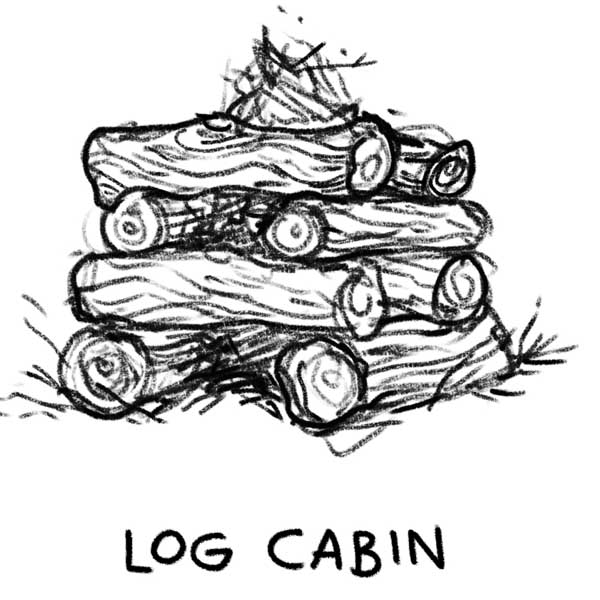
For this fire lay, you build up walls around a teepee fire. The walls block wind. Personally, I find the lean-to fire much more effective at blocking wind. However, the log cabin can also be useful if you want to dry out wet wood. If properly built, the walls of the cabin will fall into the fire themselves, creating a long-lasting fire that you don’t have to feed.
- Pros: Once built, it requires less effort to maintain; protects against wind; good for drying out wet wood
- Cons: Takes longer to build
Instructions:
- Build a teepee fire
- Build a “fence” around the teepee by stacking kindling sticks on top of each other
- As the teepee burns, the fence will fall in on the teepee, creating a self-feeding fire.
5. Star Fire/Cross Fire
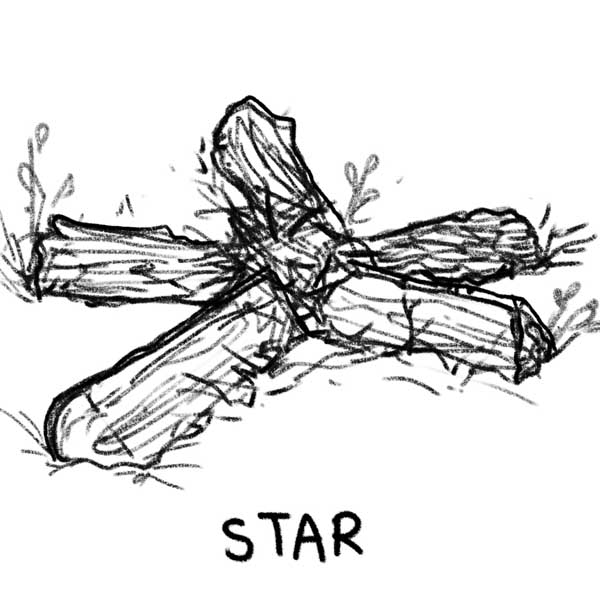
This is the fire lay you always see in cowboy movies. The reason is because there wasn’t much wood on the open range and the star fire lets you make a small, slow-burning fire that doesn’t require much fuel. I find it only works well with very dry wood. If the wood is even slightly damp, the ends will smolder instead of burn.
- Pros: Uses very little firewood; good for cooking
- Cons: Makes just a small fire; not good for wet wood; hard to keep going
Instructions:
- Start by making a small teepee fire.
- Instead of laying your fuelwood across the fire, you just put the ends of the fuelwood into the fire.
- As the ends of the wood burn, push the wood further into the center.
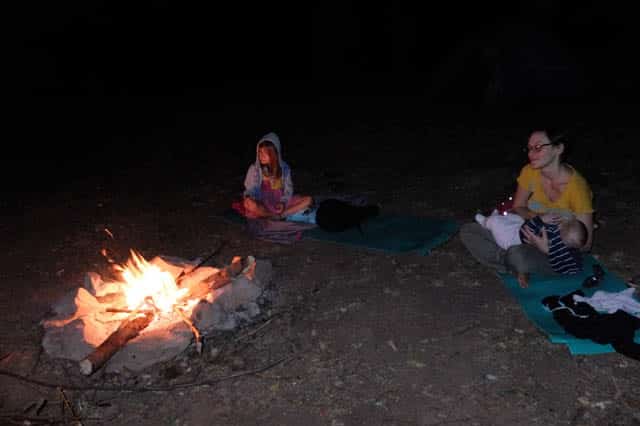
This is what the star fire looks like in real life. Yes, I’m breastfeeding my baby in this photo! 😮
6. Pyramid Fire Lay
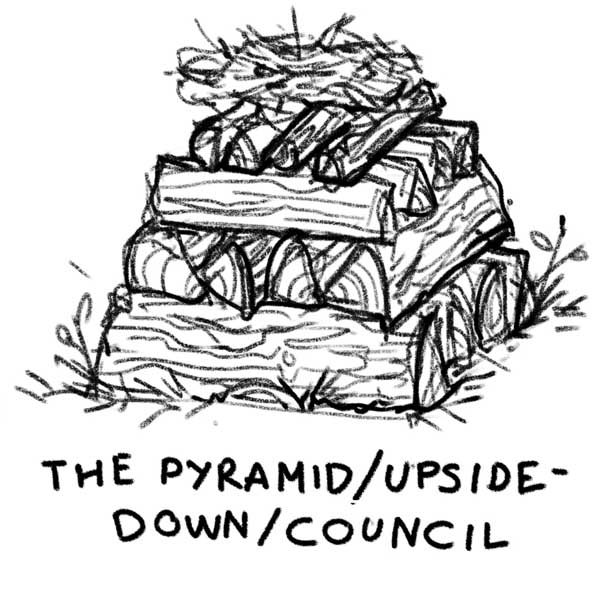
Also known as the upside down fire or pyramid fire, this is what you’d use to make a massive bonfire that you don’t want to tend. It’s also good if all your fuel wood is wet: as the fire burns down, it will dry off the layers of wood in the pyramid. I sometimes use this as a base for a lean-to fire when it’s raining. Because the fire lay is so tall, it is dangerous in windy conditions: sparks will go flying everywhere!
- Pros: Makes long-lasting fire; dries out wet fuel wood
- Cons: Requires lots of wood; high risk of forest fire
Instructions:
- Start with your largest pieces of fuel wood.
- Arrange pieces of fuel wood in a layer on the ground
- Add another layer of fuel wood on top of this, but in the opposite direction.
- Keep adding layers, changing direction as you stack them up.
- As the stack grows, it should get smaller to make a pyramid shape.
- When you’re satisfied with your pyramid, you build a teepee fire on top. When the teepee fire burns down, it will light the fuel wood below it.
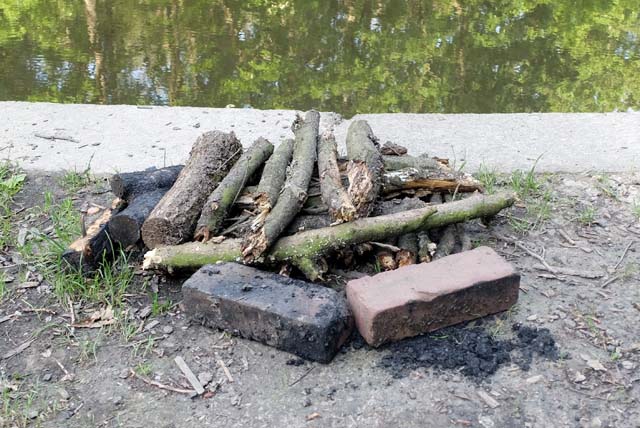
Here’s a small pyramid fire. I used it as a base for a teepee fire. The ground was really wet, so the pyramid got the fire off the ground. As the teepee burned, it dried out the wood in the pyramid.


Post your comments