
Getting outdoors in cold winter weather is definitely much more of a challenge or, at the very least, a bit of a hassle. But if you are willing to put forth the effort to go hiking in winter, you’ll be rewarded with beautiful views and trails that are refreshingly free of crowds.
Here are 17 incredibly important tips for hiking in winter to ensure you enjoy the experience and stay safe too.
1. Layer Properly
By now, you should know that you need to wear layered clothing when hiking. Winter requires a slightly different layering system than in shoulder seasons though. Instead of three layers, you’ll probably need to wear four. Essentially, you are putting an extra insulating layer on your upper body to stay warm.
Upper Body Layers:
- Base layer: Preferably a wool base layer shirt with a zip collar so you can unzip to vent. Polyester base layers also work but get stinky very quickly.
- Mid layer 1: A mid or heavy-weight fleece.
- Mid layer 2: A puffy jacket is preferred. I sometimes wear a wool hoodie, though it’s a bit heavy and bulky.
- Shell: It needs to be breathable, water-resistant, and windproof. Usually this means choosing a soft-shell jacket. If it’s going to be raining or sleeting, you’ll want to choose a rain jacket instead of a soft-shell.
Bottom Layers:
Your legs don’t lose heat as quickly as your core does, so you usually only need three layers on your lower body.
- Base layer: Also preferably wool.
- Mid layer: Fleece pants are great for this. Choose mid or heavy-weight fleece depending on the weather.
- Shell layer: Soft-shell pants protect you from water and wind. Some are already insulated so you can skip the mid layer. You can also get away with wearing rain pants as your shell, but you’ll need to have a very warm mid layer.
Notes:
- Be careful about wearing a down puffy jacket as your mid layer. They are useless if they get wet. Synthetic is better in many cases.
- You’ll also need a buff and a hat
Also read: The 3-Layer Clothing System Explained
2. Layering Applies to Your Hands and Feet Too
Just like you need to wear layers on your body, you need to layer your hands and feet too. For your hands, this means wearing a liner glove (wicking to prevent sweating), an insulating glove, and a shell mitten. For your feet, you’ll need a liner stock and insulating socks. Your boots act as the shell layer.
Because our hands and feet succumb to frostbite so quickly – especially if wet — it’s really important that you have spare liner and insulating gloves and socks. If you don’t want to bring a spare shell mitten, then make sure your mitts are attached to your jacket sleeves. This will prevent you from losing them when you take them off to open your water bottle, use GPS, etc.
Read more about winter hiking gloves and layering methods here.
3. Wear Gaiters
When walking through high snow, some snow will fall into your boots and melt, causing your feet to get wet. Gaiters help solve this problem so your feet stay dry and warm.
Read about how to keep your feet dry while hiking. The post is about rainy weather but the tips also apply to hiking in winter.
4. Know Which Gear is Mandatory
Winter hiking conditions can change quickly and drastically – like going from bare trails at base to deep snow drifts or massive ice sheets as you get higher up. Without the right gear, some of these areas might be completely impassible. Do your research about what trail conditions can be like on the hike and make sure you’ve got the right gear.
This winter hiking gear includes:
- Trekking poles: These are always mandatory when hiking in winter! You can also argue that they should be mandatory regardless of the season.
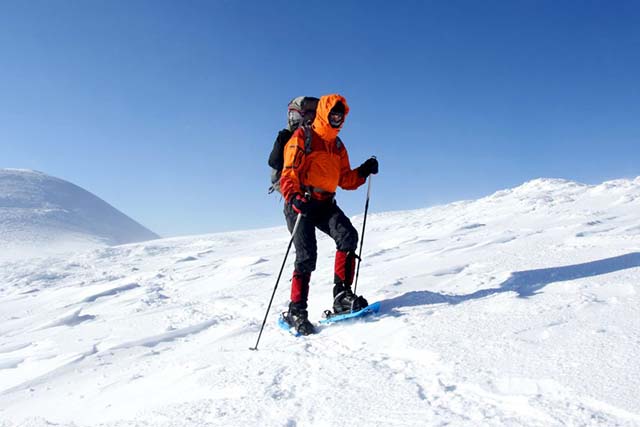
- Snow shoes: You’ll need snow shoes for snow over 6 to 8 inches.
- Crampons: These are for hiking on icy inclines or slopes. They are large and provide aggressive traction.
- Microspikes: Similar to crampons, these are better suited for flat terrain. They are lighter weight, easier to pack and can quickly be put on when needed.
- Ice pick: On more extreme hikes, you might even need an ice pick to get up trails.
Tip: Make sure you practice hiking in crampons – both uphill and downhill – before you actually take them on a winter hike. You can easily injure yourself if you don’t know how to use them.
5. Winterize Your Emergency Kit
Responsible hikers will always bring basic emergency supplies with them in case they have to spend an unplanned night outside. Bad things – like getting lost or injured – are more likely in winter, so it’s even more imperative that you have everything you need to survive an emergency.
In addition to the normal emergency hiking gear, you’ll need items like: hand warmers, chocolate (for hypothermia treatment), spare GPS batteries, spare headlamp batteries, stove and fuel which can be used in cold weather, and waterproof fire starters.
Don’t forget about emergency items for your car too. You might get back from the hike only to discover your car battery is dead, the vehicle is stuck in snow, or some other issue that leaves you stranded. I’ve got items like a shovel, cat litter (for traction), warm sleeping bags, change of clothing, and emergency food and water in our vehicle.
Read:
6. Navigation
Even in mild conditions, navigating in winter can be a challenge because snow can make it hard to see trails. In difficult conditions – such as snowstorms or complete whiteouts – navigation can be nearly impossible. You will get disoriented and can get completely lost. While I generally prefer a map and compass for navigation, a GPS definitely has its place in winter.
Tip: Make sure you mark where you parked your car on the GPS before you start the hike. I’ve heard stories of people coming back from their hike in heavy snow and not being able to find their car, even when it was only 20 feet in front of them.
7. Choose the Right Water Bottle
When hiking in sub-freezing weather, you can have serious issues with your water bottle like:
- Water completely freezes as you hike
- Frozen water in the threads cause the bottle lid to freeze shut
- The bottle cracks and then leaks when it starts to melt
- Have to remove your mittens to remove the lid, meaning your hands lose warmth each time you take a drink
To solve these problems, it’s important that you get the right water bottle. Ideally, you’d get a good insulated thermos with a flip-top or a wide-mouth sturdy bottle with an insulated sleeve.
Read about water bottles for winter hiking here.
8. Allow a Lot More Time
Normally, you should allow 20 minutes for each mile plus 60 minutes for every 2,000 meters of ascent. In snowy or icy conditions though, it is going to take much longer to complete a hike. According to “Tranter’s Correction”, a hike which normally takes 3 hours will take almost 5 hours in bad weather.
This is incredibly important to know, especially because it gets dark so early in winter. You don’t want to be caught out on the trail at nighttime.
Read more about how to calculate how long it will take to complete a hike.
9. Have a Cold Start
A big mistake many winter hikers make is starting their hike bundled up and warm. Then they start hiking, their body produces heat and they begin to sweat.
Sweat = wet = coldness and potential hypothermia.
Instead, you should make sure to have a cold start. Wear just enough layers so you feel chilly. You’ll warm up quickly.
10. Get Shells On Quickly When You Stop
Just like how your body warms up quickly when hiking, it loses heat quickly once you stop. As soon as you stop, make sure to put on your shell layers to trap all that heat your body made.
11. Attach All Gear with Carabiners or Guylines
It is incredibly difficult to use gear while wearing mittens or gloves. You will drop gear, which may mean it breaks or gets lost in a snow drift. Prevent this by attaching everything important (GPS, water bottle, shell mittens…) to your backpack straps or jacket.
12. Vaseline Your Exposed Skin
Hiking in cold weather means your lips will get chapped. Your nose will start to drip and the snot will crack the skin around your nose. The chapped, cracked red skin isn’t just unsightly but also can be downright painful.
Do yourself a favor and put Vaseline over any areas of skin which is exposed. I personally don’t like Vaseline much (it blocks my pores and gives me breakouts) but did find a nice beeswax-based balm to use.
13. Keep Batteries Warm
Alkaline and rechargeable batteries do not perform well when they get near freezing temperatures. Lithium batteries tend to handle cold better but even these don’t perform at their best in extreme cold. Bottom line, expect batteries to drain much faster or even have issues with the device not working at all.
Keep devices and spare batteries somewhere like an interior jacket pocket so they won’t freeze. And it’s smart to bring more spare batteries than you normally would so your important devices don’t die when you need them most.
14. Consider a Butt Pad
I like to take a lot of breaks while hiking. Normally, I will just sit on a fallen tree, big rock, or whatever. In winter though, it is too cold to sit just anywhere. If I sit on snow, my butt will get wet (even with shell pants on).
The easy solution is to bring a small foam pad for sitting on. Yes, it does add weight and bulk to your pack but makes breaks much more enjoyable.
15. Use Sunglasses and Sunscreen
The sun gets incredibly intense on clear days when it reflects against the snow, especially at high elevations. Without sunglasses, the light can blind you and you’ll have to squint to see the trail. And if you forget to put on sunblock, you could end up with a terrible burn on your face. If you wore sunglasses but forgot the sunblock, you’ll end up looking like a raccoon from the white patch over your eyes.
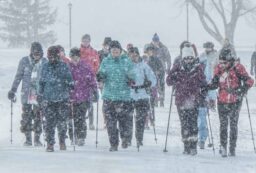
16. Don’t Go Alone
And if you absolutely have to hike alone in winter, then make sure you’ve told people where you are going and when you expect to be back (something that’s smart to do regardless of the season). You should also really consider an emergency communication device so you can call for help.
17. Be Prepared to Turn Back
Don’t let your ego get in the way of better judgment. If you come across dangerous conditions, are going much slower than anticipated, get wet, or simply aren’t having a good time, then TURN BACK. You really don’t want to be one of the many people who have to call Mountain Rescue Services or die in the cold because you didn’t readjust your plans and get off the trail at the first signs of trouble.
Resources:
static/file/2017MREWIncidentReport.pdf
https://www.walkhighlands.co.uk/news/the-swiss-cheese/0018025/
https://www.reddit.com/r/photography/comments/7fopb5/keeping_batteries_warm_in_extreme_cold/
https://electronics.stackexchange.com/questions/263036/why-charging-li-ion-batteries-in-cold-temperatures-would-harm-them
http://www.nemountaineering.com/blog/2016/04/26/traction-selecting-footwear-traction-for-your-hike/
https://www.hammockforums.net/forum/showthread.php/160424-Winter-tips
https://14ers.com/forum/viewtopic.php?t=53375


Post your comments