When I started backpacking as a kid, it was common for backpackers to carry around 40 or even 50lbs worth of gear on their backs. Then the ultralight backpacking revolution began in the early 90s. Manufacturers began making better quality, lighter gear. Now, ultralight backpacking has become an obsession with hikers trying to get their base weight down lower and lower.
What Weight Is Considered Ultralight Backpacking?
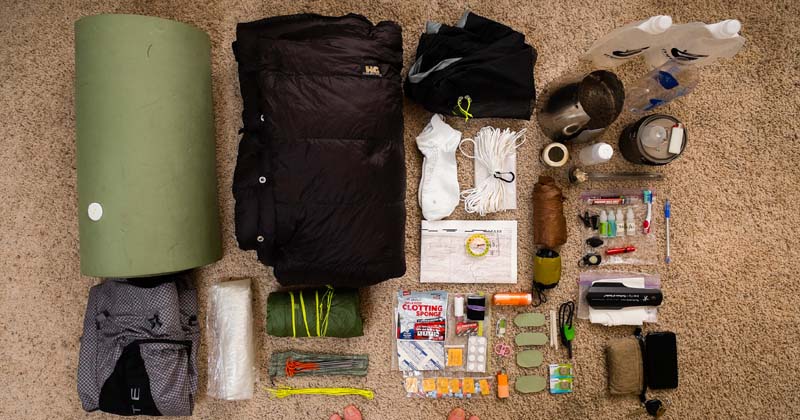
Ultralight backpacking means your base weight (without food or water) is below 12lbs, though some UL backpackers now say 10lbs is the upper limit. By contrast, lightweight backpacking is a base weight under 20lbs. Normal backpacking is a base weight of 20 to 30lbs.
Here’s how it breaks down.
| Ultralight | Lightweight | Normal | |
|---|---|---|---|
| Sleeping bag and pad | 2 | 3 | 5 |
| Tent/shelter | 2 | 4 | 5 |
| Cooking, drinking & water treatment | 1 | 2 | 3 |
| Extra clothing (not worn) | 3 | 4 | 7 |
| Other gear (flashlight, compass, first aid, etc.) | 2 | 3 | 4 |
| Total base weight | 12 | 20 | 30 |
(Source)
Ultralight Backpacking Tips for Beginners
If your current base weight is in the 20-30lb range, it might seem impossible to get it down to under 12lbs. However, you don’t necessarily even need to spend a lot of money on UL backpacking gear. Here are 16 ultralight backpacking tips for beginners.
1. Get a Digital Kitchen Scale
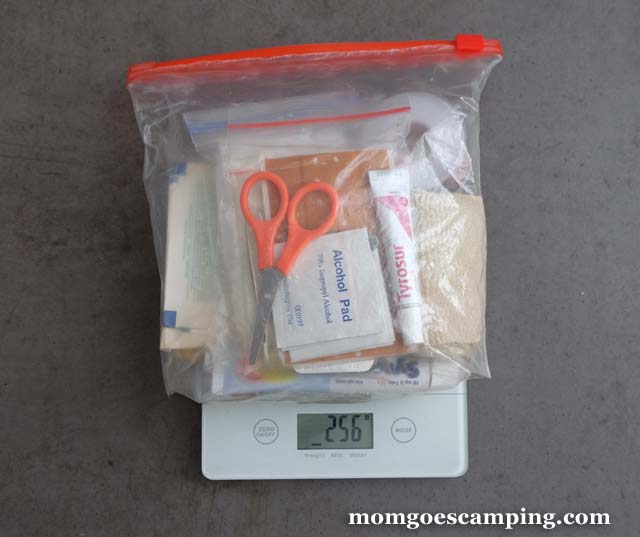
My cheap digital scale was one of the best things I bought for backpacking. It allowed me to weigh gear and supplies. Only then did I get a true sense of what gear was weighing me down. The scale also made it a lot easier to weigh dry foods like pasta so I got portions correct.
You might even want to go the extra step of weighing everything in your pack and writing it in a spreadsheet. This will give you a better idea of which items are really weighing you down.
2. Don’t Be Penny Wise but Pound Foolish
In many cases, cheap backpacking gear is just as good as the expensive version. Like my ridiculously cheap backpacking pot which only cost about $5. Or my DIY UL windscreen for my canister stove which cost about $1 to make.
But there are times when cheap gear is not worth it. Cheap sleeping bags may wear out after a season or two. Cheap tents have poles will snap in the slightest wind. Cheap batteries drain quickly…
It’s better to buy quality gear which will last you years of trips. So think twice before trying to save a few bucks by buying cheap ultralight gear.
3. Make a Food Plan
It’s really easy to weigh your backpack down with too much food, especially if you aren’t calculating portions or calories. I highly recommend making a spreadsheet with exactly what you will eat on your backpacking trip each day and calorie counts.
Below is a sample backpacking food plan. It shows 3,400 calories of food per day (almost all of which was dehydrated), averaging out to 27.8oz (1.7lbs) per day. Again, having a digital scale makes it easier to calculate how much food to bring, especially for things like pasta.

Read:
4. Embrace the Dehydrator
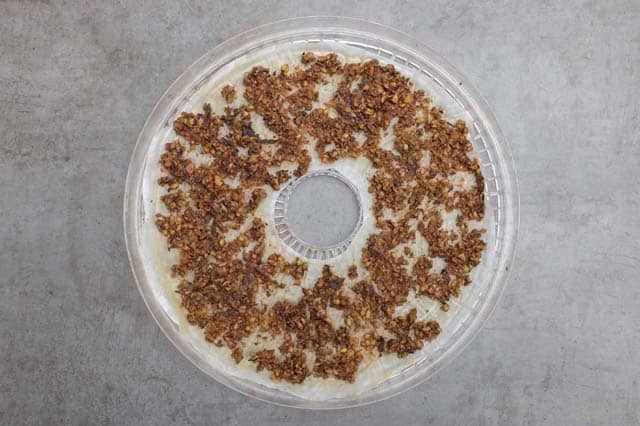
Dehydrated walnut barley risotto. UL at 172 calories/oz
As a general rule, all food you bring backpacking should have 120 calories per ounce. This will give you 3,500 calories in 1.8lbs. I was able to get my backpacking food even lighter by dehydrating my own meals.
It took some trial and error, but I was able to make super-light, ultra-healthy meals. For example, my walnut-barley risotto dehydrated down to 172 calories per ounce! My creamy cashew tomato sauce for pasta? It has a dry weight of 163 calories per ounce!
Dehydrated meals can be prepared by soaking in water for around 20 minutes (known as cold soaking). This means I could leave my stove at home and save even more weight. I actually still bring a stove because I like hot meals, but am less worried about running out of fuel or cooking in the rain since cold-soaking is an option.
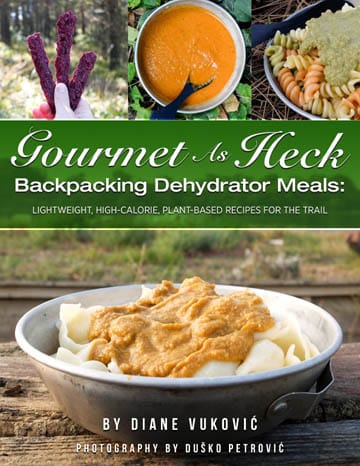
*I wrote an ebook with ultralight dehydrator recipes for backpacking. The book also has loads of info on how to plan backpacking meals. You can get it here. I’ll even give you 50% off. 🙂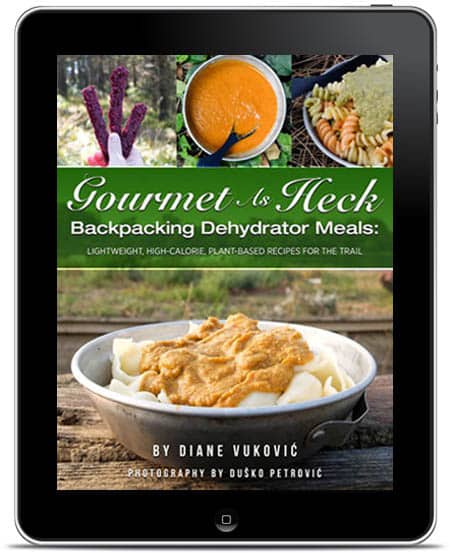 Get my book here for 50%
5. Calculate Dollars Per Ounce Saved
It’s no secret that ultralight backpacking gear is expensive. Is it really worth it to pay extra just to shed a few ounces from your base weight? Here’s one trick to see if the extra cost is worth it: calculate price per ounce saved.
For example, here are two sleeping bags rated for 20F.
- REI Co-Op Zephyr 20: Weighs 36oz and currently costs $159 .
- Therm-a-Rest Hyperion Down Sleeping Bag: Weighs 20oz and currently costs $409 .
The Hyperion bag costs $250 more but weighs 16oz less. That means I’d be paying $15.6 per ounce saved.
As a general rule, $20 per ounce saved is a good value for UL gear. If you go backpacking very frequently, then you might be willing to pay even more per ounce of weight saved.
6. Focus on the Big Three
In terms of going ultralight, there are three items which will really count towards your base weight: tent, sleeping bag, and sleeping pad. If you go backpacking frequently, then it’s worth it to spend money on ultralight versions of these items.
*Note most backpackers consider your pack and not sleeping pad to be the #3 item. I’ll explain why I disagree next.
Tent:
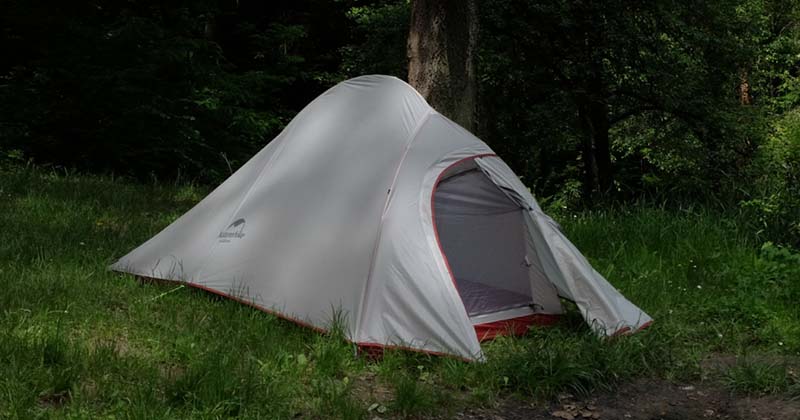
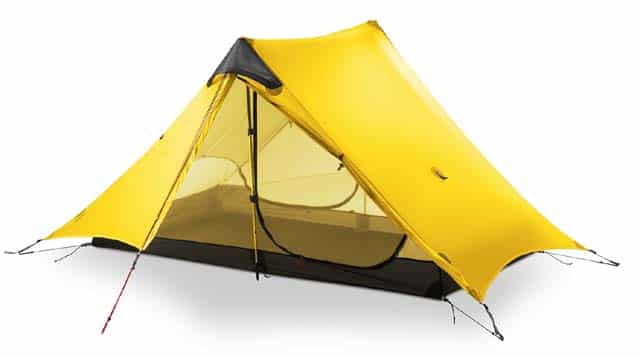
My UL tent: The Naturehike CloudUp 2
Aim for under 2lbs for a 1-person tent or 3lbs for a 2-person tent. If you are on a budget, check out these cheap ultralight tents. I have the Naturehike CloudUp 2 and, while it’s far from perfect, I’m very happy with it.
Sleeping Bag:
How much does an ultralight sleeping bag weigh? Any bag under 2lbs is generally considered to be ultralight.
Note that a lot of sleeping bags which are under 2lbs are not suitable for cold weather. This is fine: a lot of people make the mistake of buying a sleeping bag rated for low temperatures even though they only go backpacking in summer.
What if you plan on going backpacking in cold weather too? Your best option is to get two bags. Then you won’t drag the overkill bag on warm trips. If you can only afford one sleeping bag, then be prepared to pay for a good UL sleeping bag rated for colder weather.
Tip: Check out for cheap UL sleeping bags. You can often find sleeping bags at half the price.
Sleeping Pad
Sleeping bags get a lot of attention, but your pad is just as important. Aside from giving you comfort, the pad is what protects your body from heat loss through the ground. If you don’t have a good sleeping pad, then you are wasting your money on an UL sleeping bag.
Compared to UL sleeping bags, UL pads tend to be a lot cheaper. You can use a warmer pad and colder sleeping bag. So, if you can’t afford a good ultralight sleeping bag now, it makes more sense to get a good pad. Plus, unlike sleeping bags which are only suitable for certain temperature ranges, a sleeping pad can be used for 3 seasons. In winter, you can just add another pad on top of it for extra insulation.
What R-value should you get? In general, an R-value of 2.1 will be good in temperatures of 36F, or slightly higher temperatures if you have a colder bag. Aim for an R-value of 2 to 4 for 3-season use.
How much weight can you save by choosing an ultralight sleeping pad? To give you an idea of how much weight you can save by choosing a better sleeping pad, here are some comparisons.
- The has an R-value of 2.3 and weighs just 8.8oz. It currently costs $194 at REI.
- The has an R-value of 2.9, weighs 21oz and costs $80.
The Stratus is a lot more affordable. But, for an extra $100, you could have saved 12.2oz. That’s about $8 per ounce of savings – which is a lot cheaper per ounce than shedding weight from your sleeping bag.
7. Don’t Go Too Light with Your Pack
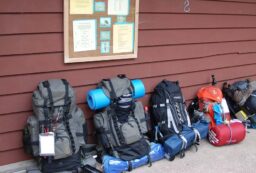
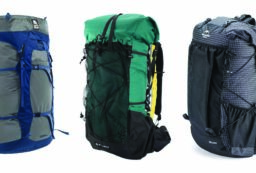
Even before you put anything in it, your pack alone can already weigh 6+ lbs. There are now a lot of manufacturers who are making ultralight backpacks which weigh under 2lbs.
However, don’t rush off and get an ultralight pack yet. As explained here, there are lots of downsides to UL packs:
- Not designed to hold a lot of weight. The pack might buckle and collapse under the weight of your gear.
- Weak frame doesn’t distribute weight properly. A sturdy frame will distribute weight vertically down your back, making a heavy load easier to carry. It’s pointless to save weight if the UL pack is just going to make you feel uncomfortable.
- Hip straps are often dinky. This means the pack won’t provide support or properly distribute weight around your hips.
- Lack features. UL backpacks need to keep the number of zippers, compression straps and pockets down to reduce weight. This can make them annoying to use, like when you need to find your first aid kit in your pack or want to stash your jacket outside your pack.
The bottom line? Aim to find a pack which is around 3lbs. This is as light as you can go while still getting good support and features. If you want to go much lighter than this with your pack, first get the weight and size of your other gear down. Then you’ll be able to choose a smaller pack.
*Osprey and Granite Gear make a lot of great lightweight packs. .
8. Ask, Do I Really Need It?
When packing, spread all of your items in front of you. Then ask yourself these three questions:
- Do I really need it?
- What could happen if I don’t bring it?
- Is there something I’m already packing which could do the same job?
Here’s an example of how this might go:
- Deodorant: Definitely no. It will just attract insects.
- Cell phone: No, I’m already bringing a separate camera and there won’t be a cell signal anyway. Better to leave it in the car.
- Extra underwear: I could go commando while waiting for wet underwear to dry.
- GPS: Not when I know how to read a paper map and am going on well-marked trails.
- Mug: No, I can just drink coffee out of my pot before I make breakfast in it.
- Big ass survival knife: No, my small multi-tool knife will do the job.
- Toilet paper: No, but I definitely want it.
- First aid kit: Absolutely need it!
I added these last examples to remind you not to go crazy. Some items are worth the weight. Sure, I could use leaves to wipe instead of toilet paper… but I could also end up with a rash on my butt which would make for a miserable trip.
And while I rarely need anything from my first aid kit, when I do need it, I really need it. I’m not going to save weight on thing which are there to save my life! Here’s what’s in my lightweight first aid kit.
9. Multipurpose Gear
In regards to the question, “Is there something I’m already packing which could do the same job?” You’d be surprised how much of your gear is redundant once you think creatively.
Here are some examples of multipurpose backpacking gear.
- Use pack cover as food bag. It’s already waterproof and sturdy and works great to hold my food when hanging a bear bag.
- Sleeping bag stuff sack as pillow. Fill it with clothes and it makes a great pillow. There are even stuff sacks which are lined with fleece specifically for this reason.
- Cook pot as a bowl. No need to carry a separate bowl when you can eat right out of the pot.
- Tent peg as a bathroom trowel. Sturdier pegs will do the job.
- Plastic water bottle to back-flush my Sawyer Mini water filter. I’ve learned that I can use a Smart Water bottle to back-flush so don’t need to bring the syringe.
- Scarf/buff as a towel. This is a bit gross admittedly, but I’ll forgo a towel on short trips and dry my face with my scarf.
- Extend sleeping pad with pack. You can save weight by choosing a short sleeping pad and then putting your pack under your calves.
10. Choose a Trekking Pole Tent
Trekking pole tents are the epitome of multipurpose gear. Instead of having their own dedicated tent poles, they are pitched with your trekking poles.
There are definitely downsides to trekking pole tents, like being harder to pitch, but they can save you a lot of weight. Check out these best trekking pole tents.
11. Look for Secondhand Backpacking Clothes
When I first started backpacking, I definitely wore cotton because it was all I had and I wasn’t ready to invest in expensive lightweight backpacking clothes. All that cotton definitely weighed my pack down. Worse, I had to bring extras because cotton is like a friggin’ sponge and takes forever to dry.
I’m still not ready to throw down a lot of money for backpacking clothes, but have managed to get rid of cotton by finding secondhand backpacking clothes. You’d be amazed at how many nice softshell jackets, hiking pants, and base layers you can find at thrift stores. I recently got a puffy down jacket for just $10 because the pocket was slightly torn.
12. Every Ounce Matters
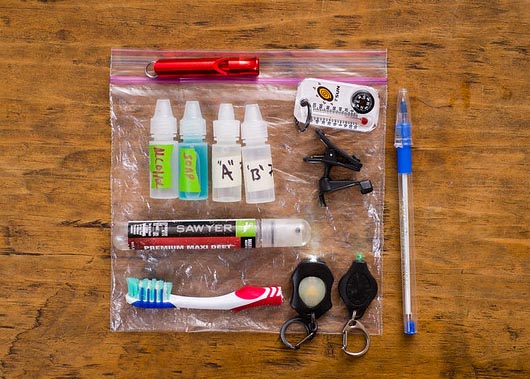
An ounce might not seem like much, but it only takes 16 ounces to add up to a pound. By making small weight savings, you can actually get your pack weight down quite a bit. Again, using a digital scale to weigh everything allows you to see just how much you’re saving on your base weight.
Here are some ways to shave ounces off your base weight:
- Cut the handle off your toothbrush
- Remove tags and labels from gear
- Repackage soap and toothpaste into smaller containers
- Trim the excess off straps, like your hip belt and sternum strap
- Recycle a plastic water bottle instead of bringing a Nalgene or stainless steel bottle
- Use lightweight painter’s tarp instead of the manufacturer’s tent footprint
- Ditch compression sacks for sleeping bags; use rubber bands or just stuff them into your pack instead
- Cut long sleeping pads down to size
- Choose the smallest version of everything
13. Make a Water Plan
Water is incredibly heavy at 2.2lbs (1kg) per liter. It’s not like you can backpack without water though, and getting dehydrated can cause headaches, crankiness, and poor decision making.
To keep water weight down, plan your trip around water sources. You’ll need to realistically calculate how much water you need per mile based on the terrain and temperature.
Read this article about How to calculate how much water to bring on a hike.
Some UL backpackers recommend carrying water purification drops or tablets since they are the lightest weight. I personally disagree; chemical purifiers take 30 minutes to 4 HOURS work and also won’t kill certain pathogens like tapeworm eggs. Getting diarrhea on a backpacking trip sucks, which is why I use the Sawyer Mini instead. See this post for the best water purifiers for backpacking.
14. Get Lightweight Cordage
In addition to hanging a bear bag, rope is incredibly useful to have while backpacking. You can use it to fix a broken bootlace, hang a clothes line, rig a tarp tent if your poles break, rescue someone from a cliff…
If you are hanging a bear bag (lots of places now require bear canisters), then you’ll need about 50 feet of rope. This can actually get really heavy, especially if you choose a rope which is thicker and stronger than you really need. Just make sure you don’t go too thin with your cordage: thin rope will cut into tree branches or your hands as you try to hoist a food bag. Thin cordage will also tangle easily
Here are some ropes and their weights:
- Military 550 paracord (4mm; 550lb strength): 7.1oz per 100 feet. Available here on Amazon.
- Dyneema Ironwire (2mm; 650lb strength): 3oz per 100 feet . (2.8g per meter). Available here on Amazon.
- Samson Zing-It (2.2mm; 580lb strength ): 2.6oz per 100 feet. Available here on Amazon.
15. Some Things Are Worth the Weight
I know a lot of UL backpackers love to boast about how much weight they’ve managed to cut, but some things are really worth the weight.
For example, lots of UL backpackers have started cold-soaking food so they don’t have to bring a stove. But for me, one of my favorite parts of backpacking is waking up in the morning and slowly drinking a hot coffee while enjoying the view. No way am I leaving my stove behind! I actually bring extra coffee on backpacking trips so I can offer other hikers a cup. No one has ever said no to a coffee and carrying the extra weight is very worth it for all the friends I’ve made.
16. Don’t Succumb to Snobbery
There’s a disturbing trend in the ultralight community: backpackers are getting snobbish.
“You still use a tent instead of a tarp shelter? You aren’t a true ultralight backpacker!”
“My ultralight layering system is better than yours… I only had to pay $400 for the down jacket…”
“You mean you don’t have a titanium spoon? You could have saved another 0.0003 ounces…”
There’s no right way to enjoy the outdoors. And, while I do personally get excited about cutting weight from my pack, it’s not a competition. Nor does having an ultralight pack make me a better backpacker than anyone else.
Don’t let anyone make you feel bad about your base weight or what you bring. If there’s one thing I want you to remember from this article it’s that:
Going ultralight isn’t about achieving elite status: it’s about making backpacking more enjoyable! If going UL means you’ll be uncomfortable or unhappy, then it isn’t worth it.
Any other ultralight backpacking tips for beginners that you would add? Let us know in the comments section below!
Some resources for this article:
https://www.thehikinglife.com/2018/10/25-multipurpose-backpacking-gear-items/
https://backpackinglight.com/forums/topic/92313/
http://blog.gossamergear.com/lightweight-backpacking-conundrum
https://pmags.com/sleepings-pads-a-grounded-view
https://backpackinglight.com/forums/topic/91275/
https://outdoors.stackexchange.com/questions/3035/is-buying-an-expensive-sleeping-bag-better
Image credits:
“Core Gear” (CC BY-NC 2.0) by azoeart
“Personal Hygiene” (CC BY-NC 2.0) by azoeart





3 Comments
Zorro
September 4, 2022 at 6:41 pmI just can’t take anyone’s advice about backpacking who cuts their toothbrush handle in half. This is so asinine as to be almost childish. There are so many other ways to save so much more weight than doing silly things like this.
Diane
September 5, 2022 at 11:48 amI also used to think this was crazy (my dad does it). But then I started doing it too. It’s more so my toothbrush fits in my pack better though 🙂
Felipe
January 7, 2024 at 5:16 amI found one with a very thin handle and just had to cut the tip to fit the pouch I use for hygiene. You can also get a disposable brush like they give on an airplane or hotel.