
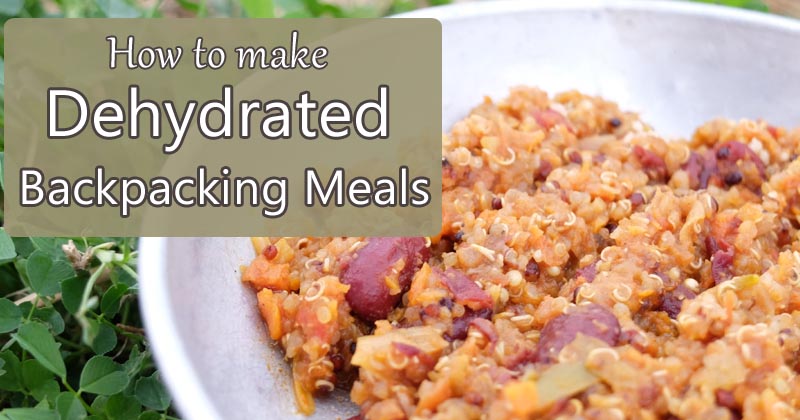
When I first started backpacking, I would make meals from instant supermarket foods. But eating ramen and boxed couscous got old really quickly, not to mention that those meals lack protein and nutrients. So, I started dehydrating my own backpacking meals.
Yes, dehydrating meals for backpacking does take work and planning (If you are new to backpacking food, read: What to Eat Backpacking). But I promise you it is worth it! It’s cheaper, more nutritious and lightens your pack since some meals become insanely calorie-dense. And dehydrating meals gets easier over time, especially once you build up a collection of go-to meals for your trips.
There are three ways to make dehydrated backpacking meals. I’d go over them here, including step-by-step instructions, info about shelf life and tips to get the best results.
Jump to:
- Method1: Dehydrating Entire Meals
- Method 2: Add-In Method
- Method 3: Spreads
- Recipe Ideas
- Packaging and Shelf Life
- Tips
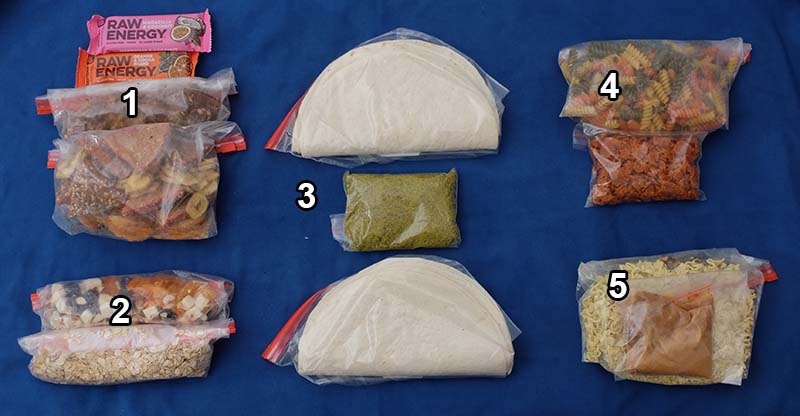
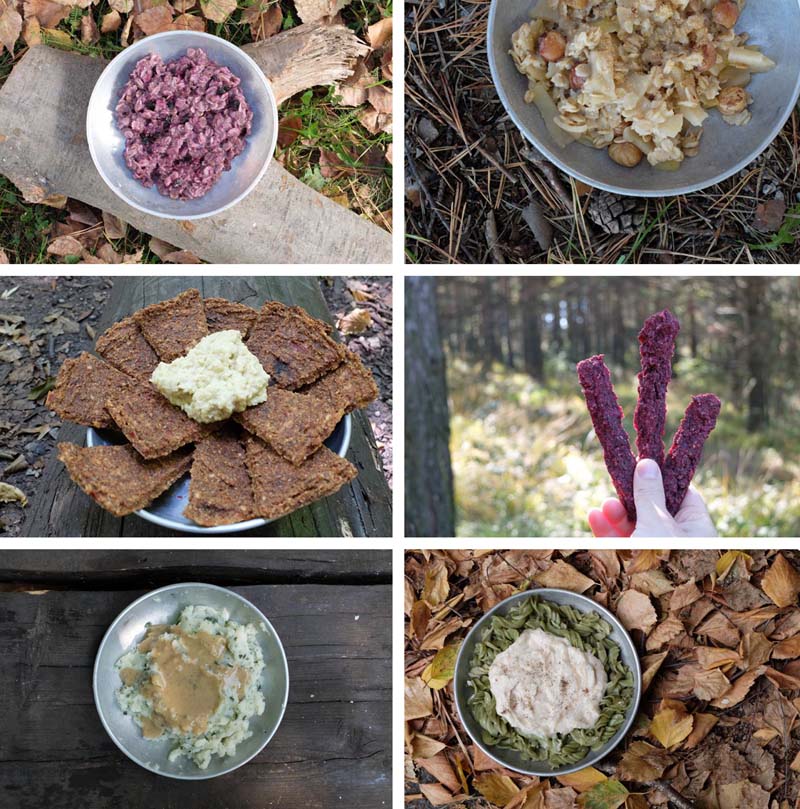
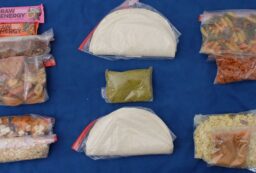
Mostly dehydrated backpacking food. 1) Snacks 2) Oatmeal with dried fruit and nuts 3) Tortillas with dried pea spread 4) Pasta with dried tomato-cashew sauce and 5) Ramen with dried mushrooms, scallions and PNB.
By the way, I wrote an entire eBook on dehydrating meals.
It also has tons of info on meal planning for backpacking trips.
Check it out here.
Method 1: Dehydrating Entire Meals
With this method, you literally dehydrate entire meals for backpacking. This is the easiest method when it comes to packaging and prep on the trial. But not all meals dehydrate well though, or they end up with weird textures when rehydrated. So, it takes a bit of trial-and-error and experimenting.
At-Home Instructions:
- Cook a meal.
- Put a portion of the meal on the dehydrator.
- Dehydrate completely.
- Pack the dried meal portion for the trail.
On the Trail Instructions:
To rehydrate, you simply pour hot water over the dried meal and wait 5-25 minutes (depends on the ingredients; some take longer to rehydrate than others).
You can also use cold water to rehydrate dried meals if you don’t want to bring a stove. This is known as the cold soaking method.
Pros:
- One-Bag: The entire meal goes in one bag, so it’s easy to pack. No need to worry about multiple baggies when preparing food.
- Easy to Prepare on the Trail: It really doesn’t get easier than this. Just pour water and wait.
Cons:
- Hard to count calories: I tally calories when backpacking to ensure I bring exactly the right amount of food. This is tricky with DIY meals because you have to add up the calories in EVERY SINGLE INGREDIENT you add. It’s a pain!
- Risk of gross texture: Some ingredients rehydrate faster than others. This means some ingredients can end up mushy while others are still crunchy.
- Limited options: Some meals simply don’t dehydrate or rehydrate well. For example, I’ve never had luck dehydrating meals which contain brown rice.

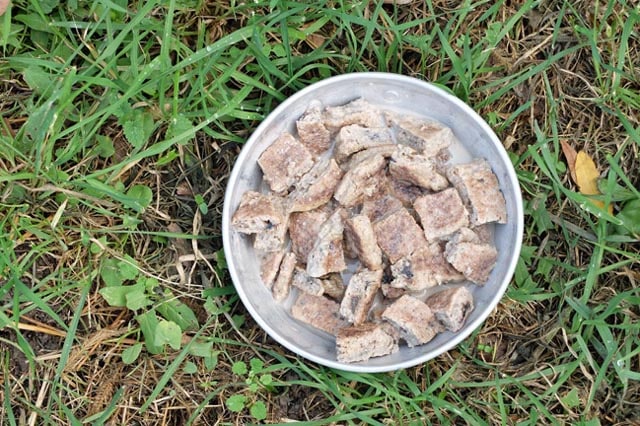
Above: Dehydrated walnut barley risotto. It is insanely calorie-dense at 172 calories/ounce dry weight.
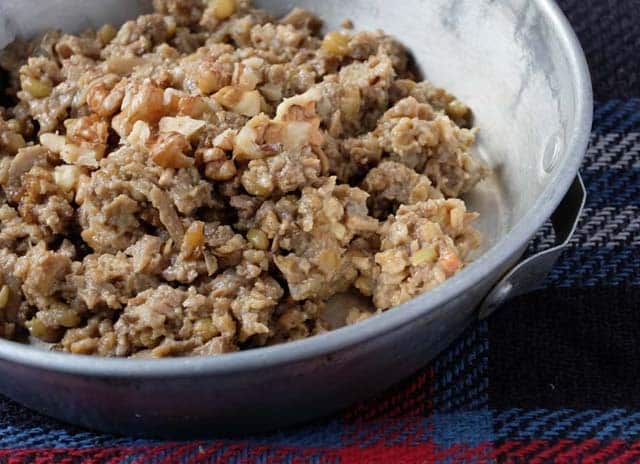
And here’s what the risotto looks like when rehydrated. It isn’t the prettiest, but it is delicious and filling.
Method 2: Dehydrated Add-Ins
With this method, you create backpacking meals by adding dehydrated foods to non-dehydrated ingredients. Typically, the carbohydrate portion of the meal will be non-dehydrated. For example, you can dehydrate sauce to add to pasta. Or dehydrate fruit to add to oatmeal.
At-Home Instructions:
- Choose a carb. Measure out a portion and pack this separately.
- Cook the add-ins. In most cases (especially with vegetables), you will need cook the add-ins before dehydrating. Otherwise they will take FOREVER to rehydrate.
- Dehydrate the add-ins.
- Pack the add-ins separately. If you have multiple add-ins which each have different rehydrating times, you may need to pack these separately too!
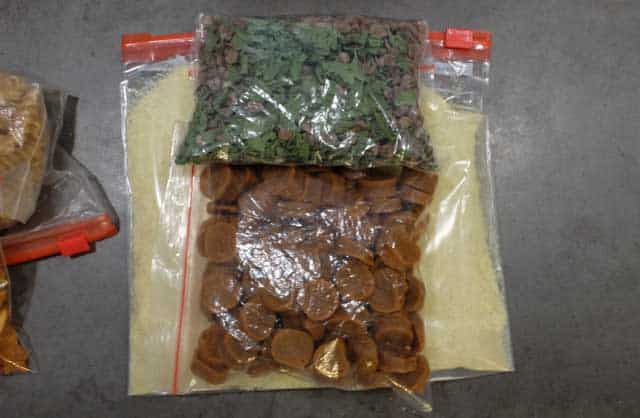
Dehydrated creamy cashew-tomato sauce which will go over pasta
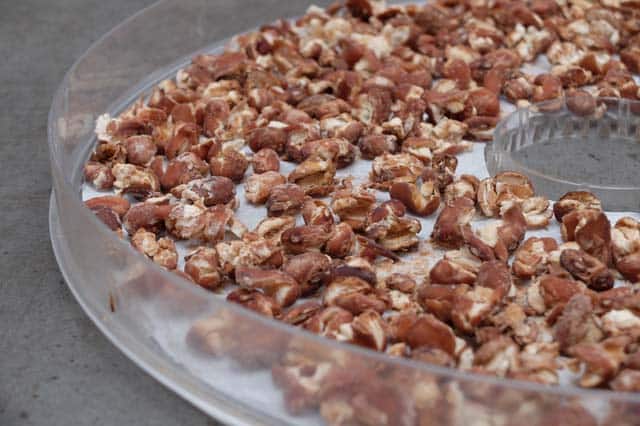
Dehydrated beans can be added to almost instant supermarket meal. They are insanely calorie-dense when dry and a cheap source of protein.
On the Trail Instructions:
How you rehydrate the meals depends on the ingredients and rehydrating times. For example, mashed potato flakes cook instantly. So, you have to rehydrate the add-ins before the mashed potatoes or you’ll end up with crunchy bits in your potatoes.
By contrast, pasta takes a lot longer to cook than dried sauces. You have to cook it before rehydrating the sauce or you’ll end up with either a runny mess or sauce burnt to the pot.
Below are instructions for rehydrating typical DIY backpacking meals with the add-in method.
Pasta with dehydrated sauce:
- First cook the carbohydrate.
- Make sure there is a bit of extra water in the pot.
- Add the dehydrated sauce.
- Mix it in, cover the pot and wait 5-15 minutes.
- OR rehydrate the sauce in a separate pot. Mix it into the pasta when rehydrated.
Pasta or rice with dehydrated add-ins:
- Cook all of the ingredients at the same time.
- OR put the veggies in right before the carb is done. This will keep soft veggies (like broccoli) from turning to mush.
Ramen with dehydrated add-ins:
- With add-ins that rehydrate quickly, just cook all of the ingredients at the same time.
- With add-ins that require longer rehydrating, soak or cook these first. Then add the ramen and finish cooking.
Oatmeal with dehydrated fruit:
- Let the dried fruit rehydrate in (ideally hot or boiling) water until soft.
- Add oats and let soak until desired texture.
Quick-cooking carbs (mashed potatoes, polenta, grits, couscous) with dehydrated add-ins:
- First rehydrate the add-ins in hot or boiling water.
- Add the carb, adjusting water as necessary
Quick-cooking carbs with sauce:
Rehydrate the sauce in a separate pot. If you try to do it in one pot, the sauce will be dispersed throughout. You have to use two pots: one for cooking the carb and another for the sauce.
Pros:
- Easier to count calories: The add-in method makes it easier to tally up calories, especially if you are “elevating” instant supermarket meals. Just calculate how much is in a portion of the instant meal and tally up the calories in any add-ins.
- Better texture: You don’t have to worry about your carbs turning to mush with this method.
- Less prep at home: Instead of dehydrating entire meals, you can just dehydrate a few ingredients to make instant meals more interesting. It’s faster and less effort.
Cons:
- Pack in multiple baggies: If the ingredients have different cooking/rehydrating times, you’ll need to pack them separately. This means more baggies of food to keep track of.
- More involved prep on the trail: Trail prep is more complex. You’ll either need multiple pots for cooking each ingredient (like one pot for pasta and another for the dehydrated sauce) or you will need to put the ingredients into your pot at separate times.
Instant mashed potatoes with dehydrated veggie sausages, lentils, and spinach. The sausages take the longest to rehydrate, so they go in the pot first. Then the lentils and spinach go in for a few minutes. Finally the potato flakes are mixed in.
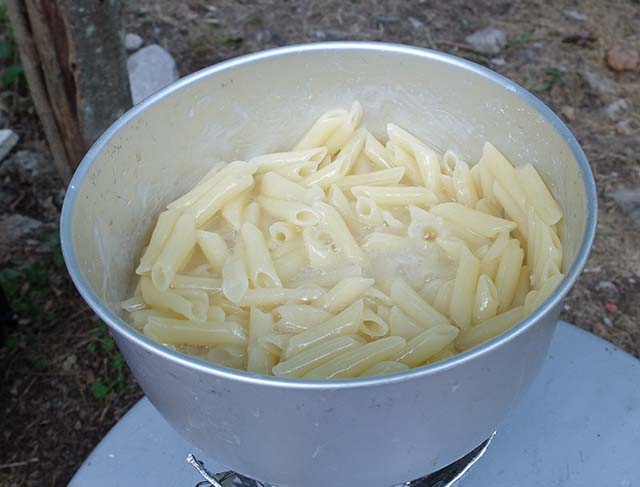
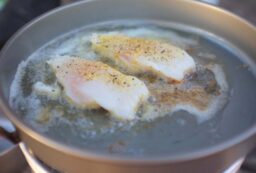
This is how much water I had in the pot before adding the dry sauce ingredients
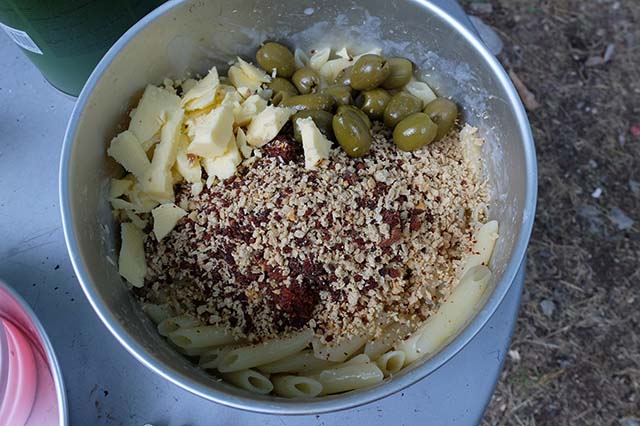
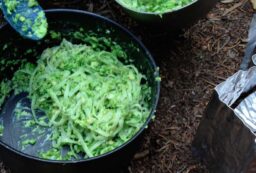
Then I mixed in the deydrated sauce. For this meal, I also added some chunks of cheese and olives for extra yumminess.
Method 3: Dehydrated Spreads
This is my go-to when it comes to backpacking lunches. It’s easy and there are tons of options.
At-Home Instructions:
- Make or buy a spread. Buying spreads is more expensive but the calories are calculated for you.
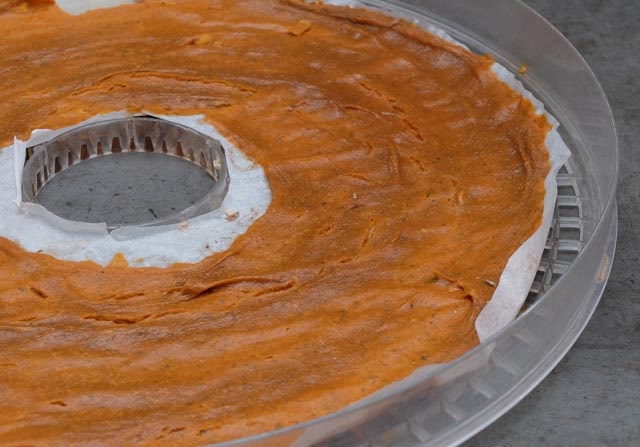
- Put a portion of the spread on the dehydrator.
- Dehydrate completely.
- Blend the dried spread into a powder. This is optional but makes rehydrating much faster!
- Pack the dried meal portion for the trail.
On the Trail Instructions:
- Add a bit of water to the dried spread. You can always add more water but you can’t take it away! So, so add the water slowly so you don’t end up with a watery mess.
- Wait a couple minutes for it to absorb the water. Add more water if necessary.
- Spread it on your carbohydrate. Tortillas are my favorite but bagels, English muffins and waffles are good. You can also add Fritos or cracker crumbs to the spread and eat it with a spoon.
Pros:
- Easiest method: Both at home and on the trail, this is the easiest way to make your own lunches.
- Counting calories is easy: If you dehydrate store-bought spreads, the calories will be calculated for you.
- No stove required: Spreads will rehydrate with cold water, though you can add boiling water if you want.
Cons:
- Not a hot meal: Though you could eat a dehydrated spread next to a hot cooked meal.
- Limited options: Oily spreads don’t dehydrate well, so your options are a bit limited.
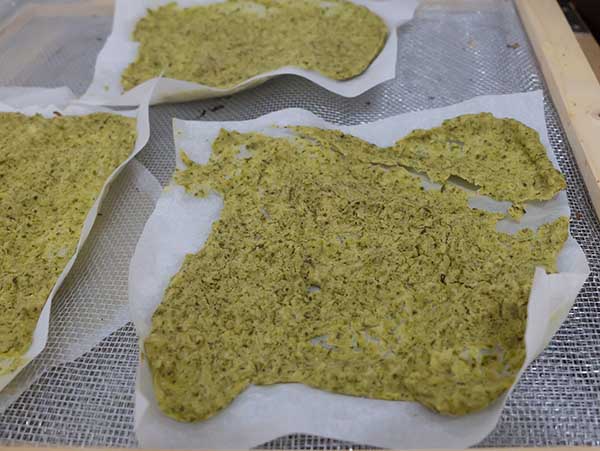
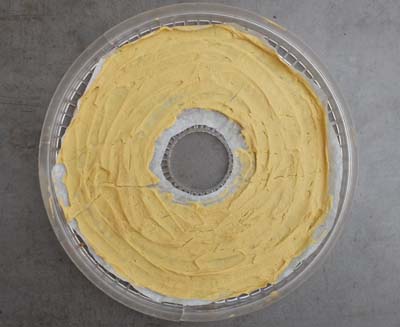
Dehydrated white bean and spinch spread
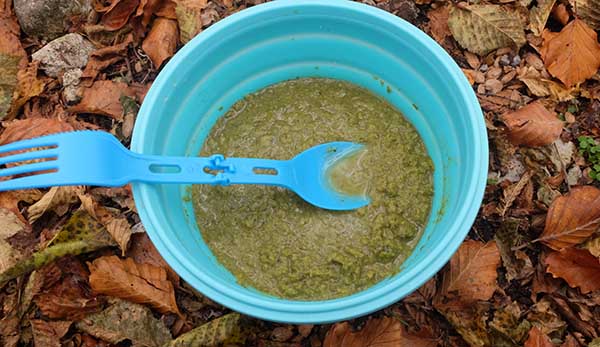
Just add water to the spread and wait a few minutes for it to absorb it.
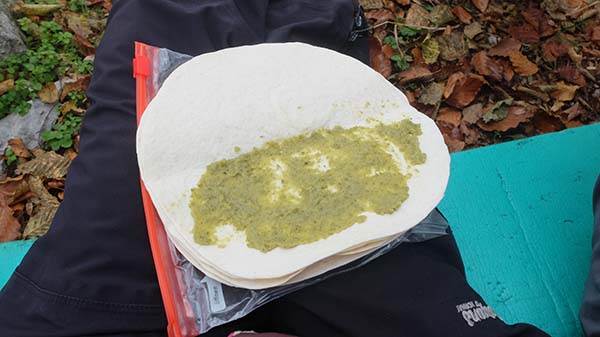
The fully-rehydrated spread on a tortilla. Delicious, nutritious and calorie-dense!
Dehydrator Recipe Ideas
Breakfast
- Oatmeal with dehydrated fruit and powdered milk
- Dehydrated pancakes, rehydrated in powdered milk
- Dehydrated carrot cake, rehydrated in powdered milk or eaten dry
Dehydrated pancakes getting rehydrated in milk (from powder) for breakfast
Spreads and Lunches:
- Hummus
- Cauliflower, tomatoes and walnut “meat” mix
- White bean and spinach spread
- Black bean enchilada filling
Dehydrated hummus
Dinner:
- Couscous with dehydrated beans and salsa
- Instant mashed potatoes with dehydrated hot dogs and veggies
- Pasta with dehydrated tomato sauce with TVP, olives and cheese
- Ramen with dehydrated scallions, mushroom powder and jerky
- Dehydrated corn chowder (from a can or homemade) served with crackers
- Dehydrated thick tomato soup (from a can or homemade) served with croutons
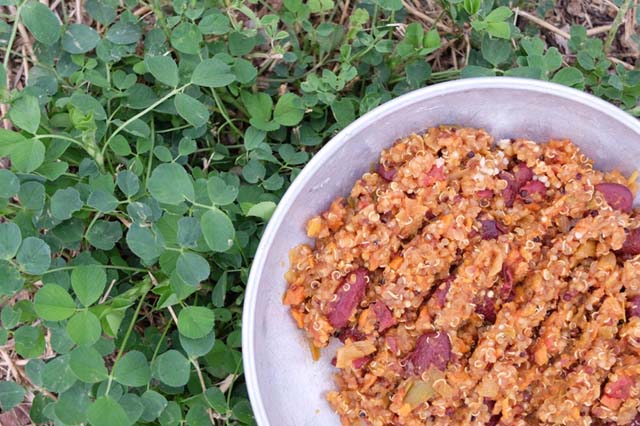
This quinoa chili was dehydrated as an entire meal. On the trail, I just add hot water and wait 5 minutes. Voila! I’ve got a healthy meal!
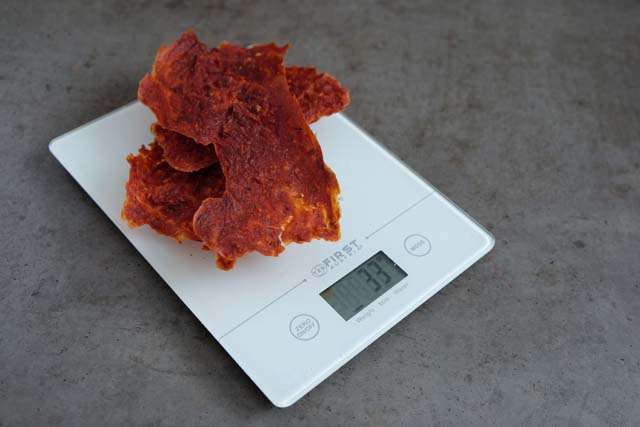
One portion of dehydrated tomato soup. It weighs just 1oz (33g).
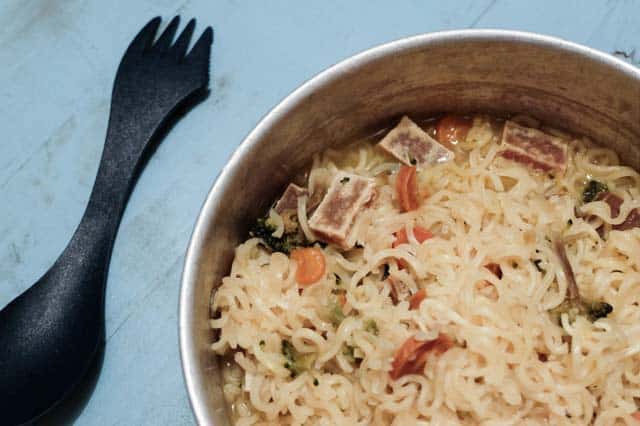
Ramen with dehydrated tofu and veggies added in
Want lots of delicious, calorie-dense dehydrator recipes? Check out my eBook.
Yes, this is shameless self-promotion but I’ll even give you 50% off 😀
Get the book here for 50% off.
Packaging Dehydrated Meals for Backpacking
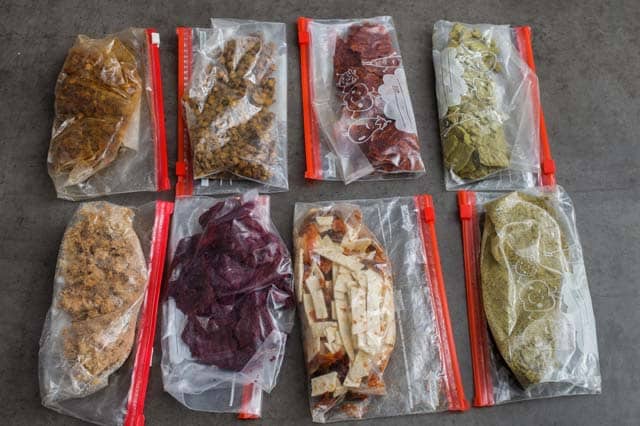
These meals have 13,700 calories and only weigh 6.9lbs dry. No special packaging required 🙂
I just put my dehydrator meals in zip baggies. This is generally fine for trips of up to two weeks.
If you are going on longer backpacking trips or need to mail-drop yourself meals, then you’ll probably want to vacuum seal your DIY meals. Likewise, if you want to eat out of the bag instead of a pot or bowl, you’ll need sturdier bags which won’t melt when in contact with hot water.
Shelf Life
Most DIY dehydrated backpacking meals will last for at least 4 weeks without any special packaging. Heat and humidity will make dehydrated meals go bad faster. To make them last longer, you may want to vacuum seal them.
Fatty meals have a much shorter shelf-life because heat will make the fats go rancid. Rancid foods are still technically safe to eat (won’t give you food poisoning), but get a gross sour or even fishy taste.
To make dehydrated meals last longer:
- Make sure foods are very dry: They should snap or break and not bend. This means most of the moisture is out of the food and it will last longer. However, it will also take longer to rehydrate.
- Add oil separately: When making dehydrator meals, cook the meal without any oil. The oil will make the meal go rancid faster. Instead, bring a little bottle of oil with you on the trail and add it to the meal when you rehydrate it.
- Also add milk separately: Milk contains a lot of fat which will cause the food to go bad faster. For recipes like cream soups which call for milk, make the meal without the milk and dehydrate it. Then bring some powdered milk with you on the trail and add it to the meal when rehydrating.
Tips
Start with Breakfast and Lunch Spreads
If you don’t have much experience planning backpacking meals or dehydrating, then it’s best to stick to breakfast for starters.
It’s really easy to dehydrate fruit to add to oatmeal or other hot breakfast cereals. And it’s a LOT cheaper than buying commercial backpacking breakfasts.
Creamy Recipes and Stews Work Best
These meals are the most forgiving. Why? Because it won’t matter as much if you accidentally add too much water. Nor do you have to worry about some ingredients ending up mushy while others are still hard.
Blend Dehydrated Ingredients into a Powder
The biggest problem with dehydrating your own backpacking meals is some ingredients remain chewy, even after soaking or boiling for a long time. A workaround is this: use a coffee mill or high-speed blender (like this one) to grind the dried foods into a powder. These foods will rehydrate almost instantly and give you a uniform texture.
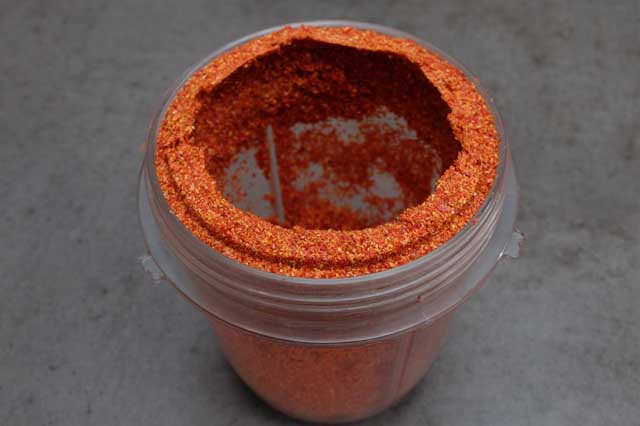
Dehydrated pasta sauce, blended into a powder, so it rehydrates faster and without clumps
Test Meals before Hitting the Trail!
Especially if you plan on eating the same dehydrated meal multiple times on the trail, test it before setting out! You don’t want to discover that your meal won’t rehydrate when you are tired, hungry, and have no other options. For example, I learned the hard way that certain brands of tofu can’t be rehydrated whereas others rehydrate without a problem.
Vegetables Must Be Pre-Cooked
One of the biggest mistakes when dehydrating backpacking food is not pre-cooking vegetables. For example, you might dehydrate slices of raw carrot to add to a stew. Here’s the problem with that:
Raw dehydrated vegetables must be rehydrated and cooked. Because raw veggies have tough fibers (cooking softens them), they take a very long time to rehydrate. You also need to factor in the cooking time for carrots (which is about 8 minutes of boiling). You will blow through 40+ minutes of fuel before the dry carrots ever get soft!
There are some veggies which don’t need to be pre-cooked, such as leafy greens like kale. However, make sure you pre-cook all other veggies before dehydrating.
Avoid These Ingredients:
Some foods simply don’t dehydrate or rehydrate well. Avoid using these ingredients in your DIY backpacking meals:
- Fatty foods: Dehydrators only dry out water and not oil. So fatty foods like avocados and peanut butter cannot be dehydrated. I have had lots of success dehydrating nut and seed butters though, but only when they are mixed with other ingredients like tomato sauce.
- Mushrooms: While you can dehydrate mushrooms, they take forever to rehydrate on the trail. Even after 20 minutes of boiling, they will still be chewy and tough to digest.
- Brown rice: I experimented with dehydrating brown rice. It takes around 20-30 minutes of boiling to completely rehydrate, which is way too long of a cooking time for backpacking.
- Peas and corn: Foods which hard “shells” around them turn into hard rocks when dehydrated and will remain hard even after boiling for a long time. Some people like Backpacking Chef apparently have success with these, but I haven’t and don’t want to blow through fuel to boil peas for 45 minutes!
- Eggs: Dehydrated eggs reconstitute into a gross tough mess. If you want to eat eggs on the trail you should get freeze-dried eggs. These are made with a completely different process.
Soups = Dips, Bars = Porridge
By adding more or less water to a dehydrated meal, you will change the consistency. This means you can eat soup as a dip, or vice versa. Likewise, I’ve discovered dehydrated bars can also be rehydrated into breakfast porridge. While the taste is the same, the texture is very different and thus will feel like a completely new meal.
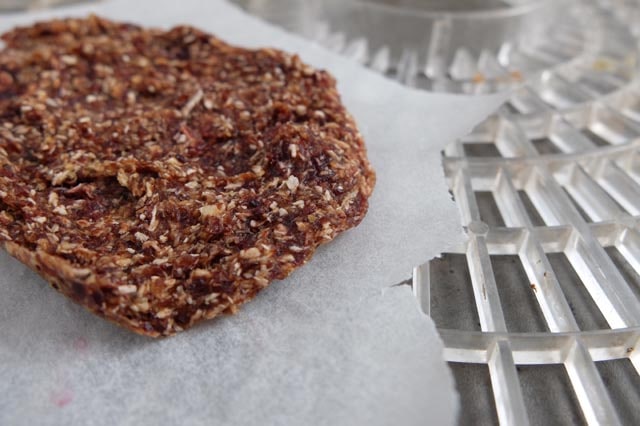
This energy bar is made by dehydrated a mixture of quinoa and fruit. It can be eaten as a bar or rehydrated into a porridge.
Label Packages
Some meals look almost identical when dehydrated. If you are bringing lots of dehydrated meals on a trip, label the baggies with the contents! Otherwise you might end up putting soup on your pasta instead of sauce.
Experiment!
In addition to dehydrating backpacking meals, you can also dehydrate lots of great hiking foods. Experiment making things like your own trail mix, protein bars, and even crackers. Not all recipes will work out but you are sure to discover some delicious snacks and meals if you experiment.
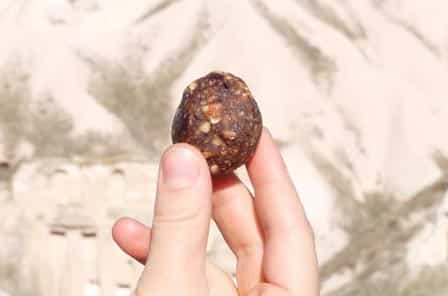
Energy balls made with nuts, DIY dehydrated fruits, and COFFEE powder! Yummy and energizing! 😀
Dehydrated Pasta Turns to Mush
It is possible to cook pasta and then dehydrate it. This will reduce the cooking time required on the trail. You could even prepare the dehydrated pasta by cold-soaking it.
However, I’ve found that dehydrated pasta often turns into a gross starchy glob when rehydrated. So, while it is possible to dehydrate cooked pasta, I don’t recommend it. I’d rather eat polenta or grits instead of a glob of pasta mush.
Be Cautious when Dehydrating Meat
You can dehydrate meat for DIY backpacking meals. However, to kill bacteria like E. Coli the meat must first be heated to at least 160°F and then kept at a temperature of at least 140°F while dehydrating.
Most cheap dehydrators aren’t capable of reaching this temperature. Even if they claim to reach this temperature, it’s possible the top racks are much cooler.
To play it safe, only dehydrate meat if you have a very good dehydrator (preferably a horizontal-flow dehydrator). Put a meat thermometer on the top rack so you can monitor the temperature.
Alternatively, just buy freeze-dried meat to add to your meals instead (read about DIY freeze-dried backpacking meals here). Or use veggie proteins like beans, which rehydrate really well.
Below are images of some of the recipes from my ebook. You will definitely have the most envied food on the trail! 😀
Do you dehydrate your own backpacking meals? Let us know your favorite recipes in the comments section below.


Post your comments