

Don’t want to bother carrying a stove or cooking meals while backpacking, but you still want to eat delicious food? Cold-soaking is a method of making backpacking meals without a stove which is getting popular with ultralight hikers. Here’s what you need to know about cold-soaking backpacking meals and whether you should consider going stove-less.
Jump to:
- What is cold soaking?
- What Foods Can Be Cold-Soaked?
- Cold-Soak Meal Ideas
- Pre-Packaged Backpacking Meals which Can Be Cold-Soaked
- Containers
- Tips
- Verdict
What is Cold-Soaking?
Cold-soaking is a method of preparing meals. Here’s how it works.
- Put your food in a leak-proof container.
- Pour clean water over the food.
- Wait anywhere from 5 minutes to 2 hours for the food to soften.
- Stir and eat.
Yes, cold-soaking meals really can be this simple. However, you’ll probably have to do some prep work before you hit the trail such as dehydrating ingredients. Newbies also often come across issues like some ingredients remaining crunchy even after soaking for hours.
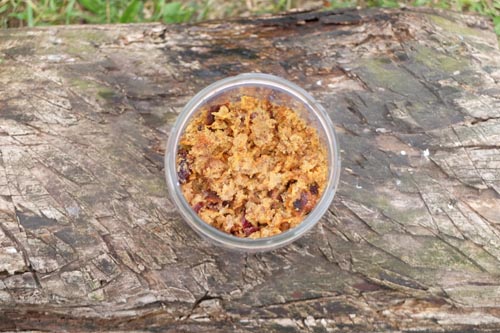
This is carrot cake which I dehydrated and then cold-soaked for breakfast on the trail.
Why Cold-Soak Meals?
There are a lot of reasons why you might want to cold-soak your backpacking meals. Here are the big ones.
1. Don’t have to bring a stove or fuel
For thru-hikers or backpackers on longer trips, this can really save you a lot of weight. It also frees up room in your pack. Read these ultralight backpacking tips for beginners.
2. No worrying about running out of fuel
Calculating fuel needs is really complicated. Factors like the amount of wind, air temperature, and temperature of water which needs to be boiled can drastically change the amount of fuel you need. I used to play it safe and bring more fuel than I think I need – which meant carrying extra weight. When at least some of your meals can be made with cold-soaking, it’s not a big deal if you run out of fuel.
3. Don’t have to cook in the rain
Even with good rain gear, I still hate cooking in the rain. Because of carbon monoxide poisoning, it’s definitely not safe to cook inside your tent. If you have some cold-soak meals, you can prepare them inside the tent and don’t have to worry about getting drenched. It sure beats eating GORP for dinner on rainy evenings!
4. Saves time
You can cold-soak meals while you hike. This saves you time cooking when you reach camp. Since cold-soaking usually only involves one container, you also don’t have to waste time cleaning a cooking pot.
5. Fire bans
The risk of wildfire has gotten so bad in some places that they’ve made outright bans on all types of stoves. Cold-soaking meals might be your only option in these place.s
6. Saves you money
A good backpacking stove and fuel costs money. By going with the cold-soak method, you save money right out the door.
The Case Against Cold-Soaking
While cold-soaking backpacking meals is getting a lot of hype, there are definitely downsides…
1. Cold-soaking takes a lot of time
Depending on the meal, it could take hours to cold-soak. If you don’t plan well, you could arrive at camp and still have crunchy bits in your dinner.
2. Cold-soaking might not actually lighten your pack weight
Because some cold-soak meals take hours to soften, it means you need to soak while you hike. That means they are extra water with you on the trail. This counteracts the weight benefits of not carrying a stove, especially if there is a water source at camp anyway.
For example:
You’d need approximately ½ liter of water to cold-soak chili while hiking. That’s an extra 500g/17.6oz of weight in your pack.
The MSR Pocket Rocket stove weighs 74g/2.6oz. Their smallest fuel canister weighs 210g/7.4oz full. It boils 2 liters of water per ounce, so can boil 5.2 liters of water, which should be enough for 4 days of backpacking.
- Cold soaking weight: 500g/17.6oz
- Stove cooking weight: 284g/10oz
It isn’t this simple though. With cold-soaking, you are only carrying the extra weight for a few hours. Or you might be able to cold-soak at camp, so you don’t actually carry any extra water. You also don’t have to bring a cook pot. Even if you are used to eating out of your cook pot, cold-soaking containers are usually a lot lighter than cook pots. On the flip side, you might need more than ½ liter to cold-soak some meals, which means lugging around even more water weight! If you go with an alcohol stove, the weight benefits might be even more negligible…
The bottom line? Cold-soaking might not actually save you weight, so don’t choose this method just to save a few ounces without considering all the pros and cons.
3. Boiling helps disinfect dirty pots
I do a terrible job of cleaning my pots. There are usually bits of last night’s dinner still stuck on the pot when I go to make a new meal. That can be pretty gross. I’m not worried though since boiling meals means the pot gets sterilized.
I also don’t use filtered water to clean out my pots, which means there could parasites, bacteria, or other pathogens on the pot. Boiling kills these, sparing me from a terrible bout of diarrhea while on the trail. By sticking my spork into the boiling water (to stir meals), I’m also disinfecting it.
4. Stoves have other purposes
In addition to cooking, your backpacking stove has many other purposes. Here are a few:
- Purifying water: If you lose your water filter or run out of tablets
- Sterilizing bandages: I bring several sterile gauze bandages in my first aid kit (see what’s in it here). These would run out quickly though if I had a serious injury. However, I could boil them to sterilize and re-use.
- Warm drinks to fight hypothermia
- Sterilize my menstrual cup (ladies, read more on that here)
5. Lots of foods don’t rehydrate well with cold water
It took me a lot of trial and error to get my cold-soaking recipes right. Dehydrated mushrooms and tofu? They will NOT rehydrate with cold-soaking! It really sucks to discover this on the trail when you are tired and hungry.
6. Hot coffee?
While Starbucks Via apparently are okay cold-soaked, I still prefer my coffee hot! See these ways to make coffee on the trail.
Alternative Method (Hot Soaking)
Instead of cold-soaking meals, you can try hot soaking instead. Here’s how it works:
- Boil water with a stove
- Pour the hot water over your meal
- Let it soak, usually for just about 15 minutes
- Eat while still warm
While you still need to bring a stove for hot-soaking, you still get a lot of the same benefits that come with cold-soaking, like less time cooking. The hot-soak method also uses less fuel than cooking. Further, most foods will rehydrate a lot faster with hot water. This means you can hot-soak when you reach camp, so you don’t have to carry around water weight. You can even let the food soak while doing chores like setting up your tent. And, if there are still some crunchy bits, you can always put it on the stove to finish cooking.
What Foods Can Be Cold-Soaked?
Here are foods which can definitely be cold-soaked.
- Ramen: usually requires about 20-30 minutes
- Instant mashed potatoes: Instant
- Couscous: 5-15 minutes
- Rice noodles: Need to be soaked for 1+ hours and generally turn to mush, so don’t really recommend them
- Oatmeal: 5-20 minutes, depending on desired texture
- Polenta mix: 5-20 minutes
- Sweet potato powder: 10 minutes. You can buy it here
- Dehydrated refried beans: 5-20 minutes
- Falafel mixes: 5 minutes (turns into a spread instead of falafel)
- Hummus mixes: 5 minutes
- Texture soy protein (TSP) or textured vegetable protein (TVP): 5-30 minutes. Make sure you get it in small pieces, not large chunks. Butler’s soy curls apparently work well though.
- Packets of creamy soups: 15-30 minutes. Applies to cream soups, such as cream of tomato soup or cream of mushroom. Soups with pasta or pieces of veggies in them usually cannot be cold-soaked.
- Freeze-dried fruits and veggies: 5-30 minutes. Note some don’t rehydrate well!
- Dehydrated fruits and veggies: 5-30 minutes. Note some dried fruits/veggies require an insanely long soak time or never fully rehydrate, such as dried mushrooms.
- Jerky: 15-60 minutes. It ends up being still is chewy but has a softer texture instead of a jerky texture
- Milk powder: Instant but usually still has a bunch of clumps in it
- Breakfast shake powders: Instant
*Read about DIY freeze-dried meals here.
Can you cold soak instant rice or Knorr Rice sides?
Instant rice has been cooked then dehydrated or freeze-dried. In theory, it can be cold-soaked. However, it usually takes a very long time to cold-soak instant rice. Even after 2 hours, it might still be crunchy and thus hard to digest. I do NOT recommend cold-soaking instant rice. Your body won’t be able to digest it well. Don’t be surprised if you end up with diarrhea.
Can you cold-soak pasta?
No, pasta cannot be cold-soaked. It will get softer when soaked. However, the starches and proteins in pasta need to reach around 130-185F in order to break down. If they don’t reach this temperature, your body will not be able to digest the pasta, leaving you with a terrible stomach ache. Since you don’t absorb the nutrients in undigested food, it means cold-soaked pasta ends up being wasted food and empty weight in your pack.
There is one way to cold-soak pasta though: cook it and then dehydrate it. Because it has been pre-cooked, you can then cold-soak it without issues. However, I personally find this a waste of time. Dehydrated pasta also can get super mushy when rehydrated. Read more about that in my post on dehydrating your own backpacking meals.
Can you cold-soak pre-packaged backpacking meal, like from Mountain House?
No, you cannot cold-soak most packaged backpacking meals. These meals usually contain pasta which must be heated to become edible. Other meals contain rice which usually doesn’t cold-soak well. However, there are some backpacking meals which work with cold-soaking. See the list at the end of this post.
Can you cold-soak dehydrated and freeze-dried foods?
Yes, virtually all dehydrated and freeze-dried foods can be cold-soaked (they can also be eaten raw). However, some dried foods don’t ever fully soften. While still technically edible, they might be harder to digest and you won’t get as many nutrients from them. Some people even report getting stomach cramps or diarrhea from not fully rehydrating foods.
In my experience, these dry foods can NOT be made with cold-soaking*:
- Corn (though a workaround is to grind dehydrated corn into a powder)
- Peas
- Mushrooms
- Tofu
*The workaround is to use a high-powered blender to grind these into a powder. Then they will rehydrate almost instantly in cold water.
Cold-Soak Meal Ideas
These cold-soak meals can be made with foods found in the supermarket.
- Instant mashed potatoes with dried milk, TVP and lots of spices
- Ramen with dried veggies
- Freeze dried chicken with freeze dried cheese powder
- Couscous with kale chips and salami
- Couscous with dehydrated tomatoes (cut into small pieces), olive oil, and cheese powder
- Instant hummus mix, eaten with tortillas or on a bagel
- Refried bean mix, eaten with Fritos stirred into it
- Oats with raisins and dried milk powder
- Oats and any other dried fruit, so long as the fruits are cut into little pieces
If you want tastier and healthier cold-soak meals, try dehydrating. Some dehydrated foods work amazingly well with cold-soaking. For example, quinoa rehydrates in just 15 minutes. Even better, dehydrating means your food is really lightweight. My corn chowder, for example, has 189 calories per ounce! You can even dehydrate things like pancakes and make them with cold-soaking on the trial.
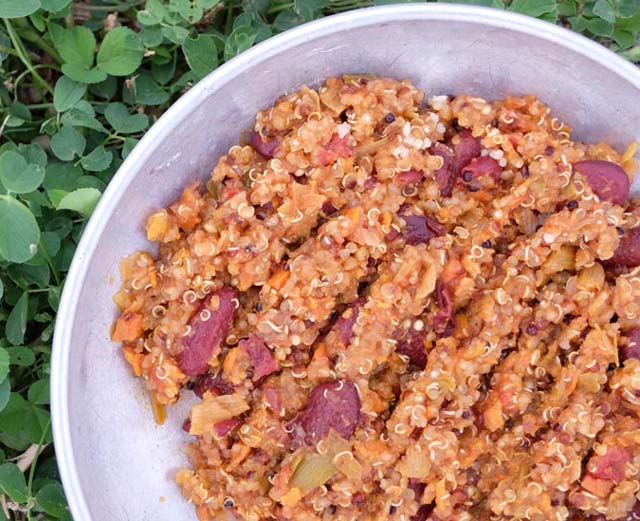
Pumpkin Quinoa Chili
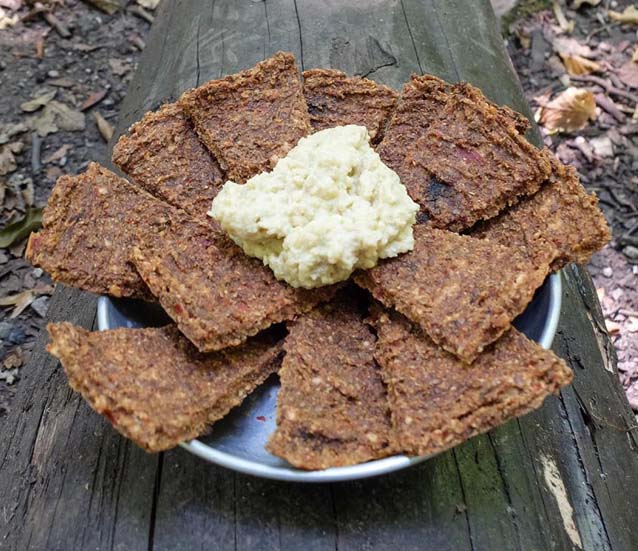
Dehydrated Hummus with Dehydrator Red-Pepper Zucchini Crackers
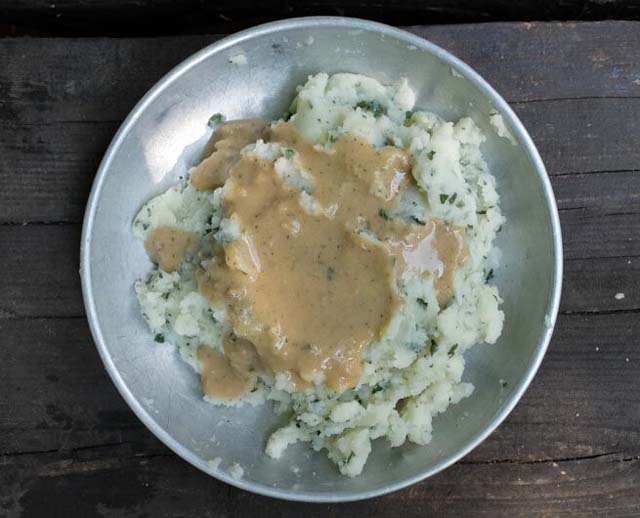
Instant potatoes with dehydrated kale and served with dehydrator white bean gravy
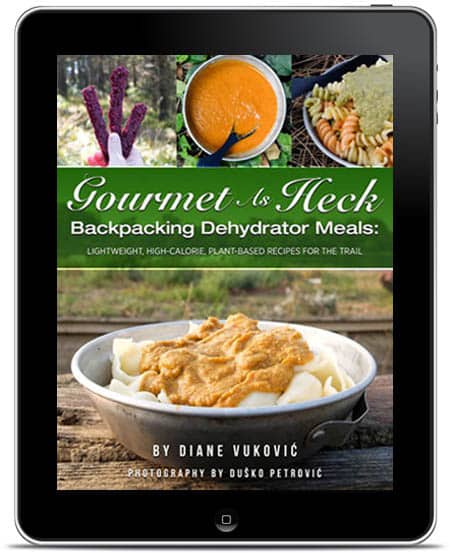
Guess what? I wrote a book. It has over 50 dehydrator recipes, many of which can be prepared with cold-soaking. Since I like you, I’ll even give you 50% off. 🙂
Pre-Packaged Backpacking Foods which Can Be Cold-Soaked
As mentioned before, most pre-packaged backpacking meals (like the ones from Backpackers Pantry or Mountain House) cannot be cold-soaked. They usually contain rice or pasta and need to be boiled to fully rehydrate and become digestible.
However, there are some exceptions. As a general rule, if the instructions say, “add hot water,” it can be made with cold-soaking.
Cold-Soaking Containers
A good cold-soaking container must be:
- Leak proof, especially if you will be soaking while you hike
- Large enough to hold an entire rehydrated meal plus some extra space for stirring
- Wide enough that you can easily eat the contents
- No taller than your fork, or how will you get the food at the bottom?
There are plenty of containers which meet these requirements. Here are some of the most popular ones.
- Talenti Gelato Containers: 473ml; 1.9oz. The only bad thing is they have large bumps at the bottom of the container. This makes it hard to clean the container as food gets stuck in the bumps.
- Ziploc Twist and Lock containers: 473ml; 1oz. These are similar in size to the Talenti containers but are lighter and don’t have those annoying bumps at the bottom. However, they don’t come full of tasty gelato 😉 Get them here.
- Peanut butter containers: Usually 1-2oz for 750ml. Look for plastic containers with straight sides and no bumps on the bottom.
- Protein powder containers: These are often made from thicker plastic which holds up well on the trail.
- Gatorade powder containers: 650ml; 1.8oz
- Quart–size freezer bag: 946ml; 0.2oz. While these are really light, I don’t recommend them. They are a pain to clean and might break open on you while you hike.
- CNOC Cold–soak bags: 1000ml; 1.9oz
- Wide–mouthed titanium water bottle: It can be put on an open flame in case you want to cook over a fire some days.
Note: Plastic containers often get destroyed or deformed in the dishwasher. Wash them by hand! And don’t pour boiling water in them!!
What about crotch pots?
On one website, a backpacker recommended making a “crotch pot.” Basically, you put your food in a plastic bag and hang it in front of your crotch. The heat from your body warms up the food as you hike.
While clever, this is probably a terrible idea. In a forum, one hiker talked about how he tried cold-soaking oats with powdered yogurt this way. The bag burst open and he reeked of yogurt for days. Probably not great if you are in bear country! :0 If you really want warm food, then bring a friggin’ stove instead of risk getting food all over your crotch!
Tips for Cold-Soaking Meals
Use a Stainless Steel or Titanium Water Bottle
So long as they aren’t double-wall or insulated, both of these materials can be put directly over fire. This gives you more versatility in case you ever want to heat up water, such as if come across a backpacker who already has a campfire going. Look for wide-mouthed, straight-side bottles as these are the easiest to clean.
Cream Textures Work Best
Whenever you rehydrate meals, there’s a risk of some ingredients turning into mush and others remaining crunchy. Thus, the meals which work best are creamy ones. For example, creamy soups, dips like hummus, and gravy.
Turn Dried Fruits and Veggies into a Powder
Some dried fruits and veggies will never fully rehydrate; no matter how long you soak them, they will remain crunchy. This includes foods like peas, corn, and mushrooms. However, there’s a workaround: Use a coffee mill or a high-speed blender to grind the dried food into a powder. Then they will rehydrate almost instantly and have a great, uniform texture.
If you don’t want to bother dehydrating and then grinding your own foods, you can buy fruit and veggie powders online. This brand is good.
Test Meals First!
It’s smart to test cold-soaking a meal before you hit the trail – especially if you are going on a long trip and will be eating the same meals multiple times. Do this even if someone has told you that X or Y food can be cold-soaked. You might unfortunately discover that some brands of ramen, for example, can’t be cold-soaked.
Don’t Add too Much Water
Too much water will turn meals like mashed potatoes into a gross, soupy mess. Start by adding a small amount of water. Then check the food about 5 minutes later and see if it is completely soft. You can always add more water but you can’t take it away!
You Might Need to Rehydrate in Steps
Some foods require a longer soaking time than others. If you try to soak them all together, some ingredients will end up soggy and others will end up crunchy. Prevent this by keeping ingredients packaged separately, and then soaking the ones with the longest soak time first. Here’s how it might work:
- Add dried veggies and water to container. Soak for 1 mile.
- Add TVP and water. Soak for another mile.
- Reach camp and add instant mashed potatoes and some water. Stir and eat.
Harness the Sun
If you are cold-soaking while at camp, then harness the sun’s heat. You can lay your cold-soak container in the sun to warm it up. Or, while on a day hike, you can leave a water bottle out in the sun at camp so the water warms up. Then use this water to make your food. *You don’t want to cold-soak unattended food though as animals can get it.
Verdict
On short weekend backpacking trips, cold-soaking is usually a good choice. You won’t mind eating cold food when it’s just a few days.
For longer trips though, it usually makes sense to bring a stove. You’ll appreciate having more variety of food when on the trail for a long time. And the weight savings are often negligible – especially if you are going with a partner and will be sharing the weight of the stove.
Personally, I always bring a stove backpacking. I like hot meals and coffee too much to ditch my stove. However, most of my meals can still be made with the cold-soak method. This gives me flexibility if I am too tired to cook, the weather is bad, or I run out of fuel.
Do you cold-soak backpacking meals? Let us know any tips or meal ideas you have in the comments section below!
And don’t forget about my eBook. You’ll get over 50 dehydrator backpacking recipes plus tons of advice on how to plan meals for the trail. Get it here for 50% off
Resources for this article include:
https://backpackinglight.com/forums/topic/cold-soaking-containers/
https://www.reddit.com/r/Ultralight/comments/6iuqco/cold_cooking_weight_of_containers_comparison/
https://www.reddit.com/r/Ultralight/comments/be8r0g/cold_soaking_ye_or_nay/
https://www.exploratorium.edu/food/soaking-pasta
https://www.tandfonline.com/doi/full/10.1080/10942910600871289


9 Comments
Scott Marckx
October 2, 2020 at 5:35 amThank you for this! Great ideas!
I took a titanium pot with a lid and a sheet of food grade silicone sheeting that I cut to fit between the lid and the pot. A couple of heavy rubber bands from produce wrapped around it and you have a sealed cold soaking pot that you can also use (without the silicone) to heat over a fire or stove. I figure this way my main plan is cold soaking, but with the option to heat a meal if I want to. On my next trip I’ll be experimenting with bringing a little titanium twig stove. Not something for going where there is fire risk, but this will probably be a rainy trip, so using a few sticks to warm up a meal here and there will be a nice option.
All the best, Scott
Diane
October 5, 2020 at 9:41 amThat’s a really smart idea with the silicone sheet so you get the best of both worlds. Personally I’m not a fan of twig stoves since it’s so hard to control the heat and it’s too easy to burn the food at the bottom of the pot (meaning cleanup is a b*tch). If you get a pot which has a handle, then you can make a ‘cooking crane’ (see here /how-to-cook-over-a-campfire/) which allows you to get higher over the flames without having to bring a separate twig stove with you.
Connie
July 17, 2021 at 4:54 pmGreat ideas – thanks! I especially appreciate that you added recommended soaking times, since trial-and-error could end in inedible meals. It’s amazing how many powders there are out there!
Hiker95
September 16, 2021 at 4:23 pmPasta can absolutely be cold soaked if it’s been cooked then dehydrated. Please correct your article.
Diane
September 30, 2021 at 9:10 amI talk about that in my post about dehydrating your own backpacking meals. I’ll add that here. Personally though, I hate the texture of pasta which has been cooked-dehydrated-rehydrated. It turns to mush. At that point, I’d rather just eat instant mashed potatoes or polenta or another mushy carb.
Arran Whiteford
December 20, 2021 at 8:12 pmFantastic article!
thanks
Diane
December 21, 2021 at 12:09 pmGlad you found it useful 😀
Simon
September 19, 2022 at 2:19 pmBuckwheat groats can be cold soaked.
Diane
September 22, 2022 at 4:39 pmThanks! I didn’t know about that one 😀